
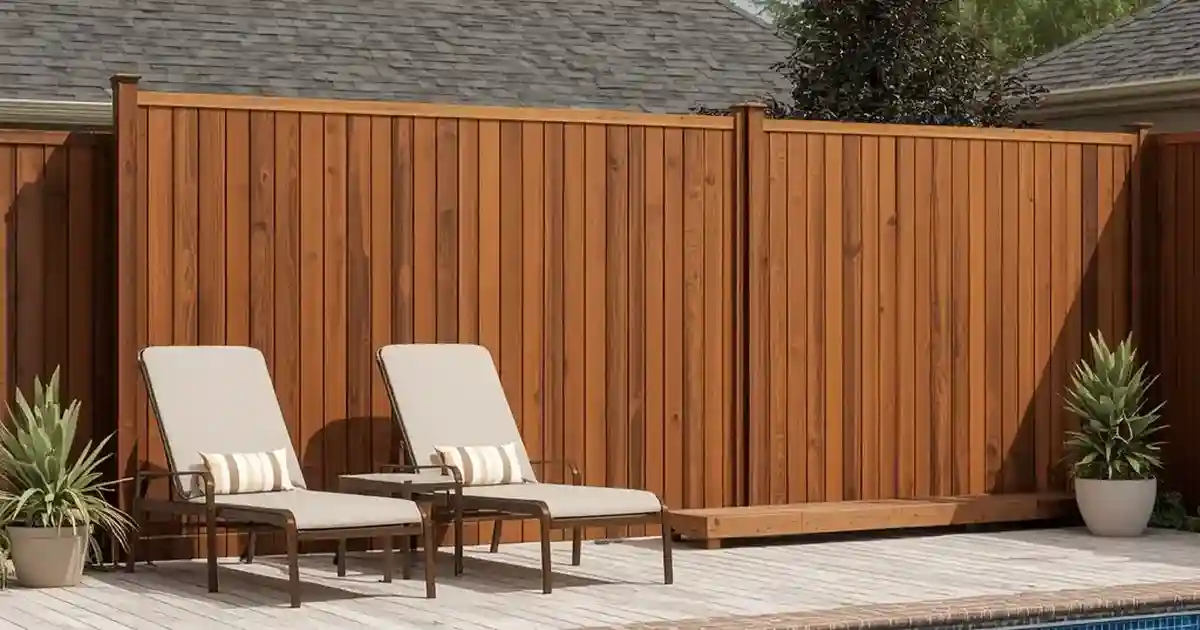
Your pool area should feel like a place where you can relax. But bare soil, faded furniture, weak lighting, and plain concrete can make the space feel unfinished.
A full backyard makeover can cost more than many homeowners want to spend. The good news is that you do not need to replace everything at once.
Pool landscaping on a budget works best when you focus on small areas with a clear purpose. A few plants can soften a hard fence. A short path can keep mud away from the pool. A privacy screen can make one seating area feel more comfortable.
The key is to spend money where it will make the biggest difference. You also need to choose materials that are safe near water and easy to care for.
These 18 cheap pool landscaping ideas cover plants, paths, privacy, shade, lighting, seating, and simple decor. You can use one idea this weekend or combine several over time.
How to Plan Pool Landscaping on a Budget
Before buying plants or gravel, decide which pool-area problem needs to be fixed first.
Walk around the pool and write down what bothers you most. It may be poor privacy, bare soil, a muddy path, no shade, or worn furniture.
Next, measure the areas you want to change. Check the length and width of paths, planting beds, and seating spaces. These numbers will help you avoid buying too much material.
Set a total budget before you visit a garden center. Split that amount between safety needs and visual updates.
For example, a $500 budget could look like this:
- $175 for plants and containers
- $125 for gravel, mulch, or edging
- $100 for lighting
- $100 for paint, cushions, or decor
Check sunlight before choosing plants. Some pool areas receive strong sun for most of the day. Other areas stay shaded by fences, trees, or nearby buildings.
You should also watch where water collects after rain. Gravel, beds, and furniture should not block drainage.
Complete simple jobs yourself when it is safe. Hire a trained professional for new electrical work, major concrete repairs, or heavy shade structures.
Once you have a plan, choose the ideas that solve your biggest problems first.
Cheap Pool Landscaping Ideas Using Plants
Plants can make a plain pool area feel softer and more welcoming. But the wrong plants can create extra cleaning work.
Avoid thorny plants near paths and seating. Stay away from plants that drop lots of fruit, seeds, flowers, or leaves into the water.
Check the mature size before planting anything close to pipes, decks, walls, or pool equipment.
1. Use Large Container Plants Instead of New Beds
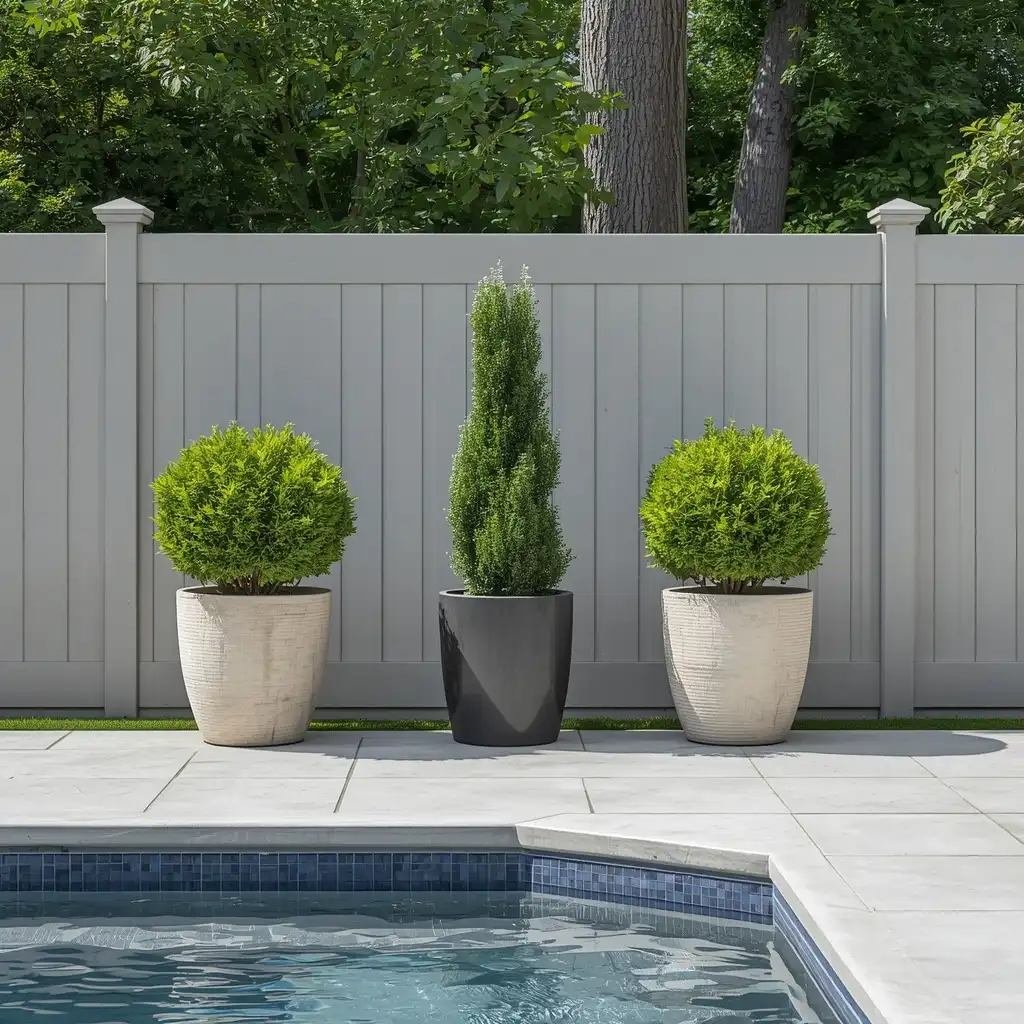
Large containers add color without the cost and work of building new garden beds.
They are also easy to move. You can change the layout when you add furniture or need access to pool equipment.
Use two or three large pots instead of filling the area with many small containers. Larger pots often look cleaner and hold moisture longer.
Place one tall plant behind two shorter plants. This creates height and makes the group feel planned.
Containers can also hide less attractive parts of the yard. Use them near a plain fence, visible pipe, or empty corner.
Choose pots made for outdoor use. Thin plastic may crack in cold weather or fade in strong sun.
You can save money by cleaning and painting old pots. Use paint made for the pot material and outdoor conditions.
Best for: Small yards, rentals, and above-ground pools
Budget level: Low to medium
Watch out for: Heavy pots that may be hard to move
2. Choose Low-Maintenance Perennials
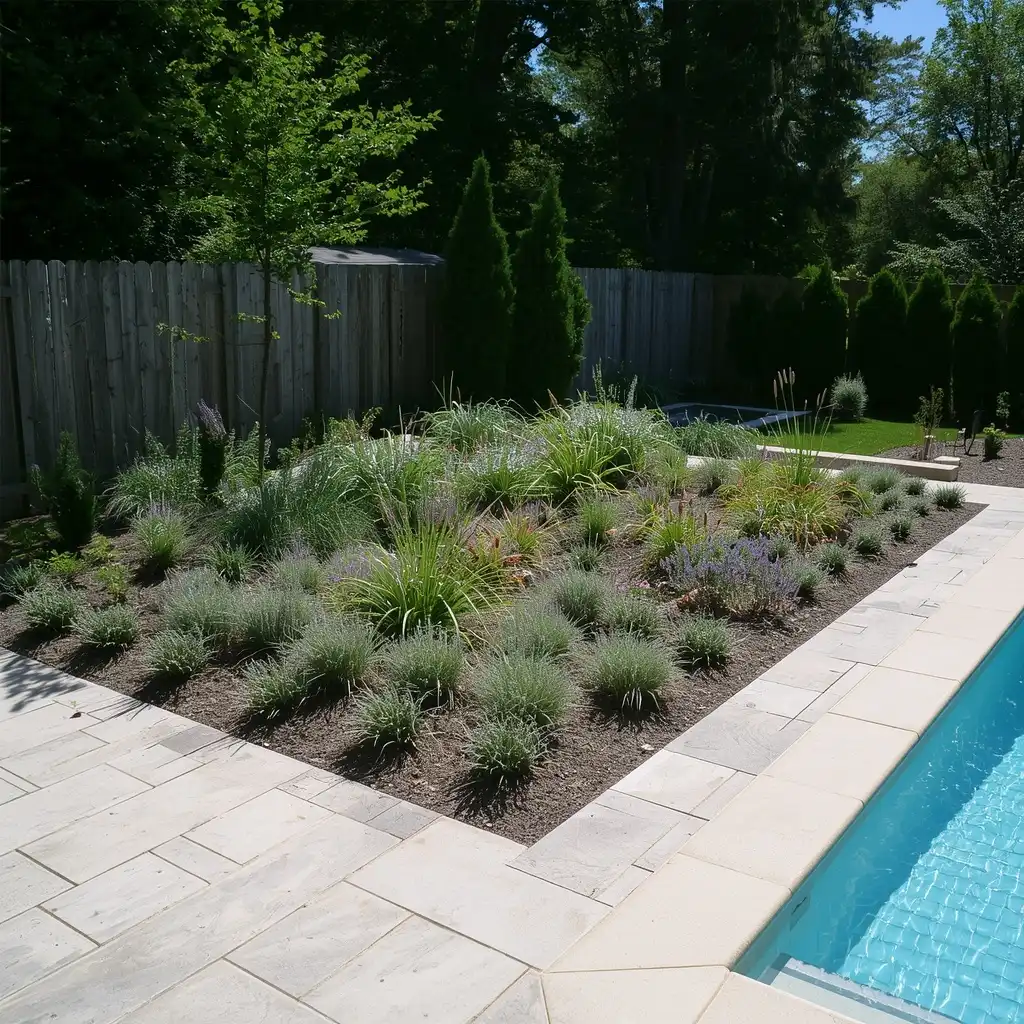
Perennials return for several growing seasons. This can save money because you do not need to replace every plant each year.
Choose plants that fit your local weather. A plant that struggles in your climate may need more water, care, and replacement.
Good choices may include ornamental grasses, lavender, salvia, agapanthus, daylilies, or small shrubs. The best option depends on your growing zone and sunlight.
Look for plants that create little mess. Avoid weak branches and heavy flowers that may fall into the pool.
Keep large plants and strong roots away from the pool shell, plumbing, and paving. Check the plant label for its mature height and width.
Repeat the same two or three plants across the area. Repetition often looks more polished than a mix of many unrelated plants.
Best for: Permanent planting beds
Budget level: Medium at first, lower over time
Watch out for: Plants that spread beyond their planned space
3. Divide and Replant What You Already Have
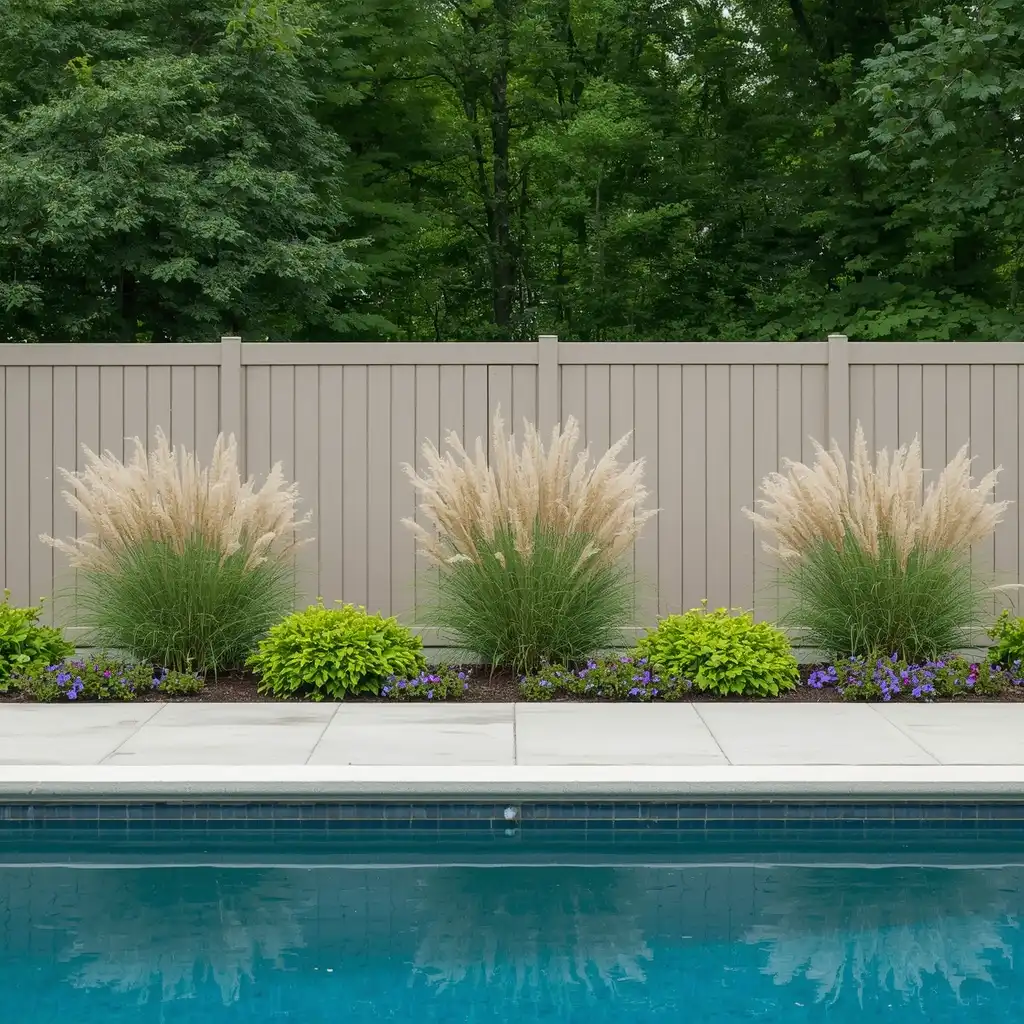
One of the best DIY pool landscaping ideas is to reuse healthy plants from other parts of your yard.
Many mature perennials can be divided into smaller sections. Each section can then be planted in a new place.
Ornamental grasses and some flowering plants often respond well to division. The right time depends on the plant and your climate.
You can also move plants from crowded beds. This helps the old bed while filling the new poolside area.
Ask friends or neighbors if they have plants they plan to divide. A plant exchange can help everyone save money.
Use repeated plants along one fence or border. Three matching plants can create a stronger look than six different ones.
Do not move sick or pest-damaged plants. They may spread problems to the new bed.
Best for: Homeowners with established gardens
Budget level: Very low
Watch out for: Moving plants during extreme heat
4. Create Mulch Beds Around Existing Plants
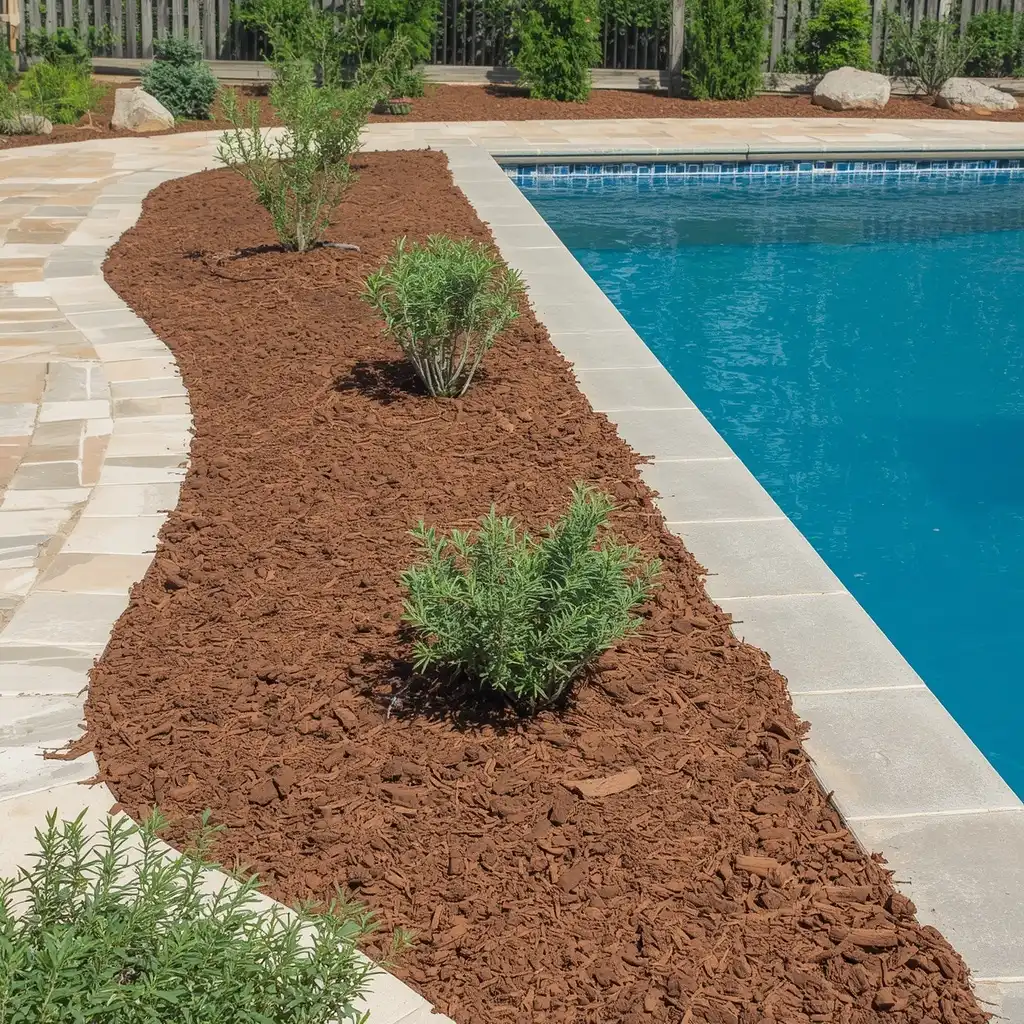
Mulch can make an unfinished planting area look neat in a few hours.
It covers bare soil and reduces the number of visible weeds. It also helps soil hold moisture during hot weather.
Start by removing weeds and loose debris. Shape a clear edge around the bed before adding mulch.
Do not pile mulch against plant stems or tree trunks. Leave a small open space around each base.
Keep loose mulch away from the pool edge. Wind, rain, and foot traffic can carry it into the water.
Wood mulch creates a soft garden look, but it may need to be replaced over time. Gravel lasts longer, but some stones become hot in full sun.
Choose a material that fits the area. Think about heat, bare feet, wind, and pool cleaning.
Best for: Existing planting beds
Budget level: Low
Watch out for: Loose mulch entering drains or pool water
5. Add a Narrow Gravel Garden
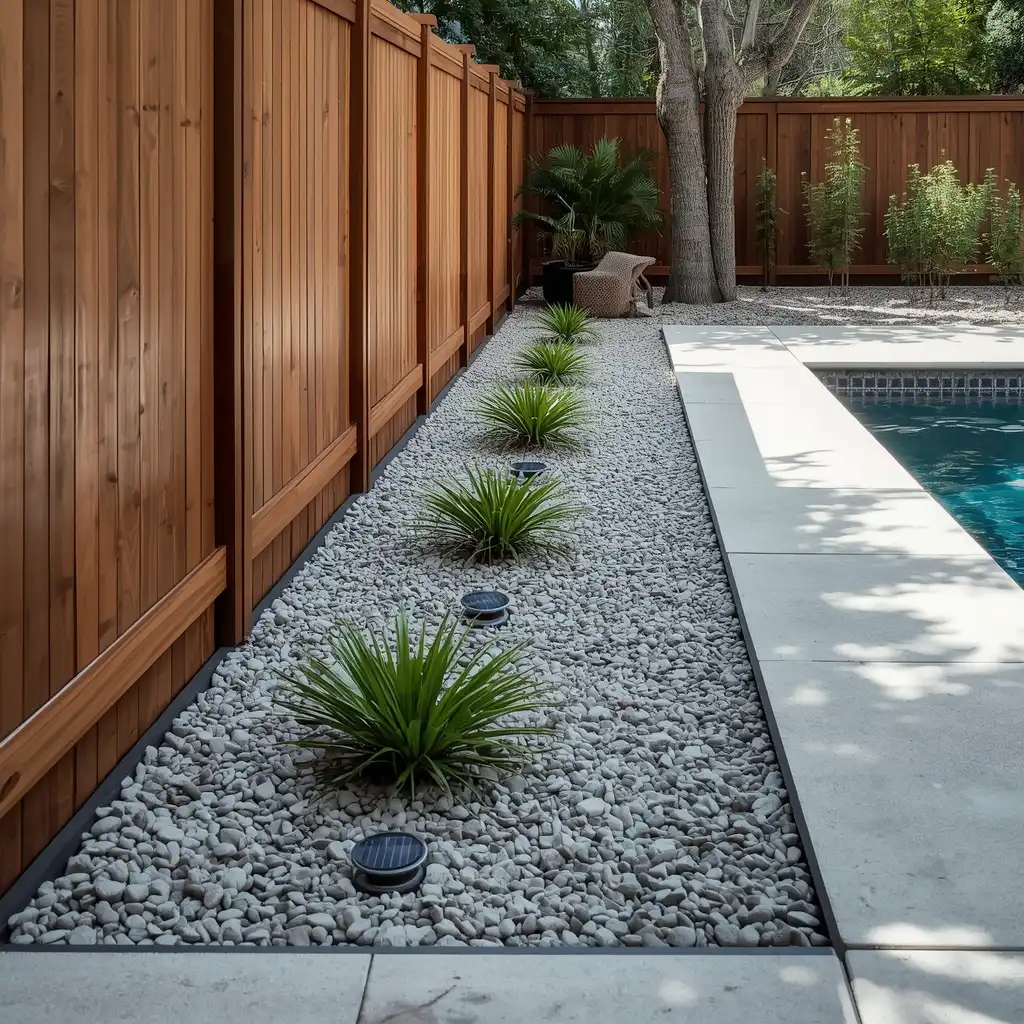
You do not need to cover the whole yard with stone. A narrow gravel strip can add texture without using a large amount of material.
Build the strip along a fence, wall, or unused side of the pool. A width of about two feet may be enough for a simple design.
Add three repeated plant groups. Leave enough room for each plant to reach its full size.
Use edging to keep gravel in place. This is important near grass, mulch, and walking areas.
Choose rounded or smooth gravel when people may walk nearby. Sharp stone can be uncomfortable and unsafe around bare feet.
Landscape fabric may help in some spots, but it is not right for every bed. Soil and organic matter can still collect above the fabric over time.
A few solar lights can finish the area at a low cost.
Best for: Hot, dry areas and narrow side yards
Budget level: Low to medium
Watch out for: Gravel spreading onto the pool deck
Plants add softness and color. Paths and borders give the yard better shape and make it easier to use.
DIY Pool Landscaping Ideas for Paths and Borders
A muddy route or messy edge can make the whole pool area feel neglected.
Simple paths and borders help people move safely between the house, gate, pool, and seating area. They also keep gravel, soil, and mulch from mixing together.
6. Build a Simple Gravel Walkway
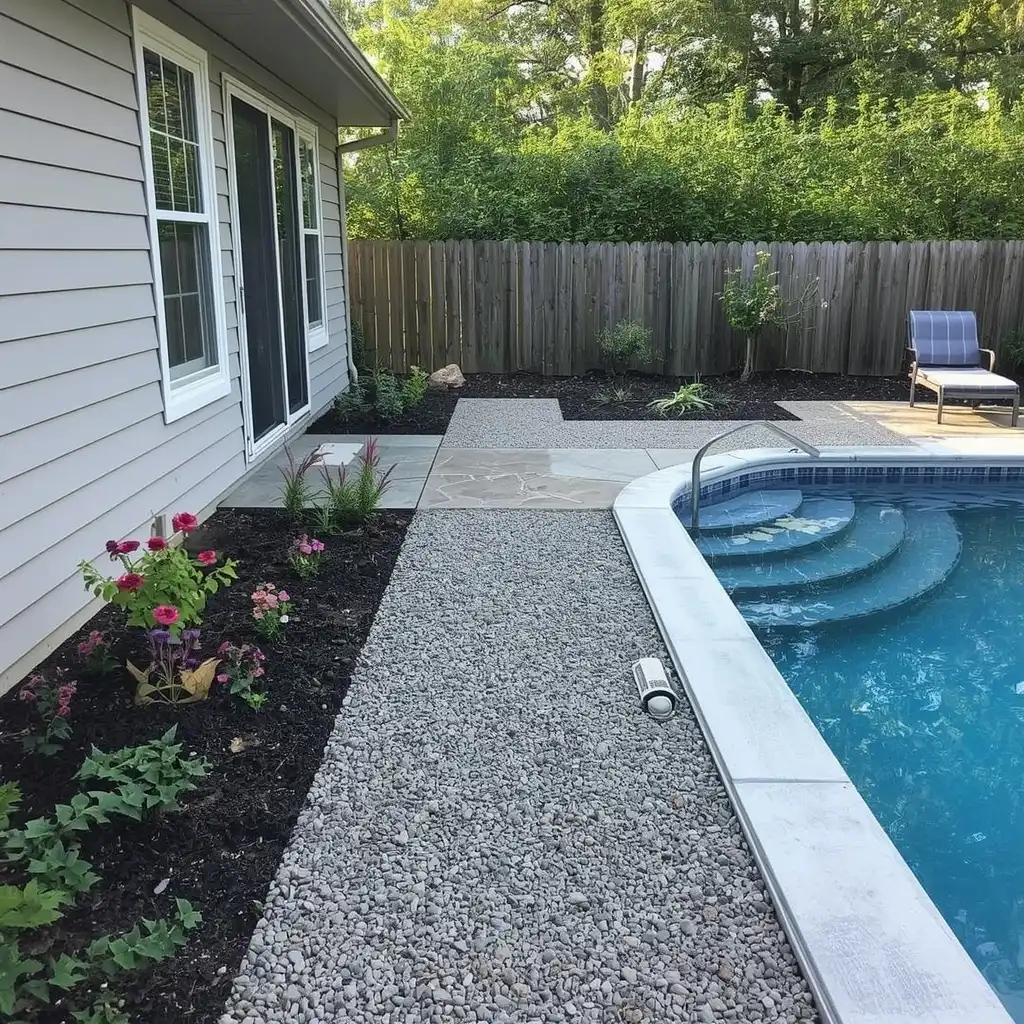
A gravel walkway can cost less than a full paver path. It also works well in side yards and spaces with uneven shapes.
Plan the route before buying material. Connect the places people use most, such as the patio door, pool gate, and seating area.
A three-foot width gives most people enough room to walk comfortably. Measure the full length and width to find the total area.
Remove grass and soft soil where needed. Add a stable base and compact it before spreading the top layer.
Install edging along both sides. This keeps the gravel from moving into the lawn or planting beds.
Do not end a loose gravel path right at the pool edge. Small stones can stick to wet feet and enter the water.
Basic materials may include:
- Base material
- Gravel
- Landscape edging
- Landscape rake
- Hand tamper
- Measuring tape
Best for: Side yards and paths between key areas
Budget level: Low to medium
Watch out for: Poor base work that causes sinking
7. Use Stepping Stones Instead of a Full Patio
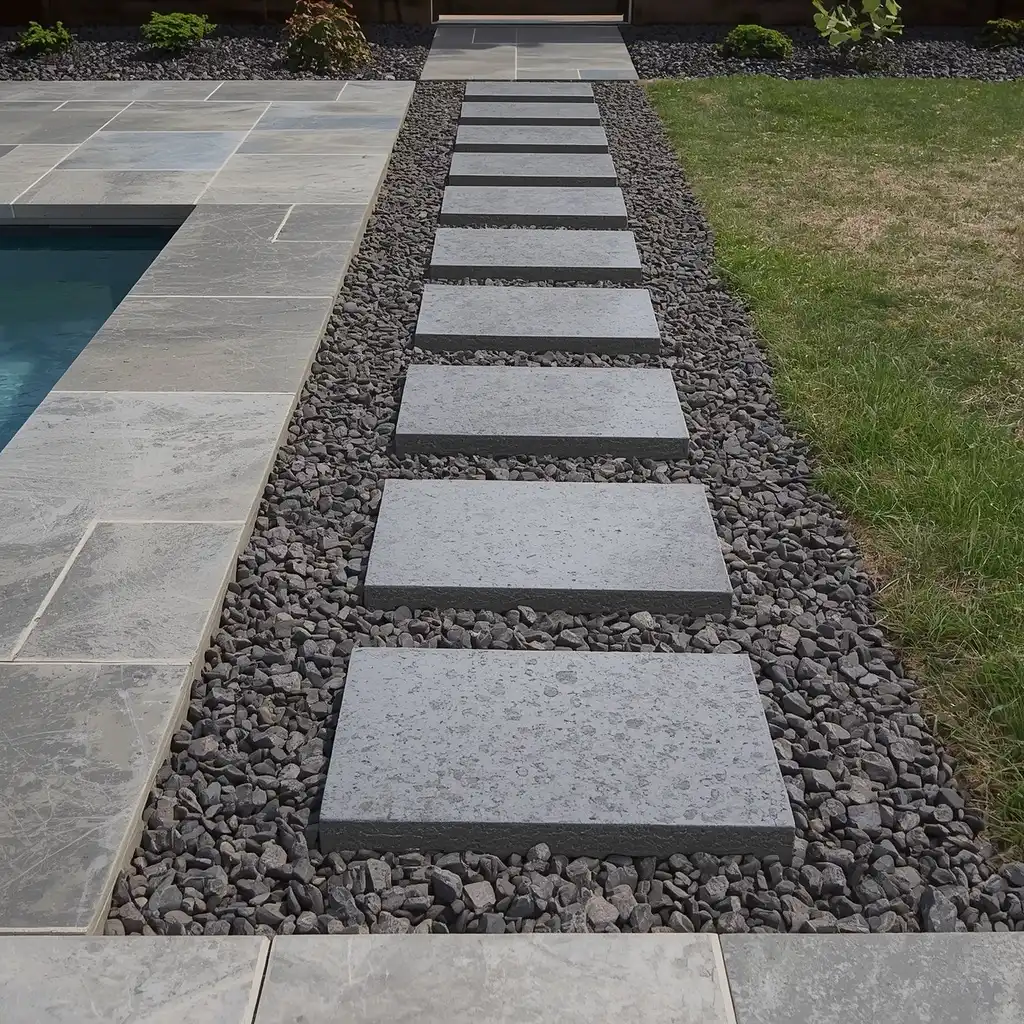
A full paver patio may require many materials and more ground work. Stepping stones create a clear route with fewer pieces.
Use large, flat stones with a textured surface. Smooth stones may become slippery when wet.
Lay the stones on the ground before setting them. Walk across them to test the spacing.
The space between stones should match a natural walking step. Do not force people to take long or uneven steps.
Set every stone level with the nearby surface. A raised corner can become a trip risk.
Fill the spaces with gravel, low ground cover, or firm soil. Choose a filler that will not turn muddy after rain.
Six to eight large stones may be enough to connect a deck with a shower, gate, or seating area.
Best for: Short paths and small yards
Budget level: Low
Watch out for: Uneven stones and slippery finishes
8. Add Low-Cost Landscape Edging
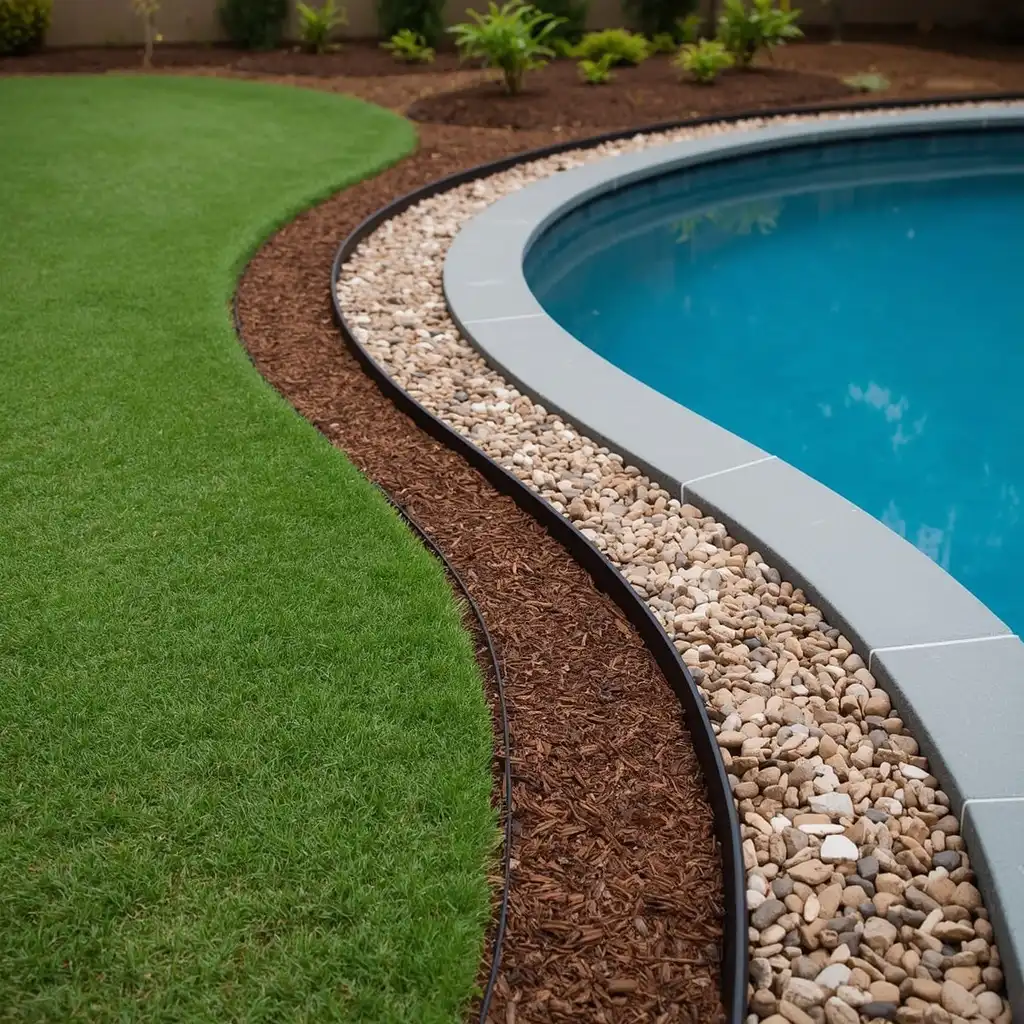
Edging is a small detail that can make cheap materials look more organized.
Use it between lawn, mulch, gravel, and planting beds. A clean border helps each area keep its shape.
Plastic edging is often affordable and easy to bend. Metal edging creates a thin, modern line. Brick and stone can add a more classic look.
You may be able to reuse old bricks or pavers. Check every piece for cracks, sharp edges, and unstable surfaces.
Keep edging low near walking areas. Raised borders can catch feet or create a hard edge near the pool.
Use the same edging across several beds when possible. Matching borders make separate areas feel connected.
Best for: Planting beds and gravel strips
Budget level: Low
Watch out for: Edging that lifts out of the ground
9. Create a Small Pea-Gravel Seating Zone
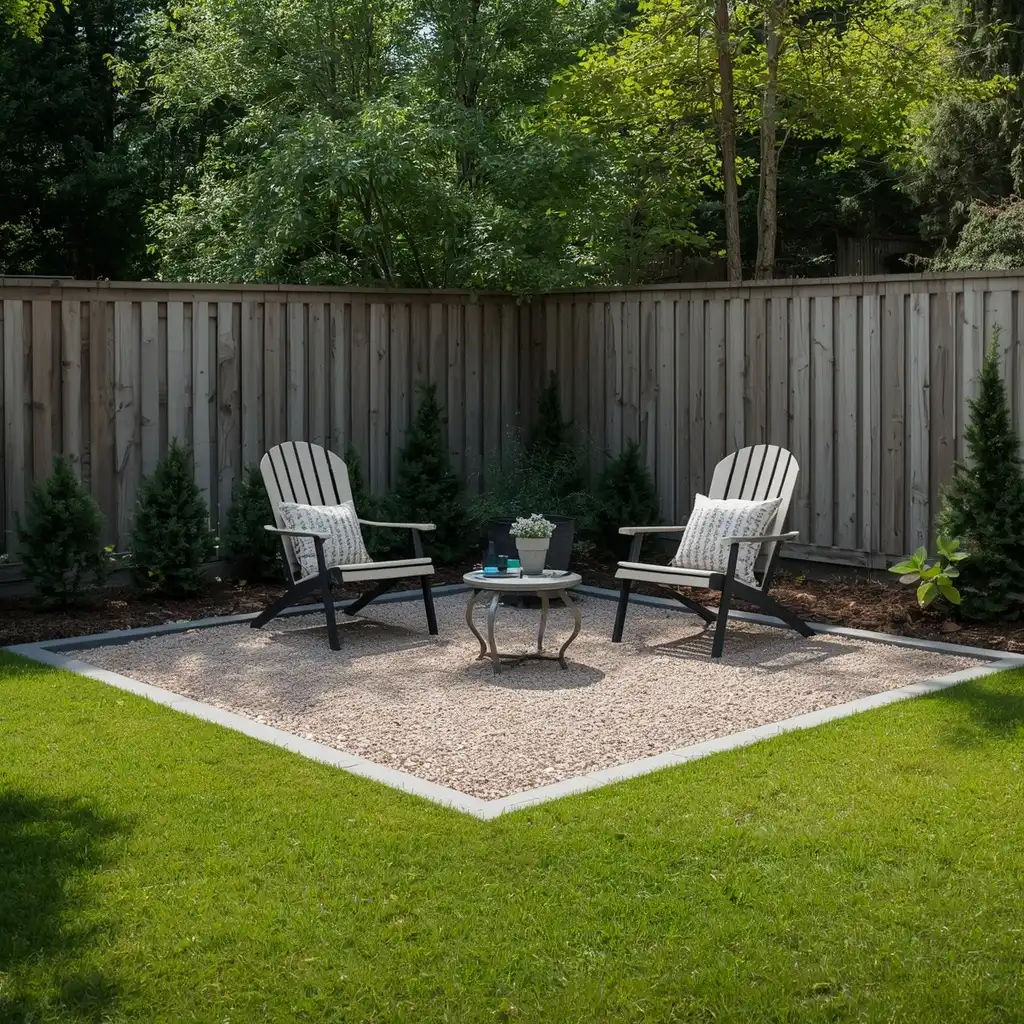
You do not need a large patio to make room for two chairs and a table.
Choose one quiet corner away from the main splash area. An eight-foot by eight-foot space may be enough for a small setup.
Mark the shape with stakes or garden paint. Remove soft ground and build a compact base.
Add edging around the full area. This keeps gravel from spreading into grass or walking paths.
Use chairs with wide, stable legs. Thin chair legs may sink into loose gravel.
Add one outdoor table and one large planter. This creates a useful seating area without filling the space with decor.
Compare the cost with a concrete or paver extension of the same size. Gravel may cost less, but it also needs occasional raking.
This is a practical form of pool landscaping on a budget because it improves one focused area rather than the whole yard.
Best for: Small poolside seating areas
Budget level: Medium
Watch out for: Loose stone near the water
10. Refresh Plain Concrete With a Pool-Deck Coating
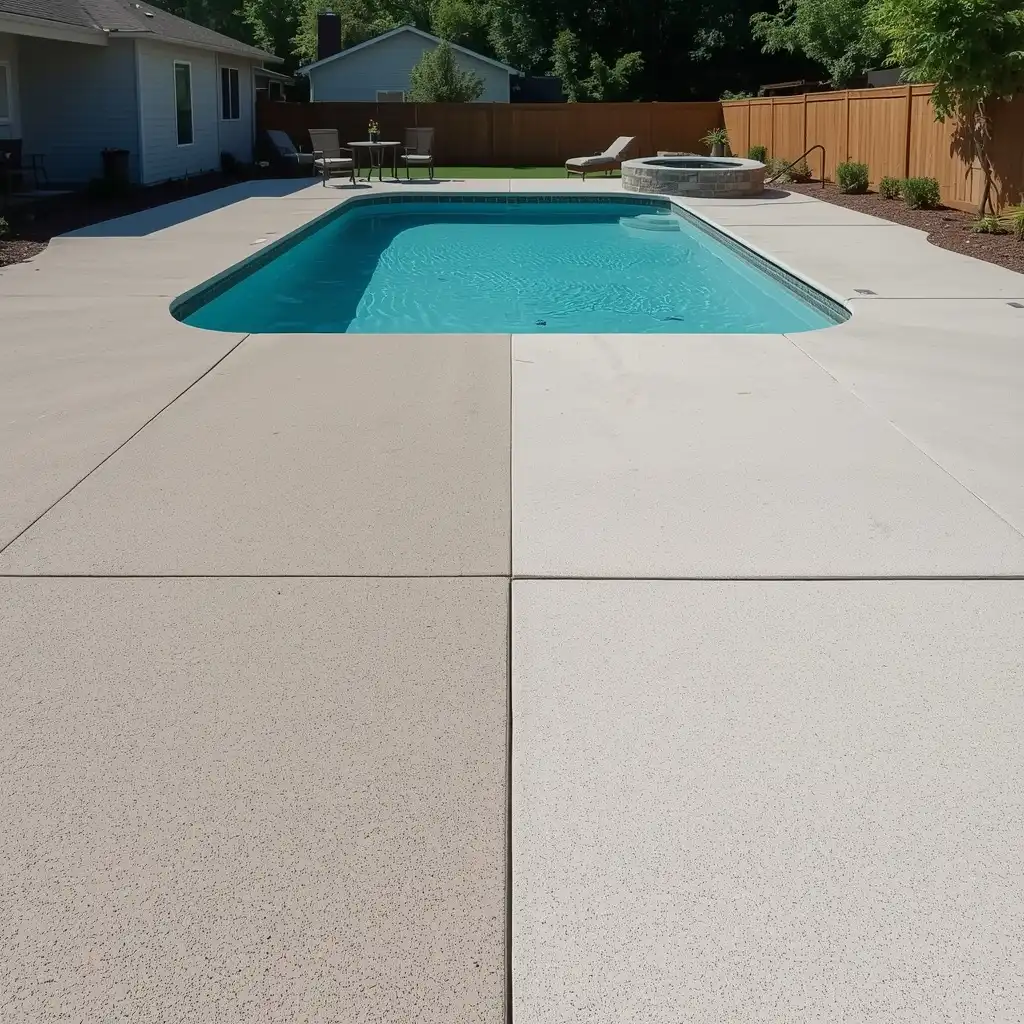
Old concrete can make the pool area look tired, even when it is still in fair condition.
A suitable coating may improve the color and surface without replacing the deck. This works best when the concrete has no major movement or deep damage.
Clean the area well before applying any product. Remove dirt, oil, algae, and loose material.
Repair small cracks as directed by the coating maker. Major cracks or sinking areas may need professional repair.
Use a coating made for outdoor pool decks. Regular wall or floor paint may become slippery or peel near water.
Choose a slip-resistant finish. Lighter colors may feel cooler than very dark shades in strong sun.
Follow all drying and curing instructions. Keep people, pets, and water off the surface until it is ready.
Best for: Plain or faded concrete decks
Budget level: Medium
Watch out for: Coating damaged or moving concrete
Once your paths and borders look organized, focus on privacy and shade. These changes can make the pool area more comfortable each day.
Affordable Pool Landscaping for Privacy and Shade
Privacy and shade can change how often you use your pool area.
You do not always need a new fence or a large wood structure. Affordable pool landscaping can solve one exposed or sunny spot at a time.
11. Install a Freestanding Privacy Screen
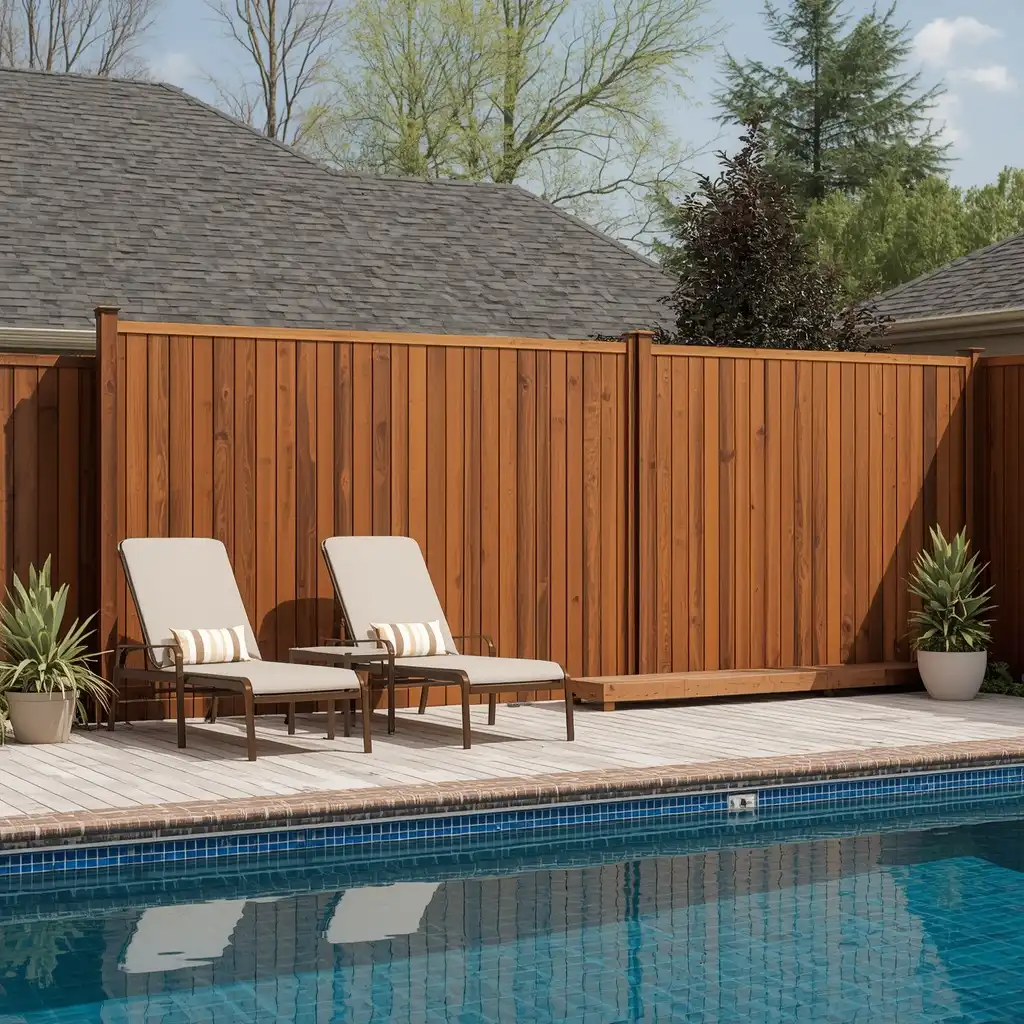
A freestanding screen can block a direct view from a nearby window, road, or seating area.
Place it where privacy matters most. This may be beside lounge chairs, an outdoor shower, or one end of the pool.
Wood screens offer a warm look. Vinyl and composite options may need less care. Metal panels can work well in a modern yard.
Choose a material made for outdoor use. Indoor panels may warp, rust, or break down in wet weather.
Anchor the screen as directed by the maker. A tall panel can fall in strong wind if it is not secured.
Do not use a decorative screen as a required pool barrier unless it meets local safety rules. Pool fences often have rules for height, gaps, gates, and locks.
Best for: One exposed area
Budget level: Medium
Watch out for: Wind and local barrier rules
12. Add a Trellis With a Suitable Climbing Plant
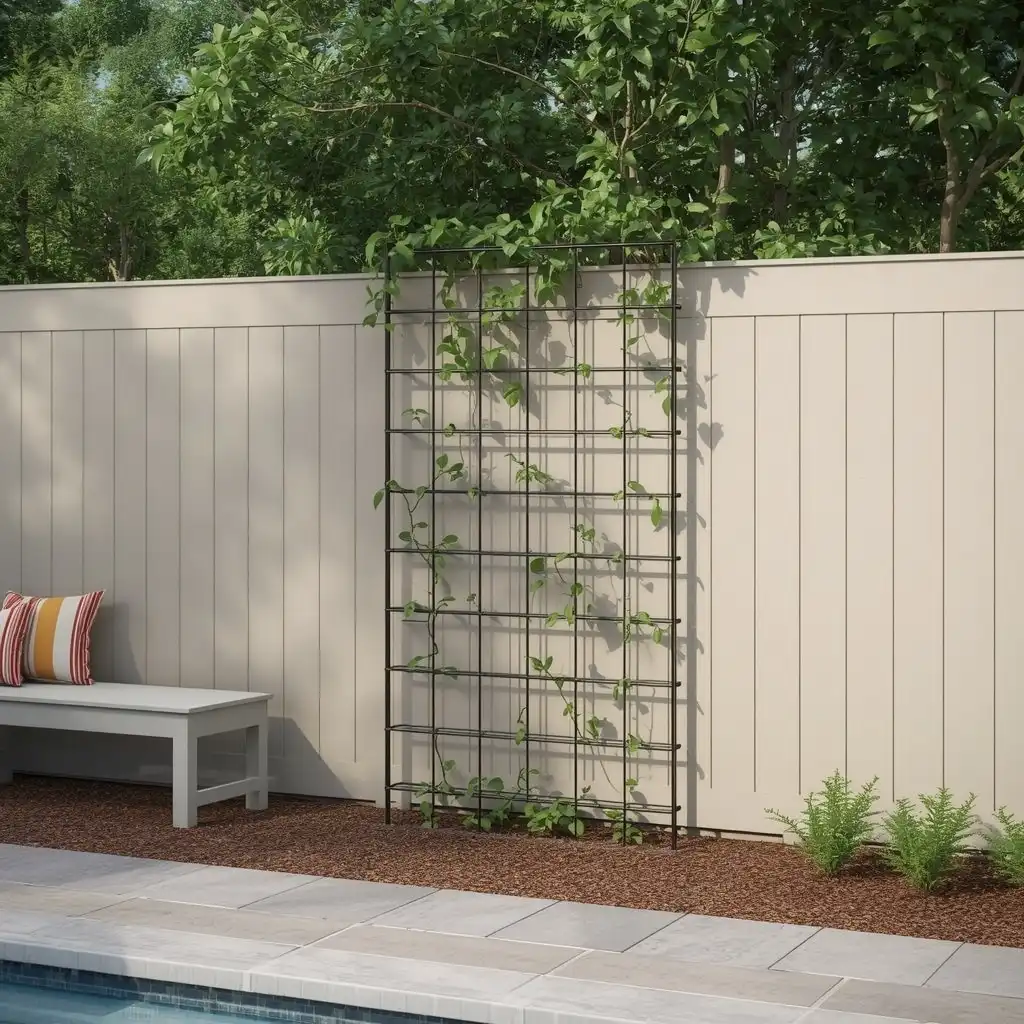
A trellis gives you height without using much ground space.
It can make a plain wall or fence feel greener. It can also create a softer background for a bench or small seating area.
Choose a vine that fits your climate and the size of the trellis. Avoid fast-spreading plants that are hard to control.
Stay away from thorny vines near paths and chairs. Plants with heavy fruit or large flower drop may add more pool cleaning.
Keep vines away from pool pumps, heaters, pipes, and control panels. These areas need clear airflow and easy access.
Prune the plant before it reaches roofs, wires, or nearby trees.
Best for: Narrow yards and plain fences
Budget level: Low to medium
Watch out for: Fast growth and leaf drop
13. Hang Outdoor Curtains Around a Covered Area
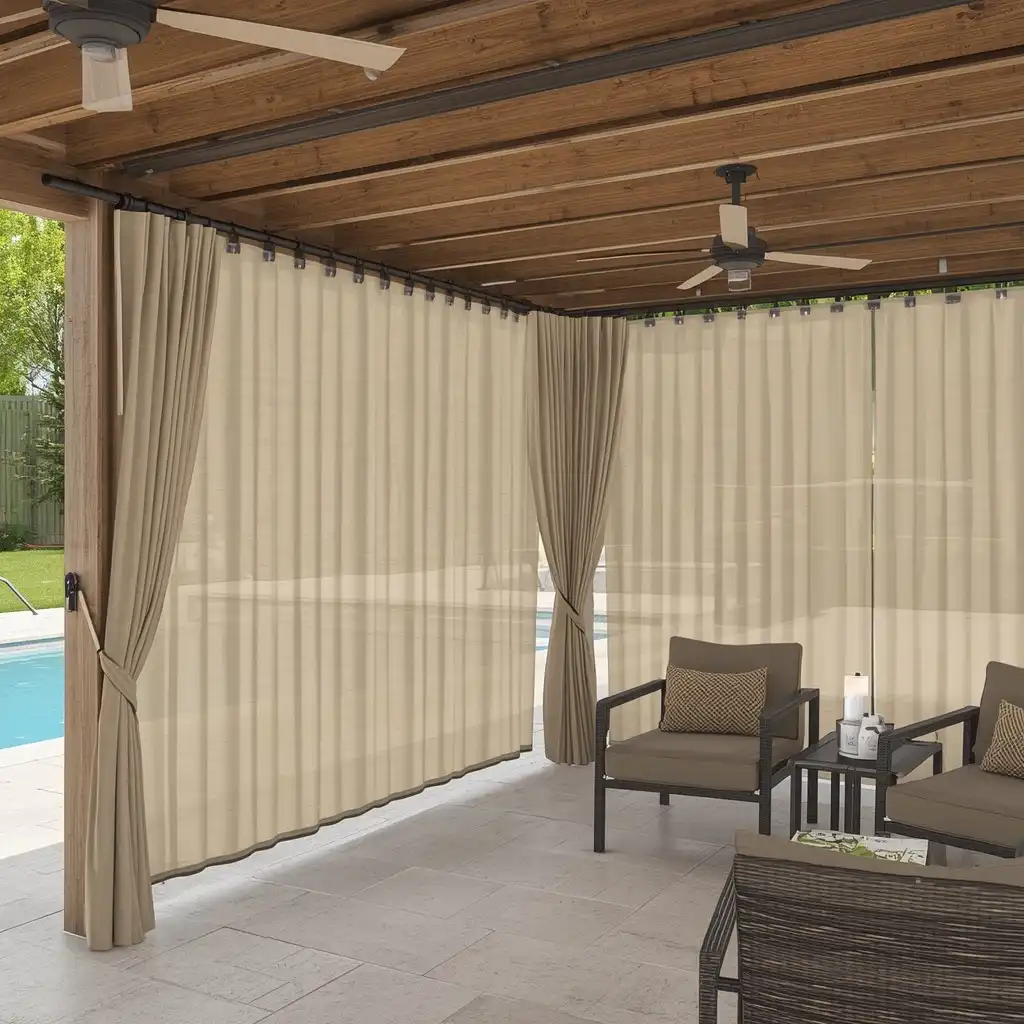
Outdoor curtains give you privacy when you need it. You can open them when you want more air or a wider view.
This idea works best with a pergola, gazebo, or covered patio. The structure should already be strong and stable.
Use fabric made for outdoor use. It should resist moisture, fading, and mildew.
Choose rust-resistant rods, hooks, and rings. Standard indoor hardware may not last near a pool.
Tie the curtains back during strong wind. Loose fabric can tear or pull on the support.
Keep curtains away from heaters, grills, flames, and standing water.
A simple white, beige, or light gray curtain can make mixed furniture look more connected.
Best for: Covered seating areas
Budget level: Low to medium
Watch out for: Wind and mildew
14. Use a Shade Sail Instead of Building a Pergola
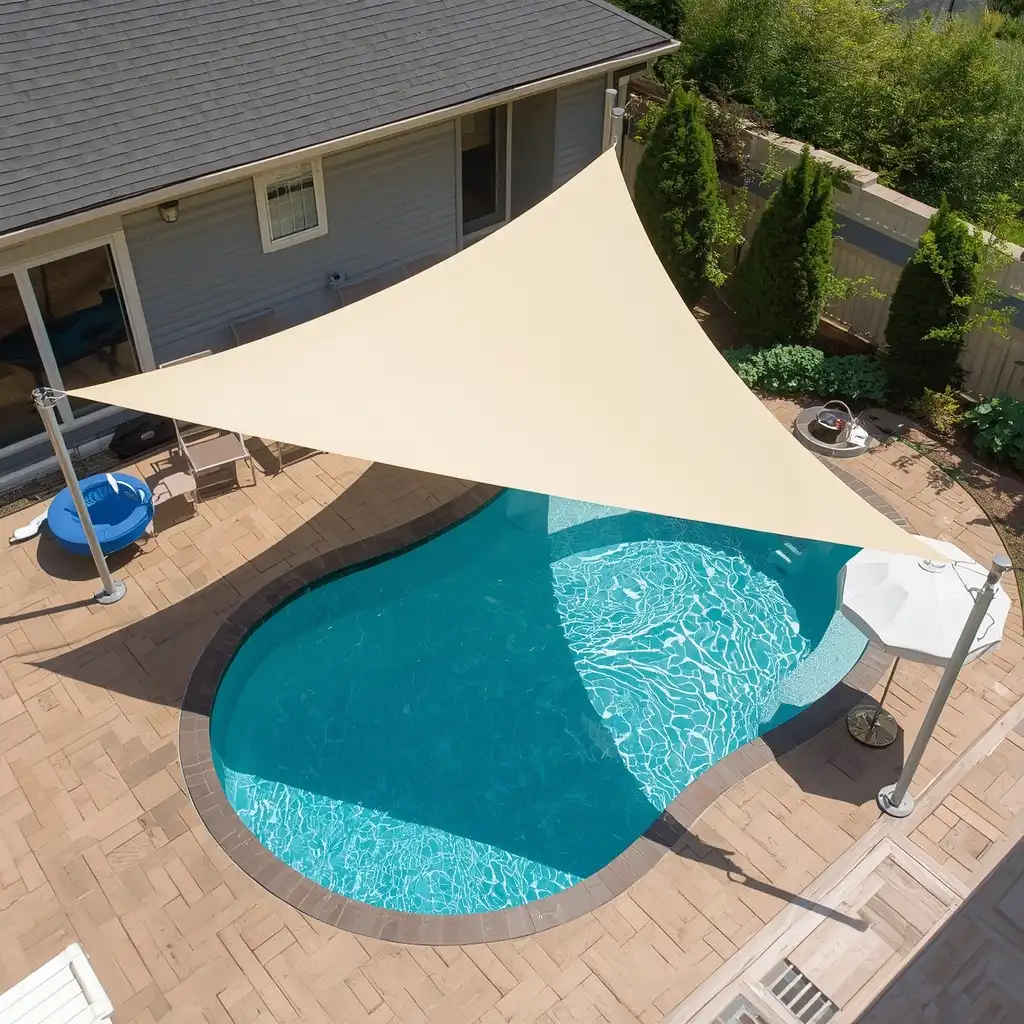
A shade sail can cover a seating area with fewer materials than a full pergola.
Start by watching the sun at the time you use the pool most. A shade sail in the wrong place may leave the chairs in full sun.
Measure the area and check the shade shape during morning and afternoon hours. The sun angle changes through the day and year.
Use strong anchor points made to handle the pull of the sail. A fence board or weak trim piece may not be safe.
The fabric needs enough slope for rainwater to run off. Flat fabric can collect water and place extra weight on the anchors.
Remove the sail during severe storms if the product instructions call for it.
Get professional advice when you are unsure about posts, walls, roofs, or tension.
Best for: Poolside seating and dining areas
Budget level: Medium
Watch out for: Weak anchors and water buildup
Privacy and shade improve comfort. Lighting and decor help the finished space feel warm and ready to use.
Budget Pool Lighting and Decorating Ideas
Add lighting and decor after the main area is safe and useful.
A few well-placed items will often look better than many small decorations. Keep the colors and materials simple.
15. Line Main Paths With Solar Lights
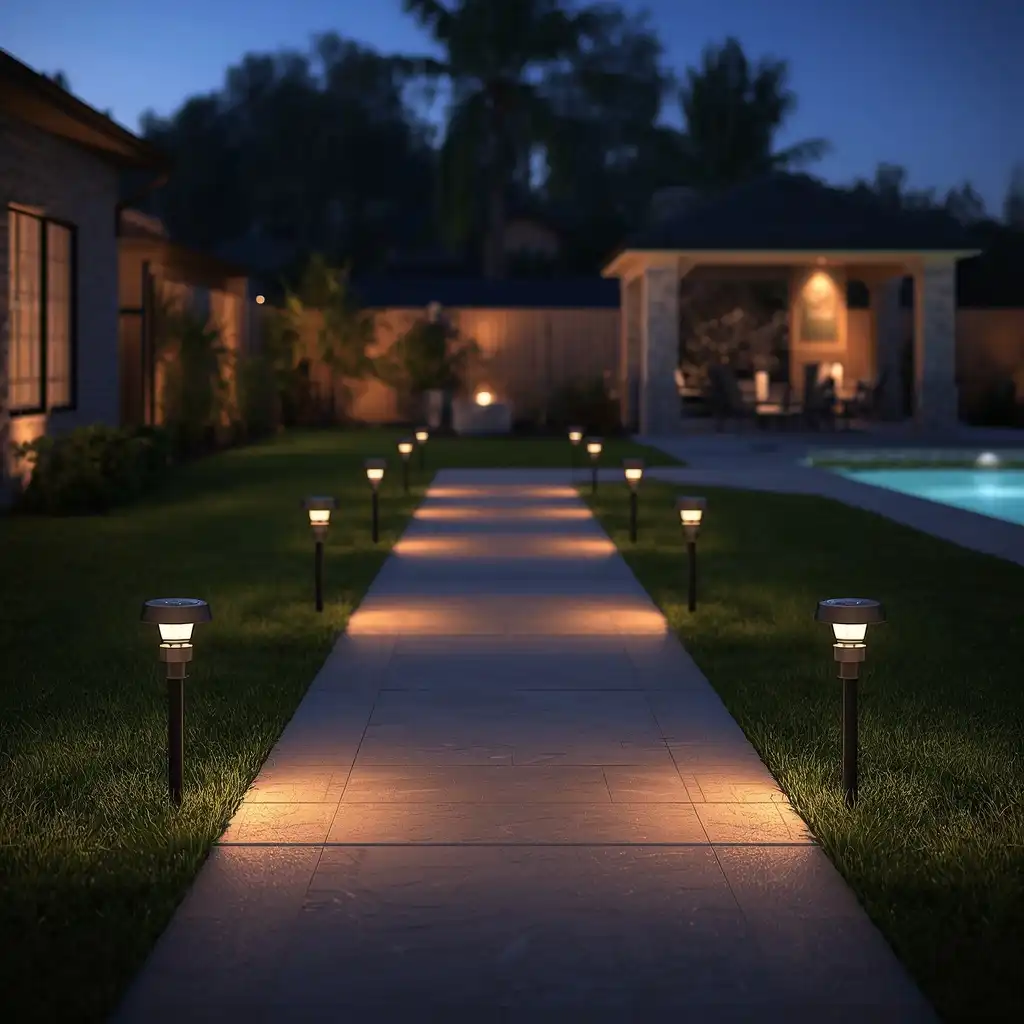
Solar path lights can make steps, gates, beds, and walkways easier to see at night.
Place them along the main route people use. Four to six lights may be enough for a short path.
Make sure each light receives direct sun during the day. A light placed under thick plants may not charge well.
Space the lights evenly. Too many lights can make a small yard feel crowded.
Choose models with replaceable batteries when possible. This may help the lights last longer.
Solar lights are useful for decoration and path marking. They should not be the only light source for steps, deep water, or safety areas.
Best for: Paths, gates, and planting beds
Budget level: Low
Watch out for: Weak light in shaded spots
16. Add Outdoor String Lights to a Seating Area
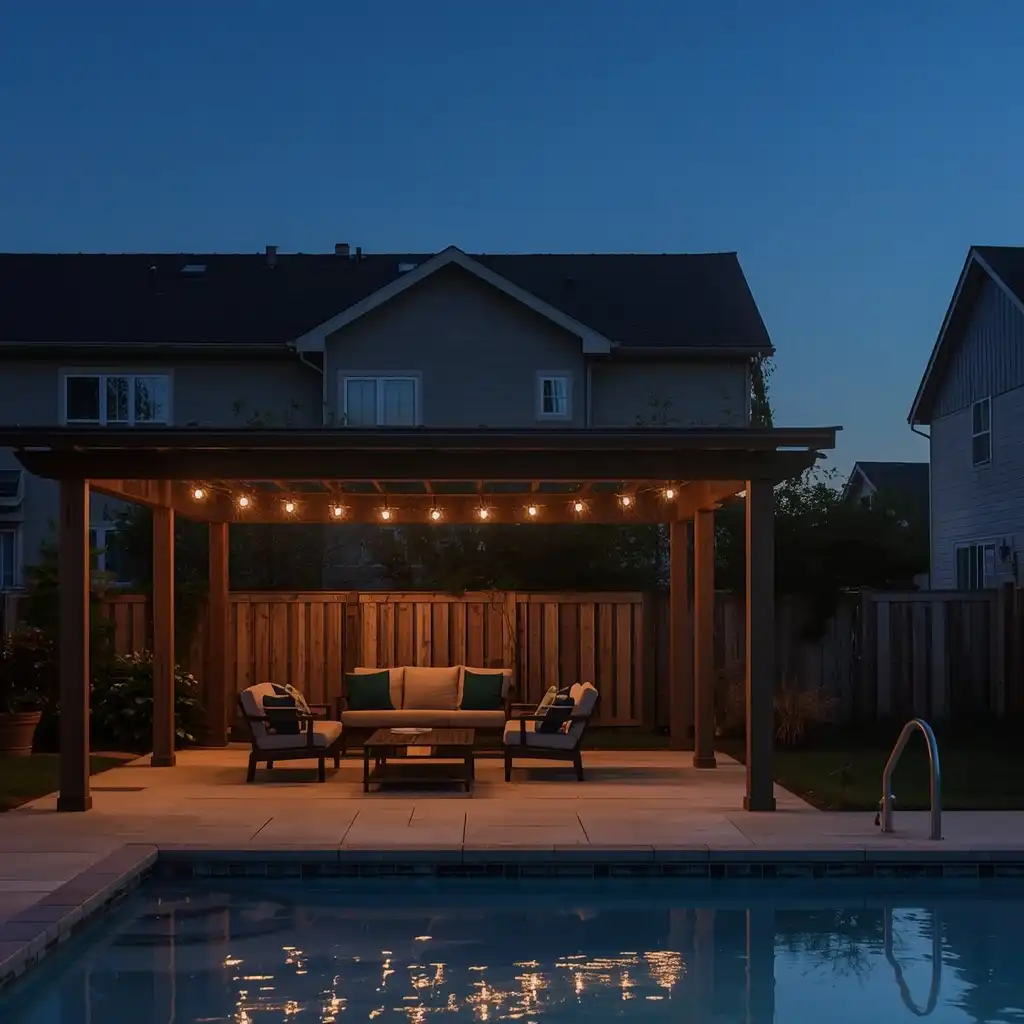
String lights can make a basic seating area feel more comfortable at night.
Hang them over a patio, pergola, or seating zone. Keep them away from the pool water.
Use lights and cords rated for outdoor use. Indoor sets may not be safe in rain or damp conditions.
Support long strings with proper wire or hardware when required. Do not let the light cord carry more weight than it is designed to hold.
Keep plugs and connections protected from water. Use a suitable outdoor outlet with ground-fault protection.
Ask a licensed electrician for help when you need a new outlet or permanent wiring.
Warm, simple lighting often looks better than flashing or very bright lights.
Best for: Covered patios and seating areas
Budget level: Low
Watch out for: Unsafe cords and wet connections
17. Update Furniture With Cushions and Paint
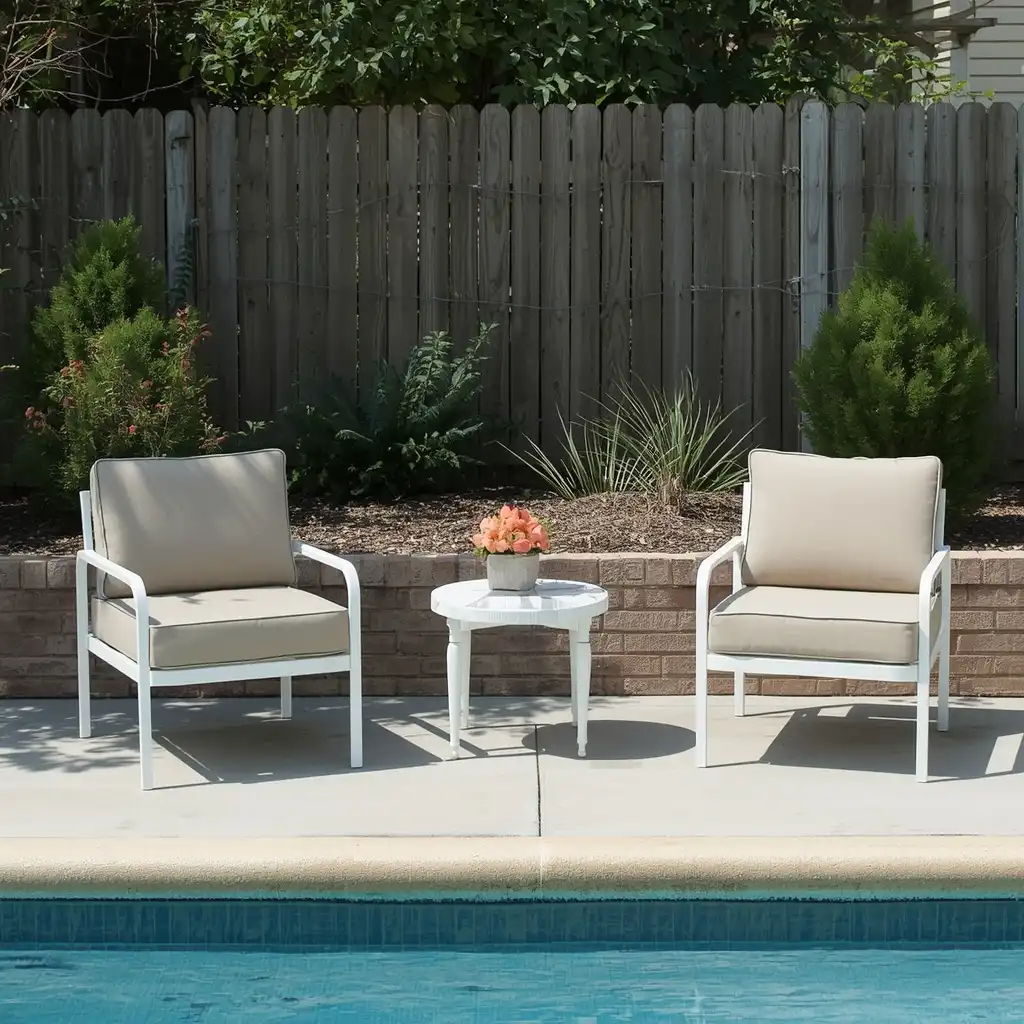
You may not need to replace your full furniture set.
Start by cleaning each chair and table. Check for rust, loose parts, cracked wood, or weak frames.
Replace worn cushions with outdoor cushions. Look for fabric that resists fading and dries quickly.
Use outdoor paint made for the furniture material. Metal, plastic, and wood may need different products and surface preparation.
Limit the area to two or three colors. Use one neutral shade, one plant-inspired color, and one small accent color.
Update the pieces people notice first. Two chairs and one table may have more impact than several small items.
Bring cushions inside or store them in a dry box when they are not in use.
Best for: Worn but safe outdoor furniture
Budget level: Low
Watch out for: Painting over rust or damaged frames
18. Create One Low-Cost Focal Point
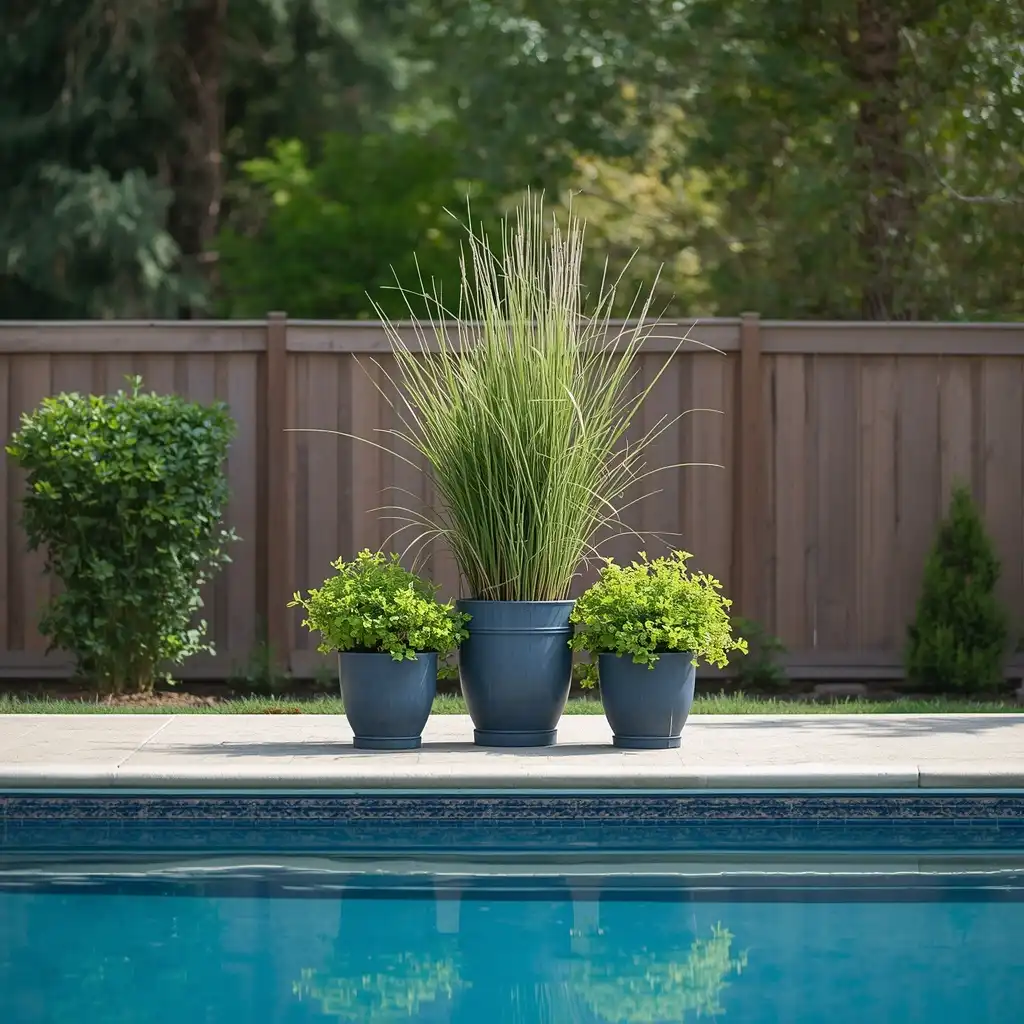
A focal point gives your eyes one clear place to land.
It can be a large painted planter, a small rock garden, a bench, an outdoor panel, or a bright umbrella.
Choose one item that fits the size of the yard. A very small decoration may disappear in a large space.
Place the focal point at the far end of the pool or behind the main seating area. This can help the layout feel more complete.
You can also group one large pot with two smaller pots. Use the same plant or color in each container.
Do not add several competing focal points. Too many strong items can make a budget yard feel cluttered.
Pool landscaping on a budget often looks best when simple materials are repeated across the space.
Best for: Plain or unfinished pool areas
Budget level: Low to medium
Watch out for: Too many unrelated decorations
3 Sample Budgets for an Affordable Pool Makeover
Pool landscaping on a budget becomes easier when you see how several ideas can fit into one spending limit.
These examples are starting points. Your final cost will depend on the yard size, local prices, and materials you choose.
What You Can Do With $250
Focus on updates that use items you already own.
You could:
- Divide and move existing plants
- Paint two or three old containers
- Add mulch to one small bed
- Install four solar path lights
- Replace two worn cushions
- Add simple plastic edging
This budget works well when the main area is already safe but looks unfinished.
What You Can Do With $500
Use this amount to improve one full section of the pool area.
You could:
- Create a narrow gravel bed
- Add three large containers
- Install edging
- Build a short stepping-stone path
- Update a small seating area
- Add one privacy panel
Choose one main goal, such as privacy or better seating. Avoid spreading the money across too many small projects.
What You Can Do With $1,000
This budget can support one larger feature plus several small updates.
You could:
- Build a compact gravel seating zone
- Add a stepping-stone path
- Install a shade sail
- Buy several low-maintenance plants
- Improve lighting around the main path
- Refresh safe outdoor furniture
Complete the work in stages. Start with drainage, surfaces, and safety before buying decor.
Pool Landscaping Mistakes That Can Cost More Later
A low price does not make an idea affordable when it creates repairs or extra maintenance later.
Do not buy a plant before checking its full size. Small plants can grow into pipes, paths, fences, and equipment areas.
Avoid plants that create lots of leaves, seeds, or fruit near the water. The extra debris may clog filters and increase cleaning.
Keep pool equipment open and easy to reach. Do not hide pumps and controls behind heavy pots or thick vines.
Do not place loose stone right beside the pool. Small pieces can enter the water or hurt bare feet.
Choose textured surfaces for wet areas. Smooth tile, polished stone, and unsuitable paint can become slippery.
Pay attention to drainage. New beds, edging, and gravel should not send rainwater against the pool or house.
Use outdoor-rated electrical products. Keep plugs, cords, and connections away from water.
Do not attach screens or shade sails to weak structures. Wind can place strong pressure on posts, walls, and anchors.
Check local pool-barrier rules before changing fences, screens, or gates.
Saving money at the start only helps when the materials remain safe, easy to maintain, and suitable for the pool area.
Start With One Affordable Pool Improvement
You do not need to rebuild your whole backyard to improve the pool area.
Start with the problem that affects you most. Add privacy if you feel exposed. Build a path if mud reaches the pool. Add shade if the seating area becomes too hot.
Set a clear budget and measure before you shop. Choose two or three materials that work well together. Repeat the same plants, colors, or borders for a cleaner look.
Complete one small area before starting the next. This keeps the project easier to manage and helps you see where your money makes the biggest difference.
Successful pool landscaping on a budget starts with a clear plan and a few changes that make the space safer, cleaner, and more comfortable.