
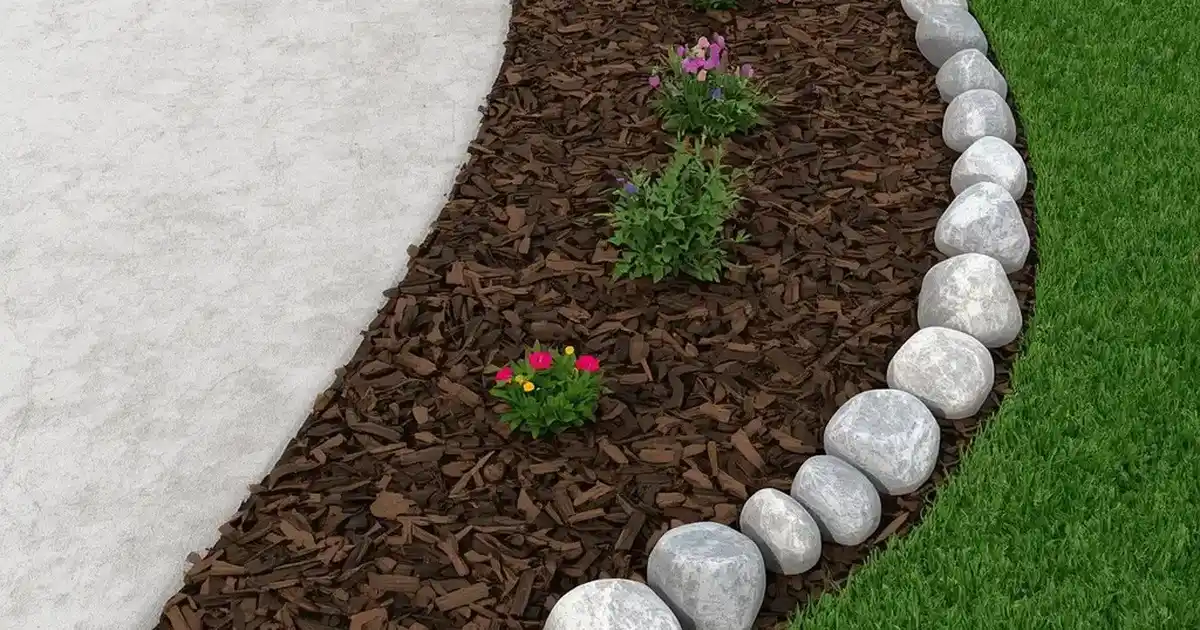
Using rocks and mulch in the same yard sounds simple. Then the materials start mixing, weeds appear, and rain washes mulch across the stones.
Good planning can prevent most of these problems.
The best rock landscaping with mulch ideas give each material a clear job. Mulch protects soil and supports plants. Rock creates borders, paths, drainage areas, and strong visual lines.
You also need to think about color, water flow, edging, and future care. A bright white rock may look clean at first, but it can show leaves and mud. Bark mulch looks natural, but you will need to replace some of it over time.
This guide shares 19 practical ways to combine rock and mulch. You will find ideas for flower beds, trees, slopes, paths, fire pits, rain gardens, and small front yards.
You do not need to change your whole yard at once. Start with one area, test the layout, and build from there.
How to Plan Rock Landscaping with Mulch
Rock and mulch can share the same yard, but they should not do the same job.
Use mulch in areas with flowers, shrubs, and trees. Organic mulch helps protect the soil from fast moisture loss. It also gives planted beds a softer and more natural look.
Use rock where you need a firm border, drainage strip, path, or dry surface. Stone also works well in places where mulch often washes away.
Before buying materials, watch what happens during rain. Look for standing water, washed soil, and wet areas near your home. Decorative stone can guide water, but it cannot fix a serious drainage problem by itself.
Choose two or three main colors. Too many shades can make a small yard feel crowded. Dark brown mulch with gray river rock creates a calm look. Cedar mulch with tan stone feels warmer and works well beside brick or wood.
Strong edging is also important. It keeps gravel out of the mulch and makes yard care easier. You can use steel, plastic, concrete, pavers, or natural stone.
Lay a garden hose on the ground before digging. Move it until the curves look smooth from your window, walkway, and street.
| Material | Best Use | Main Benefit | Main Drawback |
| Bark mulch | Planted beds | Protects soil and holds moisture | Needs fresh material over time |
| River rock | Borders and drainage | Has a soft, natural shape | Traps leaves between stones |
| Pea gravel | Seating areas | Feels comfortable underfoot | Moves without firm edging |
| Crushed stone | Paths | Packs into a stable surface | Can look less natural |
| Lava rock | Accent beds | Adds bold color and texture | May feel harsh in large areas |
| Boulders | Focal points | Adds height and structure | Heavy and hard to move |
1. Soften Hard Lines with a Curved Rock Border
Best for: Front flower beds and straight walkways
Main materials: River rock, mulch, and hidden edging
Maintenance level: Low to moderate
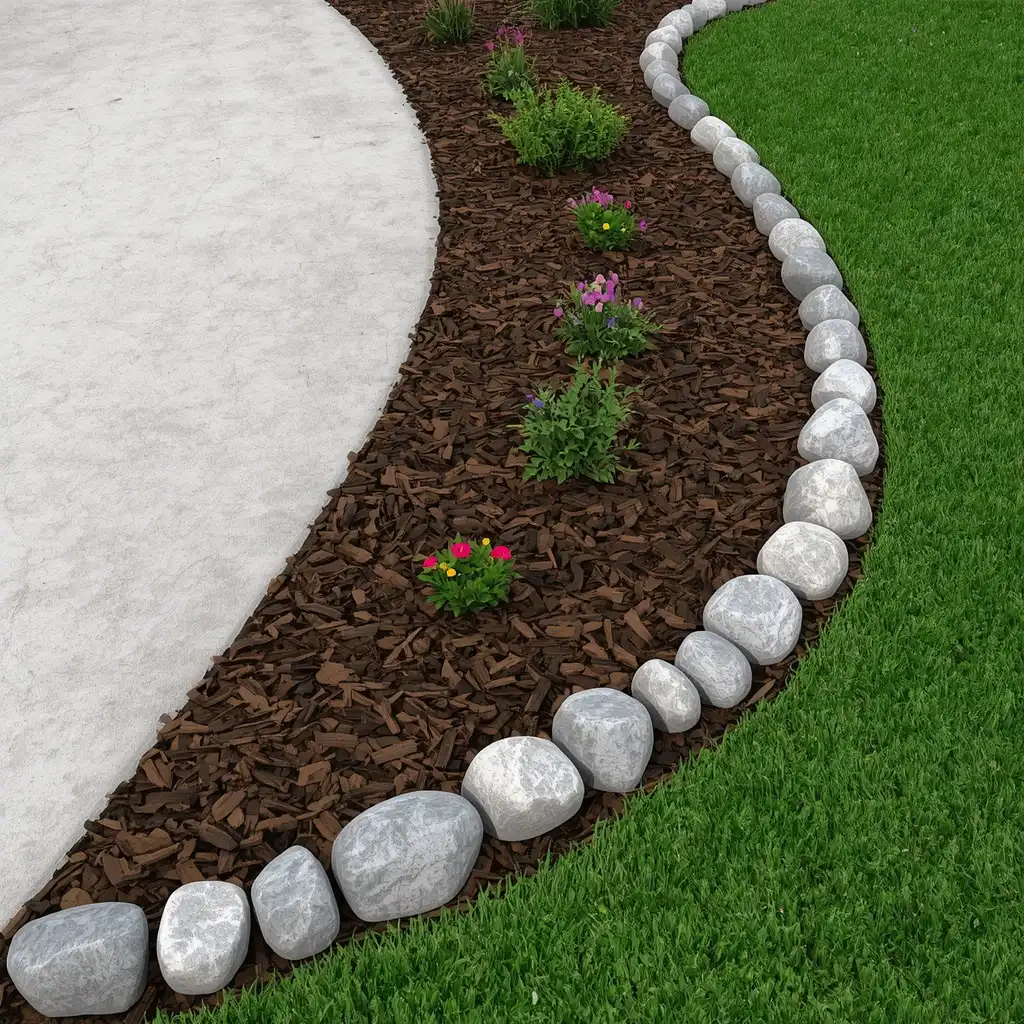
A curved rock border can soften the square shape of a house. It also gives your mulch bed a clean and finished edge.
Use smooth river rocks that are about three to five inches wide. Place them along the outside of the bed. Keep the mulch behind a firm strip of edging so it does not spill between the stones.
Avoid making a perfect row with rocks of the same size. Mix a few different shapes for a more natural result.
You can test the curve with a garden hose. Stand near the street and check the shape before you dig.
This type of river rock and mulch landscaping works well beside front paths. Dark brown mulch and soft gray stones create a simple look that fits many home styles.
2. Guide Rainwater with a Dry Creek Bed
Best for: Downspouts, low areas, and yards with light runoff
Main materials: River rock, gravel, boulders, and mulch
Maintenance level: Moderate
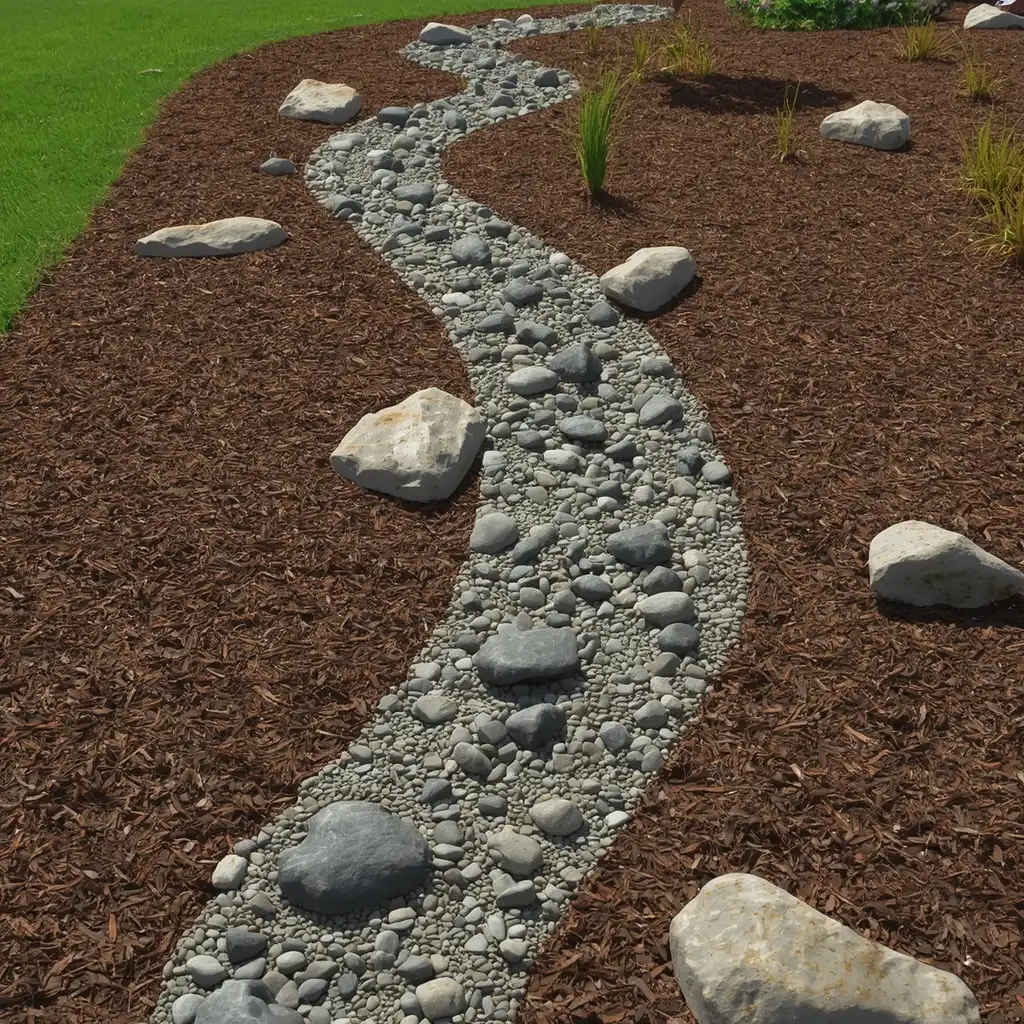
A dry creek bed can turn a wet problem into a strong garden feature. It can carry water away from a downspout or guide rain through a low part of the yard.
Start with a shallow curved channel. Make the creek wider at bends and narrower along straight sections. This makes it look more natural.
Place small gravel in the center. Add larger river rocks along the sides and around each curve. A few boulders can help anchor the design.
Keep loose mulch outside the main water path. Heavy rain may carry it into the creek and block water flow.
You can add plants near the edges. Choose types that can handle short wet periods if the area collects water.
A dry creek must lead water to a safe place. Do not send runoff onto a neighbor’s property, public path, or building foundation.
3. Keep Mulch Away from the House with a Rock Strip
Best for: Foundation beds and narrow spaces beside siding
Main materials: Gravel, edging, and mulch
Maintenance level: Low
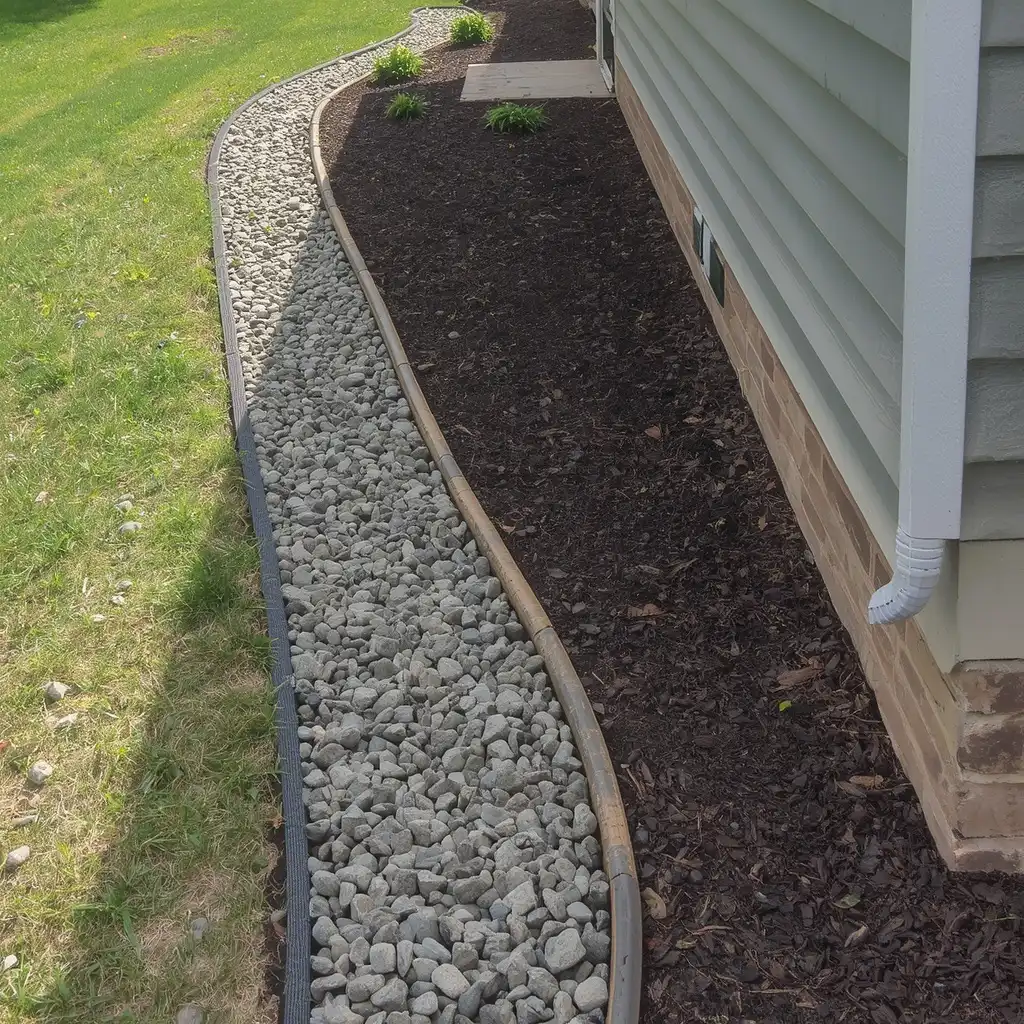
Mulch placed too close to siding can hold moisture and hide small problems. A narrow rock strip creates space between your home and the planted bed.
Make the strip about 12 to 24 inches wide, based on the size of the area. Use gravel or small decorative stone that matches nearby paths or borders.
Place edging between the stone and mulch. This keeps the two materials from mixing during rain or yard work.
The soil should slope away from the house. Rock cannot correct poor grading, clogged drains, or deep foundation issues.
Do not pack the strip with plants. Leave enough open space for inspections, repairs, and air movement.
This simple form of rock and mulch landscaping works well in tight side yards. It also makes it easier to spot weeds, insects, or damage near the wall.
4. Create Bold Contrast with White Rock and Black Mulch
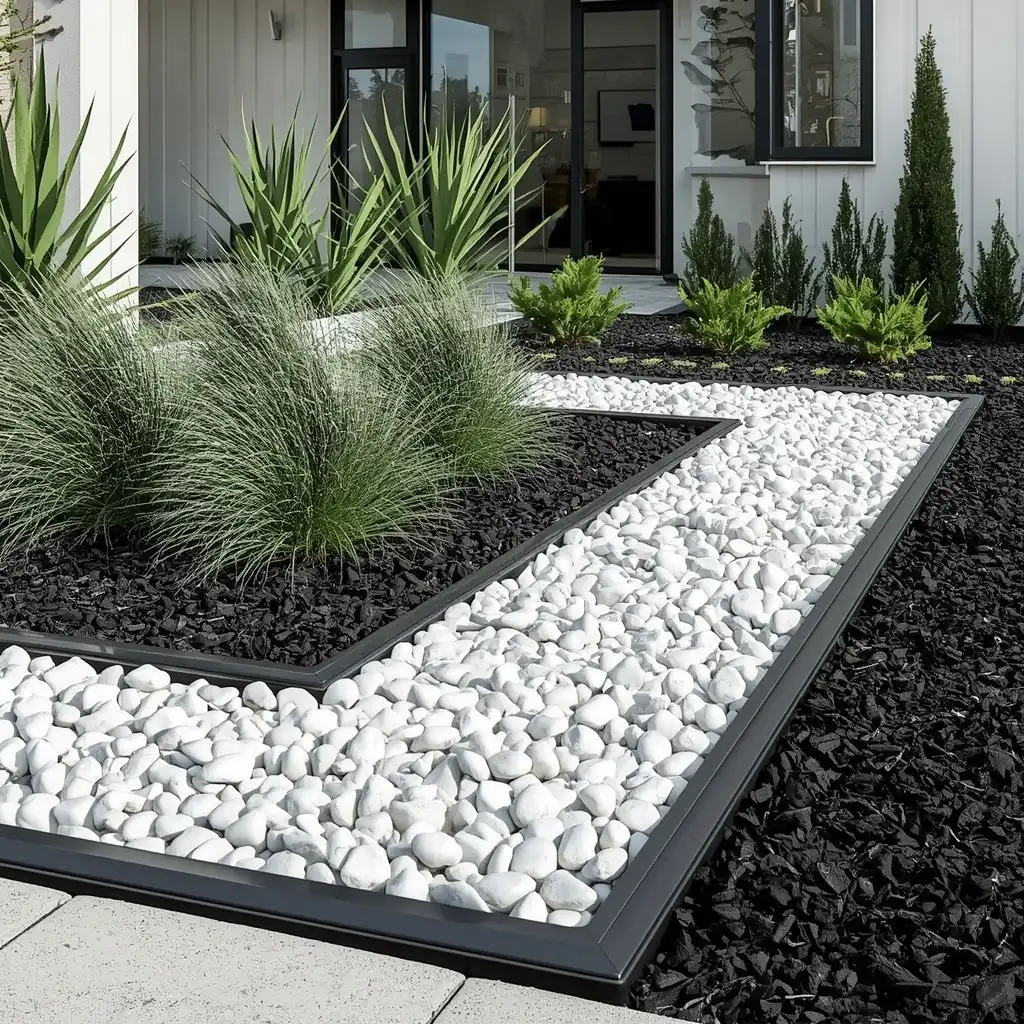
Best for: Modern homes and simple front yards
Main materials: White gravel, black mulch, and metal edging
Maintenance level: Moderate
White rock and black mulch create a sharp contrast. The look is bold, clean, and easy to notice from the street.
Keep the bed shape simple. Straight lines, wide curves, or clean blocks work better than many small twists. The colors already make a strong statement.
Add green plants to soften the black-and-white mix. Ornamental grasses, compact shrubs, and plants with wide leaves work well.
Use firm edging around the white stone. Dark mulch scattered across pale rock will stand out right away.
White rock also shows mud, dead leaves, and green stains. It may need more cleaning than gray or brown stone.
Use this mix in one focused area instead of covering the whole yard. A small section beside a walkway can create enough contrast without making the space feel too busy.
5. Warm Up the Yard with Cedar Mulch and Natural Stone
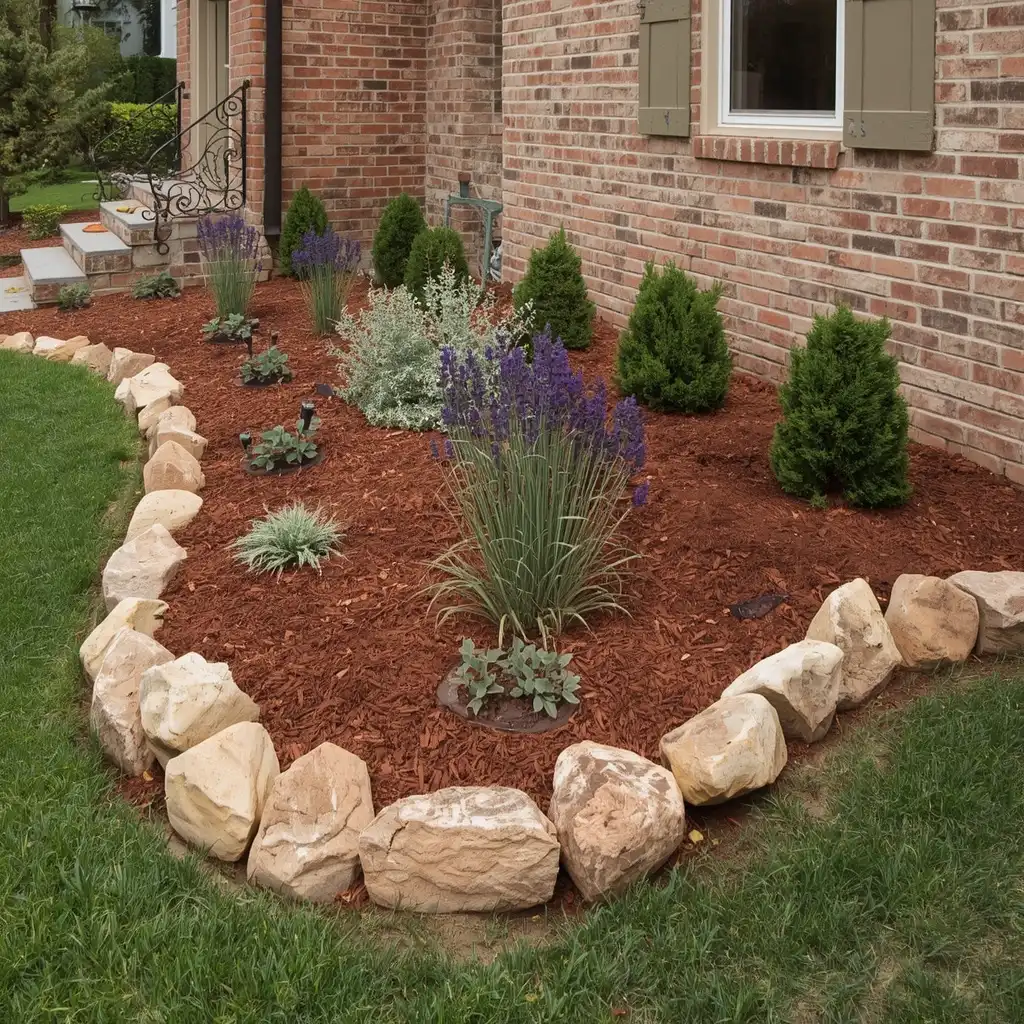
Best for: Cottage gardens, brick homes, and woodland yards
Main materials: Cedar mulch, sandstone, and soft green plants
Maintenance level: Moderate
Cedar mulch has warm red, gold, and brown tones. It pairs well with tan, cream, or light brown stone.
This mix feels softer than black mulch with white rock. It works well near brick walls, wood fences, and natural garden paths.
Choose one material as the main ground cover. For example, use cedar mulch across the planted bed and place sandstone along the edge.
Add plants with gentle colors. Lavender, salvia, dwarf evergreens, and silver-leaf plants can balance the warm materials.
Do not add too many shades of red, orange, and brown in a small bed. The space may start to look flat.
Place material samples beside your home before buying a large amount. Check them in bright sun, shade, and after they get wet. Color can change more than you expect.
6. Give a Flat Bed Height with One Large Boulder
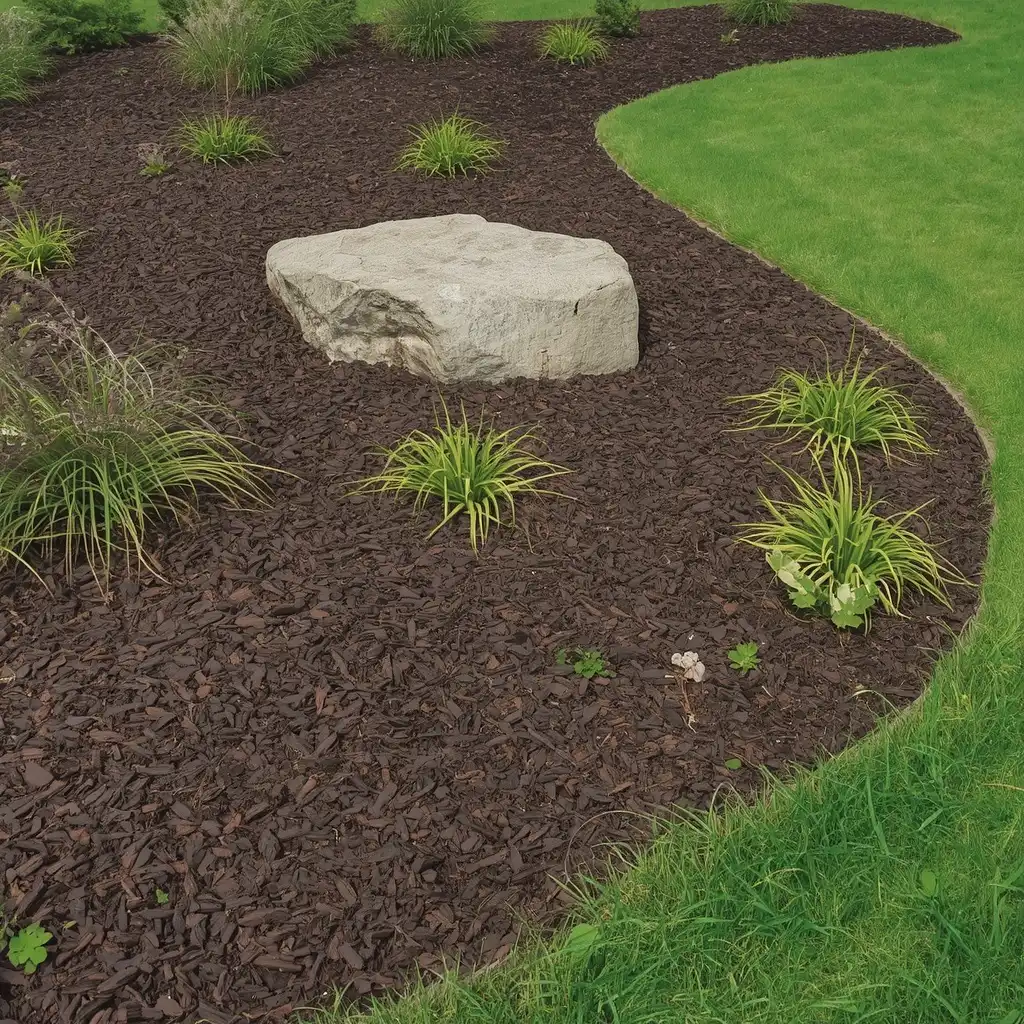
Best for: Wide beds that feel empty
Main materials: One boulder, dark mulch, and low plants
Maintenance level: Low
A large boulder can make a flat planting bed feel more complete. It gives the eye one strong place to rest.
Choose a stone that matches other hard materials in your yard. It can connect the bed to a walkway, porch, wall, or driveway.
Bury part of the boulder instead of setting it on top of the soil. This makes it look like it has always been there.
Place low plants around the base. Dwarf grasses, ground covers, and small flowers can soften the edges without hiding the whole rock.
If you use more than one boulder, try a group of three. Change their sizes and angles so they do not look too planned.
View the stones from the street before fixing them in place. A boulder that looks right up close may feel too small from a distance.
7. Protect a Tree with a Wide Mulch Ring
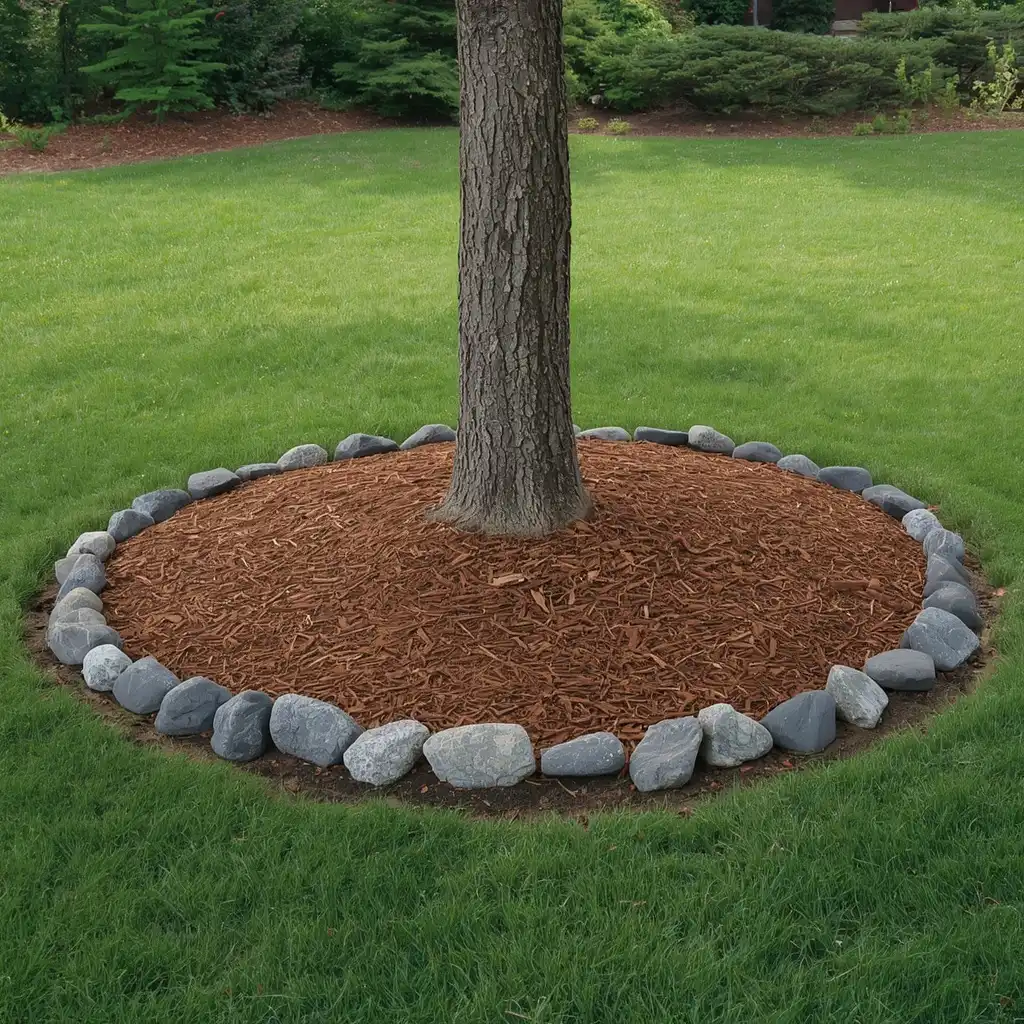
Best for: Shade trees surrounded by lawn
Main materials: Organic mulch and an outer rock border
Maintenance level: Low
Tree beds should protect the tree first. A good design leaves the trunk and root flare open.
Create a wide mulch ring around the tree. Keep mulch several inches away from the trunk. Spread it in a flat layer instead of piling it into a tall mound.
You may use river rock along the outside edge of the bed. The stones should mark the border, not form a tight collar around the trunk.
Avoid covering large surface roots with heavy rock. Do not add deep layers of soil or mulch over the root area.
A wide bed also protects the trunk from mower and trimmer damage. It can reduce competition from grass near the tree.
The main rule is simple. You should be able to see where the trunk widens at the base. If the tree looks like a pole coming out of a mulch pile, move the material back.
8. Add Easy Access with a Stepping-Stone Path
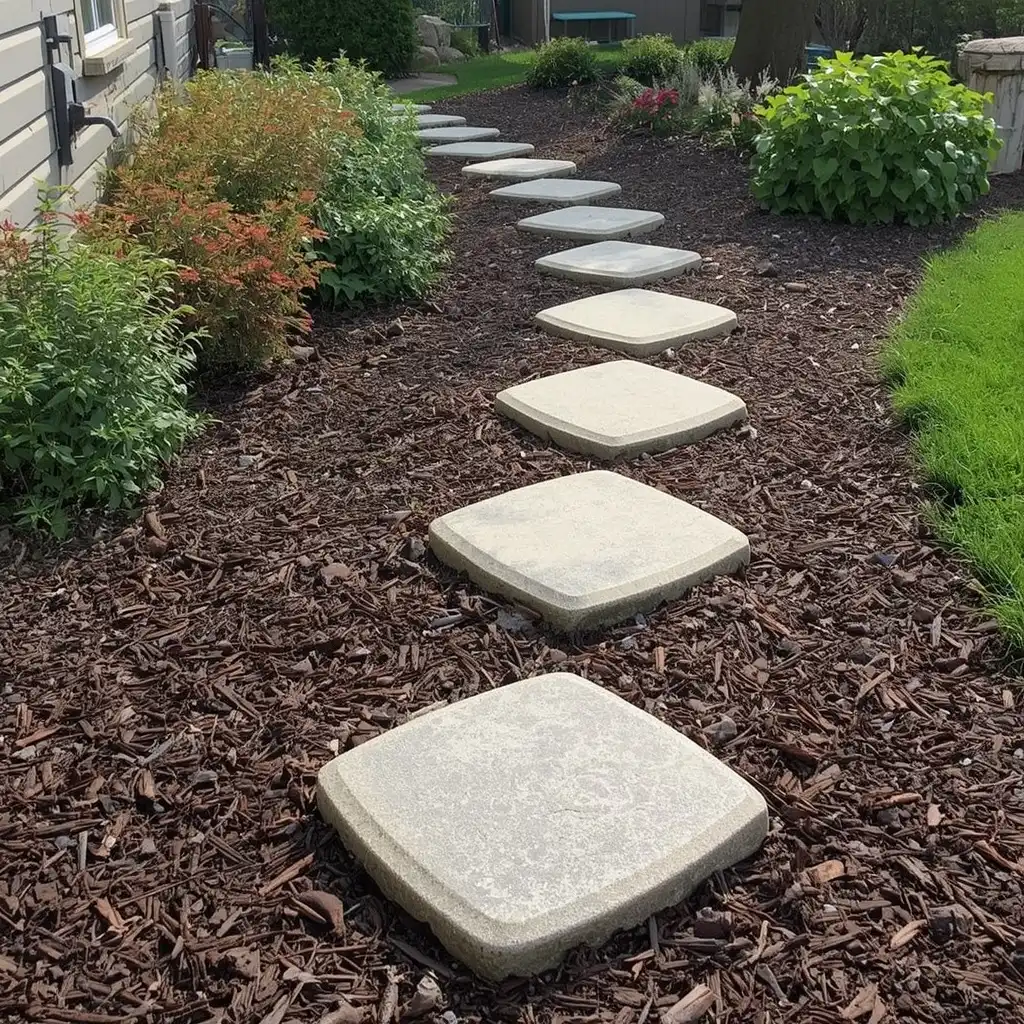
Best for: Side yards, garden taps, and deep flower beds
Main materials: Flat stones, mulch, and a firm base
Maintenance level: Low
A stepping-stone path lets you reach plants without walking on soft soil. It also keeps shoes cleaner after rain.
Choose flat stones with a wide surface. Set each one on a stable base so it does not rock or sink.
Space the stones for a natural walking step. One person can walk the planned path while another marks each foot position.
Keep the mulch a little below the top of each stone. This makes the path easier to see and reduces loose material on the walking surface.
Irregular slate works well in relaxed gardens. Square pavers fit modern yards with straight lines.
These backyard rock and mulch ideas are useful because they solve a real access problem. The path can lead to a tap, shed, compost bin, or bench without taking over the whole bed.
9. Make a Simple Seating Area with Gravel
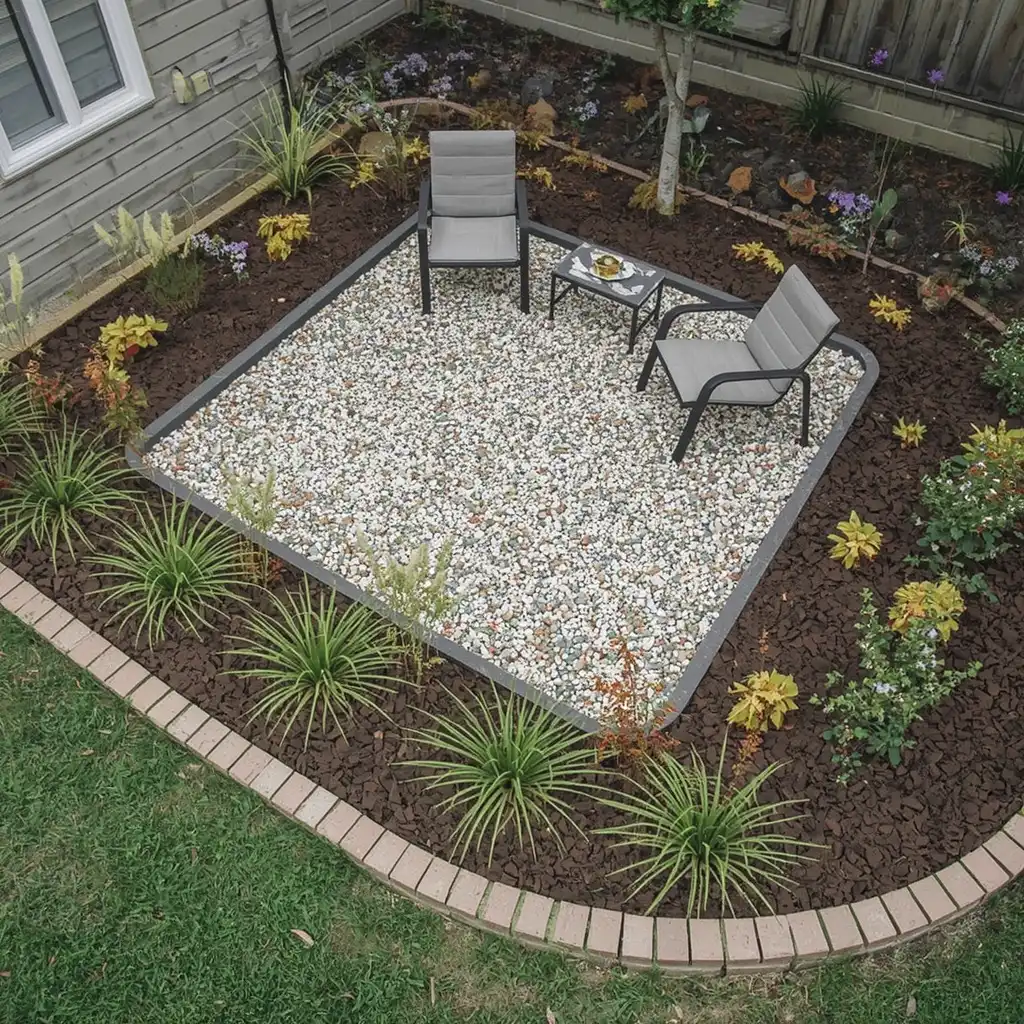
Best for: Small backyards and quiet garden corners
Main materials: Compacted gravel, edging, and mulched beds
Maintenance level: Moderate
You can create a useful seating area without pouring a large concrete slab. A well-built gravel base can hold chairs, a bench, and a small table.
Remove plants and loose soil from the area. Add a firm base and compact it before placing the top layer of gravel.
Install edging around the full space. This keeps mulch from washing into the seating area and helps the gravel stay in place.
Leave enough room to pull chairs back. A space that fits the furniture exactly may feel cramped once people sit down.
Frame the area with curved mulch beds. Low shrubs, grasses, or flowers can create privacy without closing the space.
Pea gravel feels smooth underfoot, but it moves more than angular stone. Test a small sample before choosing the final material.
Add shade or simple outdoor lighting if you plan to use the space often.
10. Break Up a Large Lawn with an Island Bed
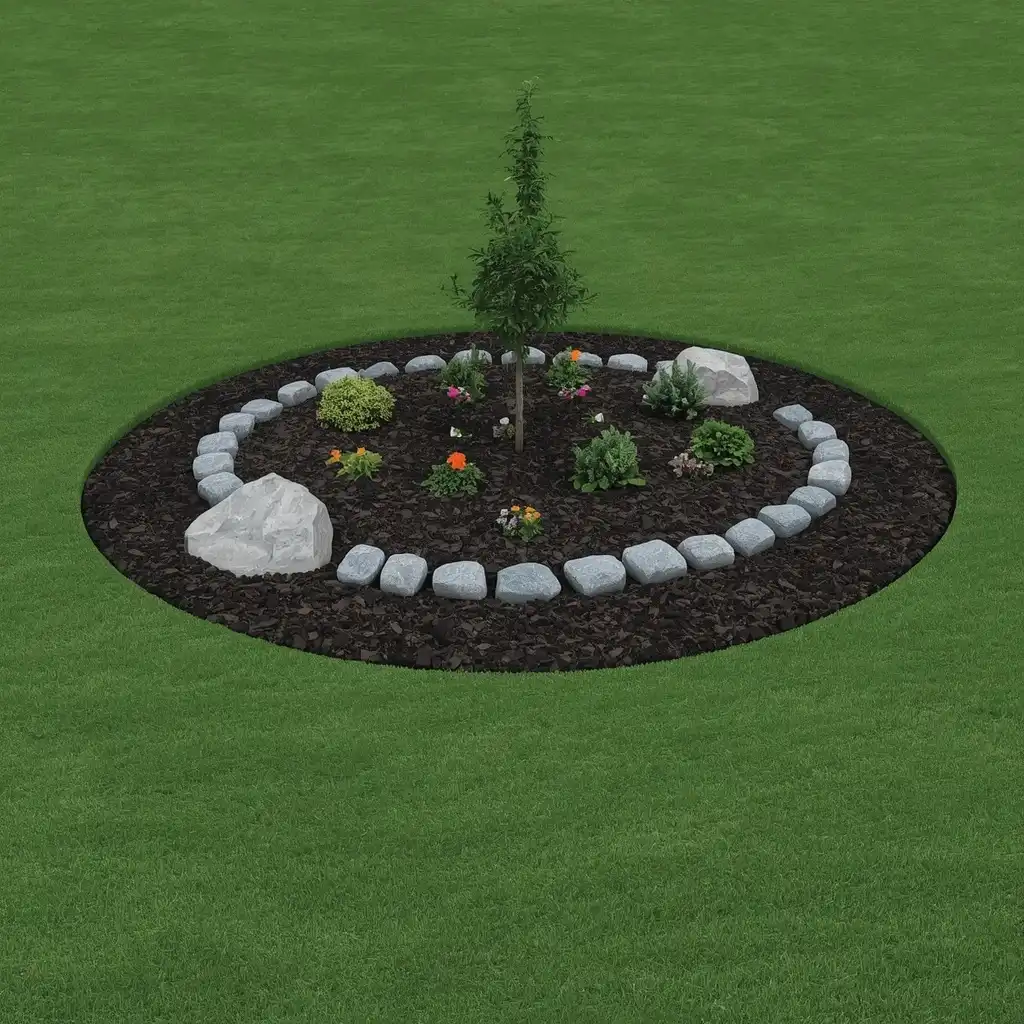
Best for: Open lawns with no clear focal point
Main materials: Mulch, river rock, one small tree, or a boulder
Maintenance level: Moderate
A large lawn can feel empty even when the grass looks healthy. An island bed adds shape, height, and seasonal color.
Create one wide oval or curved bed. Several small circles can make mowing harder and may look disconnected.
Place the tallest feature near the center, but move it slightly to one side. You can use a small ornamental tree, tall shrub, or boulder.
Cover the planted area with mulch. Add a curved river rock section on one side for contrast. The rock should act as an accent instead of cutting the bed into equal halves.
Leave enough lawn around the island for your mower. Tight corners will create extra trimming work.
Many rock landscaping with mulch ideas look best when one material leads the design. In this case, let mulch cover most of the bed and use stone to guide the eye.
11. Stop Grass from Spreading with a Stone Mowing Strip
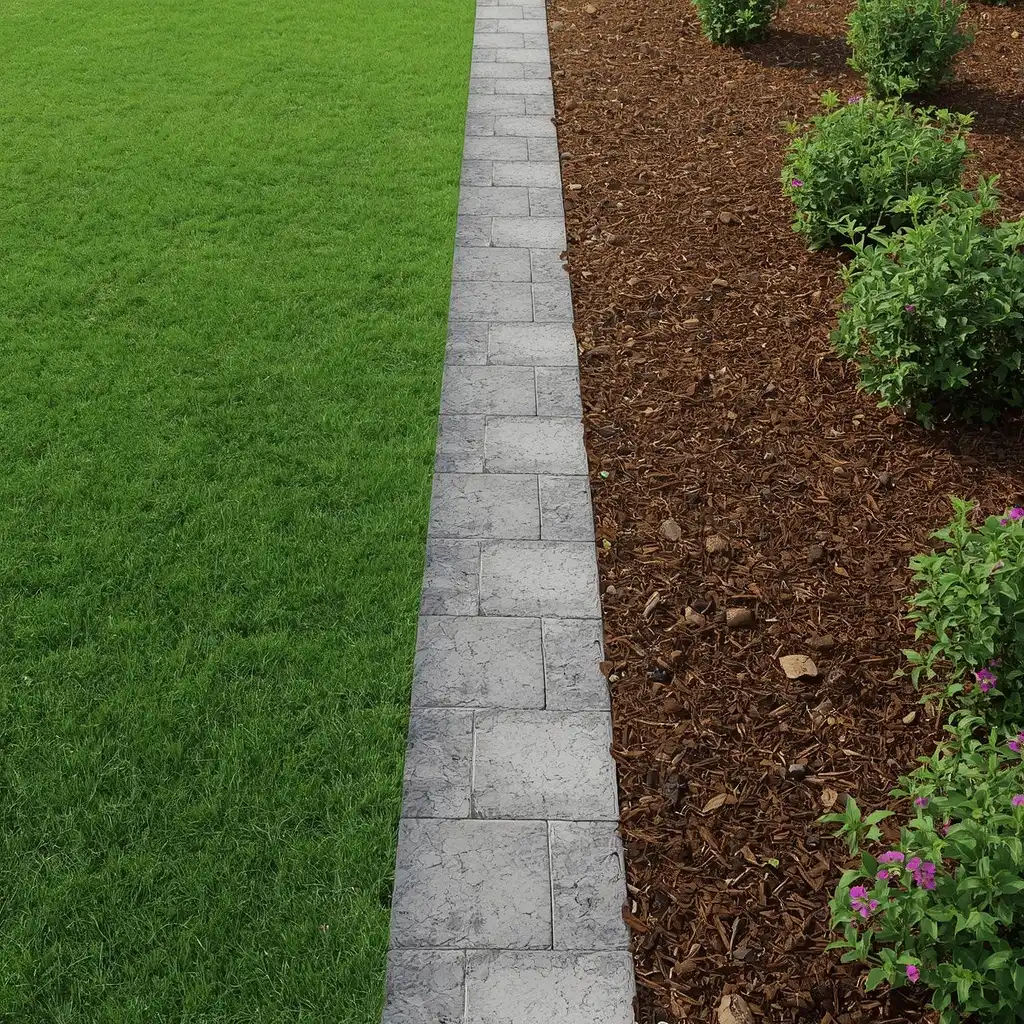
Best for: Lawn edges and foundation beds
Main materials: Flat pavers, stones, or compact gravel
Maintenance level: Low
Grass often spreads into mulch beds. A stone strip creates a clear break and can reduce hand trimming.
Use flat pavers if your mower wheels need to pass over the border. Set them near ground level so the mower can roll across without hitting a raised edge.
A gravel strip can also work, but it needs firm edging on both sides. Loose stone may move into the grass or mulch.
Keep the border wide enough to notice. A very thin line can disappear as plants grow.
Repeat the same material around nearby beds. This helps separate areas feel like one planned landscape.
Check the strip each season. Lift sunken pavers, remove grass roots, and return loose stones to the edge.
The best lawn border should save work. It should not create a new area that needs constant repair.
12. Use Gravel as the Base with Mulched Plant Pockets
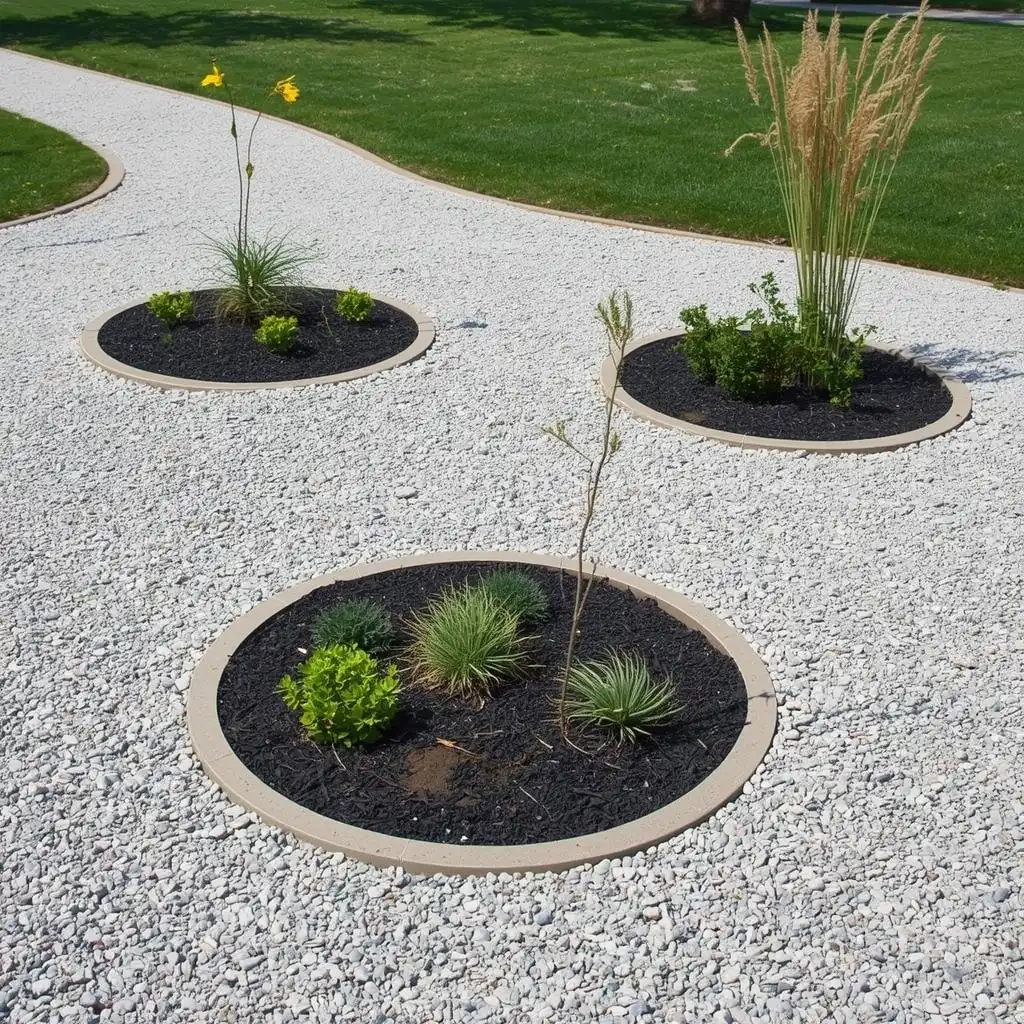
Best for: Hot, sunny side yards and dry garden areas
Main materials: Gravel, hidden edging, mulch, and drought-tolerant plants
Maintenance level: Moderate
A gravel garden can reduce muddy areas and create a clean surface in full sun. Small mulch pockets give selected plants better growing conditions.
Use gravel as the main material. Create separate planting areas with hidden edging. Fill those pockets with suitable soil and mulch.
Choose plants that match your local heat, rain, and winter conditions. Sedum, yucca, small grasses, and hardy herbs may work in some climates.
Place tall plants at the back, medium plants in the center, and low plants near the edge. This gives the bed clear layers.
Do not mix gravel into the planting soil. It can make future digging and soil care harder.
This style works best when the shapes stay simple. Three clear plant pockets often look better than ten tiny circles.
The result can feel open and calm while still giving plants the soil cover they need.
13. Slow Light Runoff with Rock Bands on a Slope
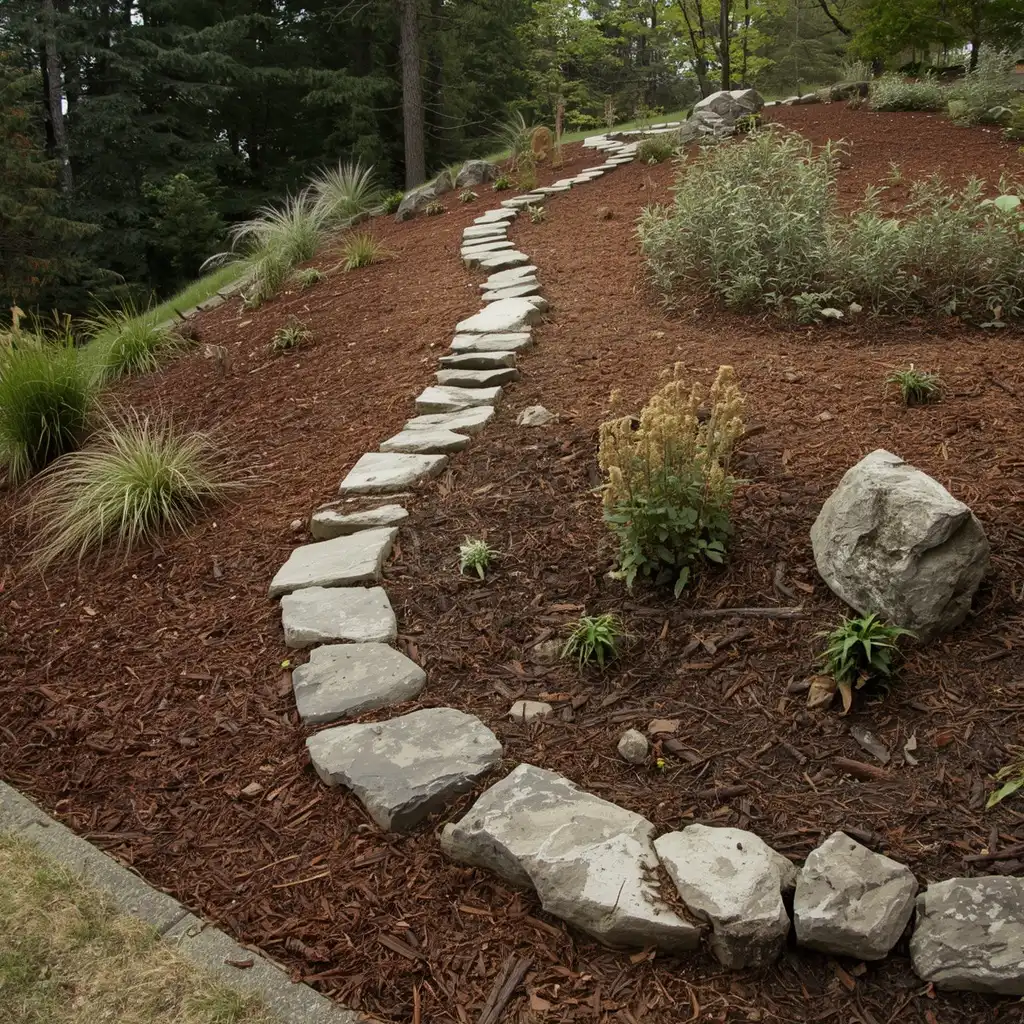
Best for: Mild slopes with washed mulch or exposed soil
Main materials: Stone bands, shredded mulch, and rooted plants
Maintenance level: Moderate to high
Sloped yards can lose mulch during heavy rain. Water moves downhill, carries loose material, and leaves bare soil behind.
Use curved stone bands across a mild slope. The bands can slow surface water and divide the area into planting sections.
Place deep-rooted plants between the bands. Ground covers, small shrubs, and grasses can help hold soil when they suit the site.
Use shredded mulch instead of large bark pieces. Shredded material often locks together better, but strong water can still move it.
Avoid round gravel on steep walking areas. It can roll underfoot and create a fall risk.
Rock and mulch hillside ideas work best for small erosion problems. Deep channels, moving soil, or leaning walls need expert help.
Do not build a tall retaining wall without checking local rules and site needs. Water pressure behind a weak wall can cause serious damage.
14. Refresh a Mailbox Bed on a Small Budget
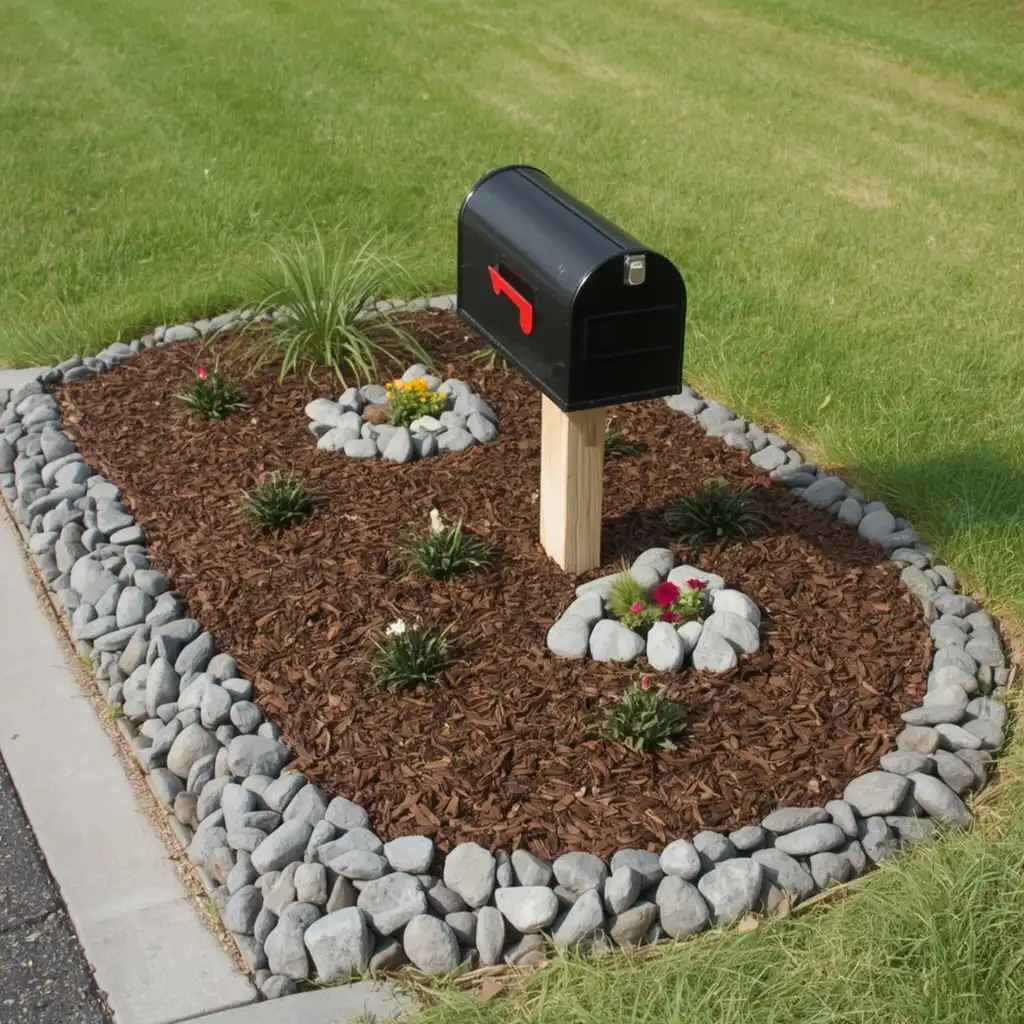
Best for: Quick front yard updates
Main materials: Mulch, small river rock, and tough plants
Maintenance level: Low
A mailbox bed gives you a small project with a clear result. You can finish it without changing the whole front yard.
Create a simple circle, oval, or half-moon shape. Keep enough space around the mailbox door and post.
Use mulch around flowers and small shrubs. Add gray river rock along the edge or in one small accent section.
Choose plants that can handle the conditions near the road. The area may face strong sun, dust, heat, road salt, or limited watering.
Dwarf grasses and compact flowering plants often fit better than large shrubs. Tall plants can block the mailbox or street view.
Do not make the bed so wide that it affects parking or foot traffic.
A dark mulch bed with soft gray stone creates a neat look. Add one or two plant types for color instead of filling the space with many small varieties.
15. Create a Safer Stone Zone Around a Fire Pit
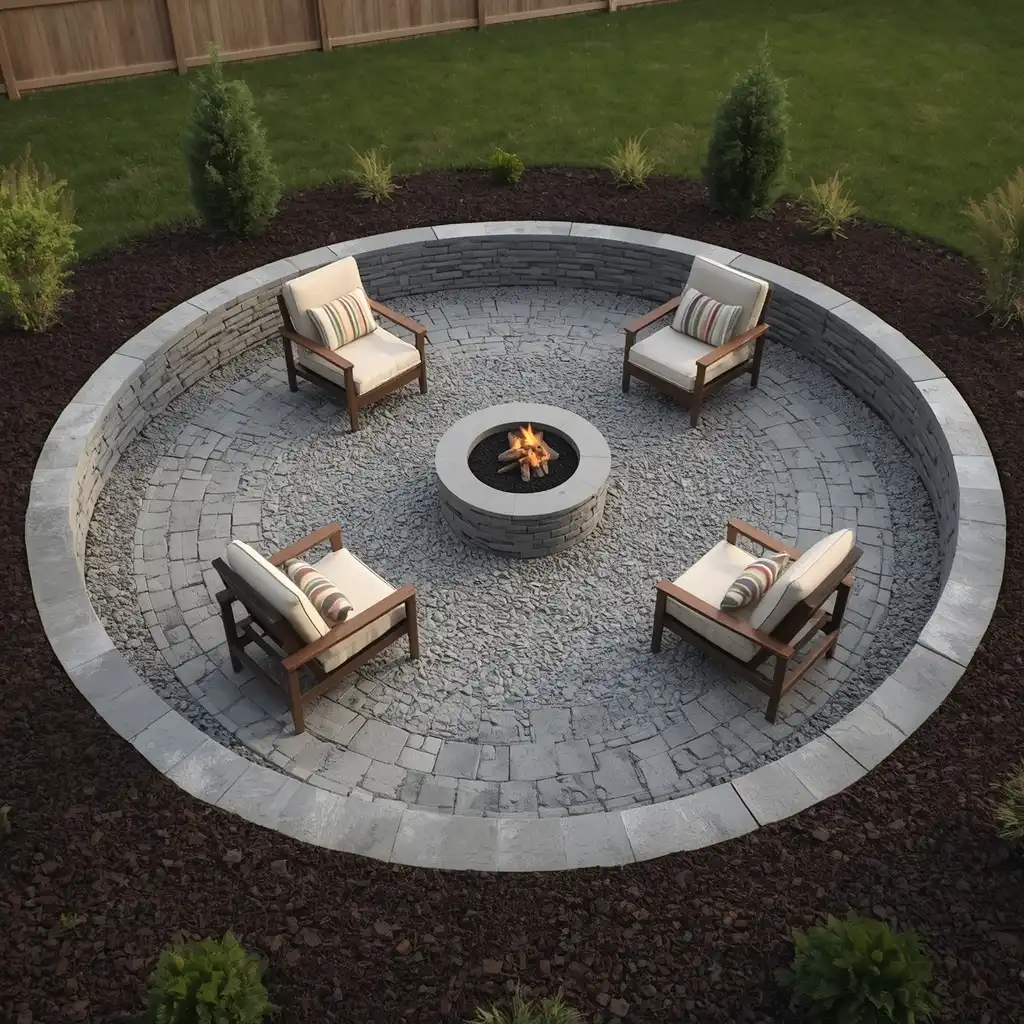
Best for: Backyard gathering areas
Main materials: Gravel, pavers, stone, and outer mulch beds
Maintenance level: Moderate
Wood mulch should not sit close to an open flame. Dry mulch, leaves, and plant waste can catch fire.
Use gravel, pavers, or another nonburning material around the fire pit. The stone area should extend far enough to hold chairs and reduce loose plant material near the flame.
Keep mulch in the outer planting beds. Use firm edging to create a clear break between the two zones.
Remove dry leaves and grass before each use. Check the area after windy weather because debris can collect between stones.
Do not place a fire pit below tree branches or close to fences and buildings. Follow local fire rules and the maker’s setup guide.
The safe distance can change based on the fire pit type and local law. Check before buying material or setting the final shape.
A gravel fire pit area can look inviting, but safety must guide the design.
16. Keep Raised Garden Paths Dry with Gravel
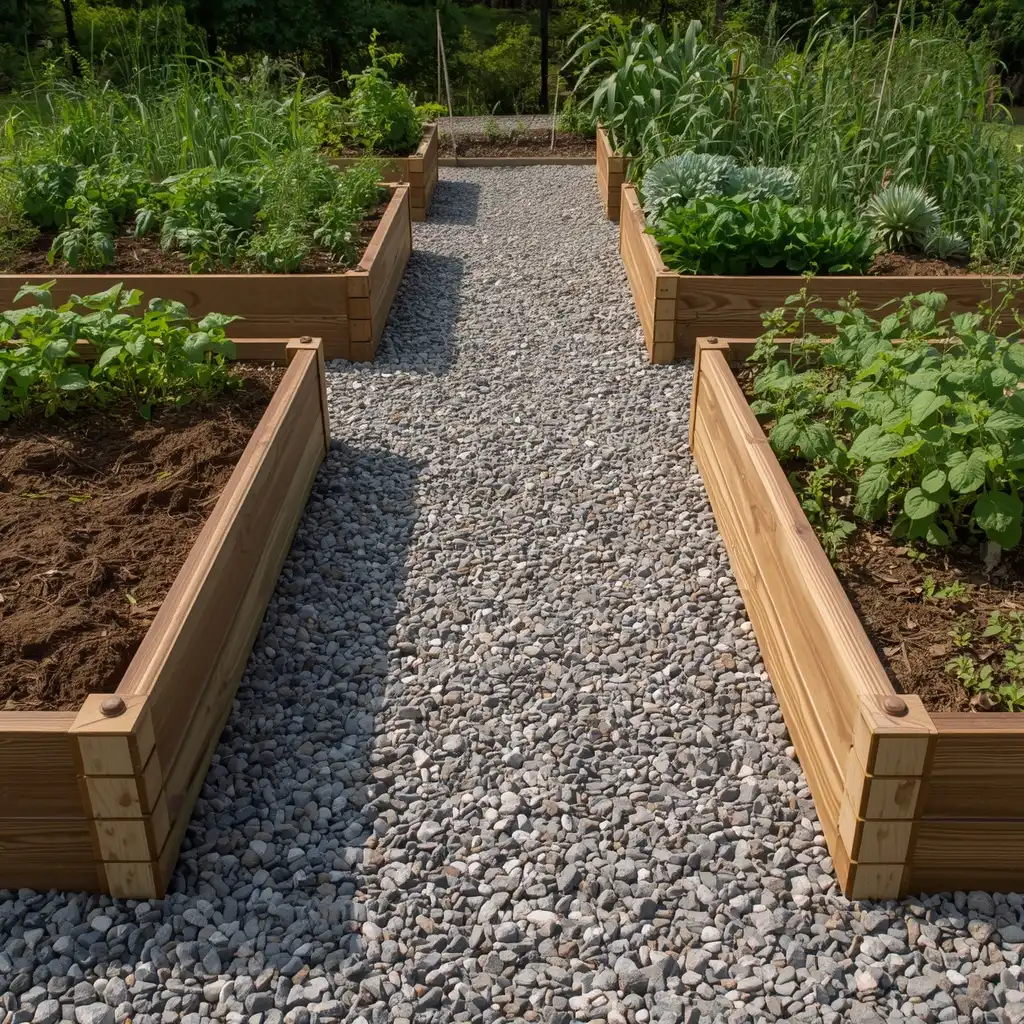
Best for: Vegetable gardens and raised planting beds
Main materials: Angular gravel, mulch, and solid edging
Maintenance level: Moderate
Paths between raised beds can turn muddy after watering or rain. Gravel creates a cleaner surface for walking and wheelbarrow use.
Remove weeds and prepare a firm base. Use angular gravel because it packs together better than smooth pea gravel.
Make the paths wide enough for your tools. Push a wheelbarrow through the planned space before adding materials.
Use mulch inside the raised beds or around long-term plants. Keep it away from the gravel with edging at the base of each bed.
A raised edge can help stop soil from washing onto the path. It also keeps the garden layout neat.
Pull weeds while they are small. Seeds may still grow in dust and soil that collect on top of the gravel.
This setup helps separate work areas from growing areas. It also makes the garden easier to use after wet weather.
17. Create a Calm Japanese-Inspired Garden Corner
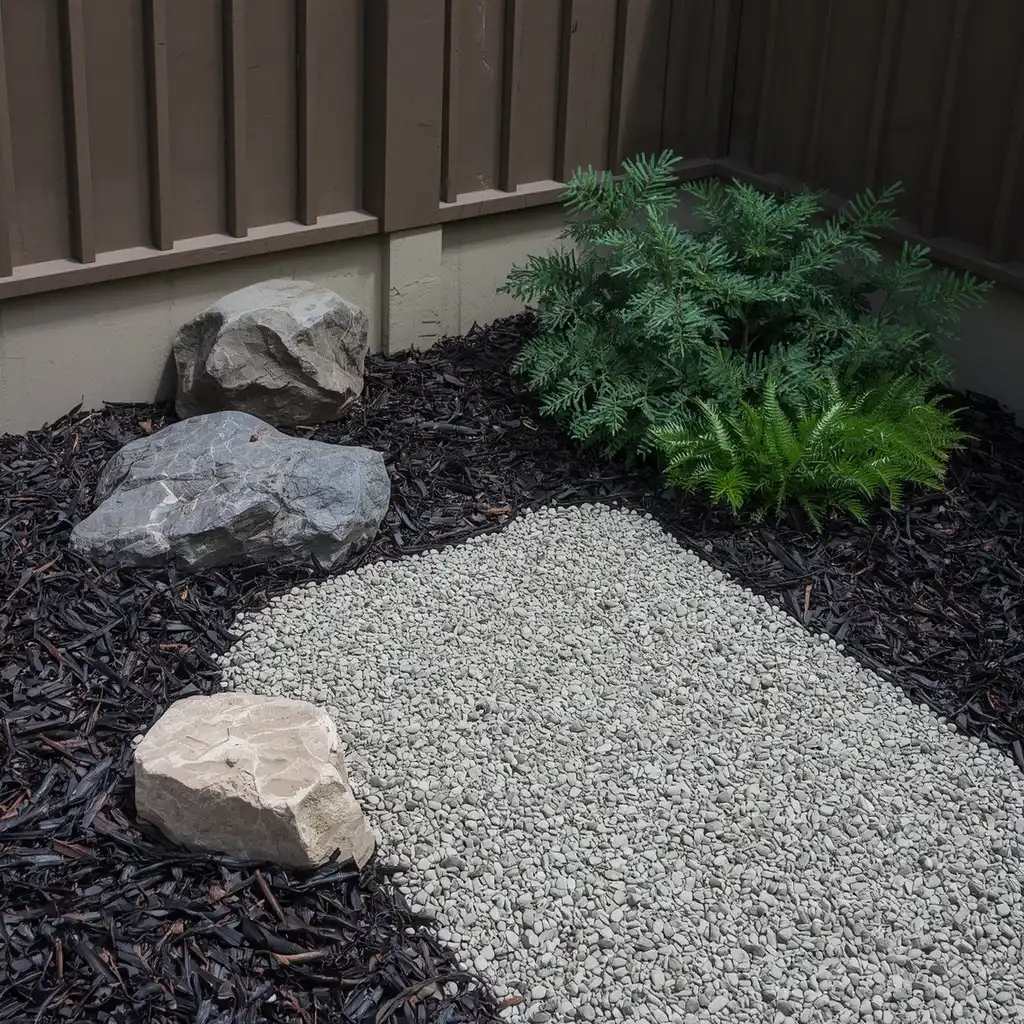
Best for: Quiet seating areas and shaded garden corners
Main materials: Natural stones, fine gravel, dark mulch, and simple plants
Maintenance level: Moderate
A calm garden does not need many plants or decorations. Open space is part of the design.
Start with two or three natural stones. Change their size and angle instead of placing them in a straight row.
Use fine gravel across one section. Add dark mulch around a small tree or a group of ferns. A Japanese maple may work where the climate and light are suitable.
Keep the plant list short. Repeating the same ground cover can feel calmer than mixing many flower colors.
Use uneven balance instead of making both sides match. One large rock can sit across from a smaller plant group.
This design can be inspired by Japanese gardens, but that does not make it an authentic traditional garden. Those spaces follow deeper cultural and design rules.
Focus on restraint. Before adding another feature, ask whether the space already feels complete.
18. Help Manage Runoff with a Mulched Rain Garden
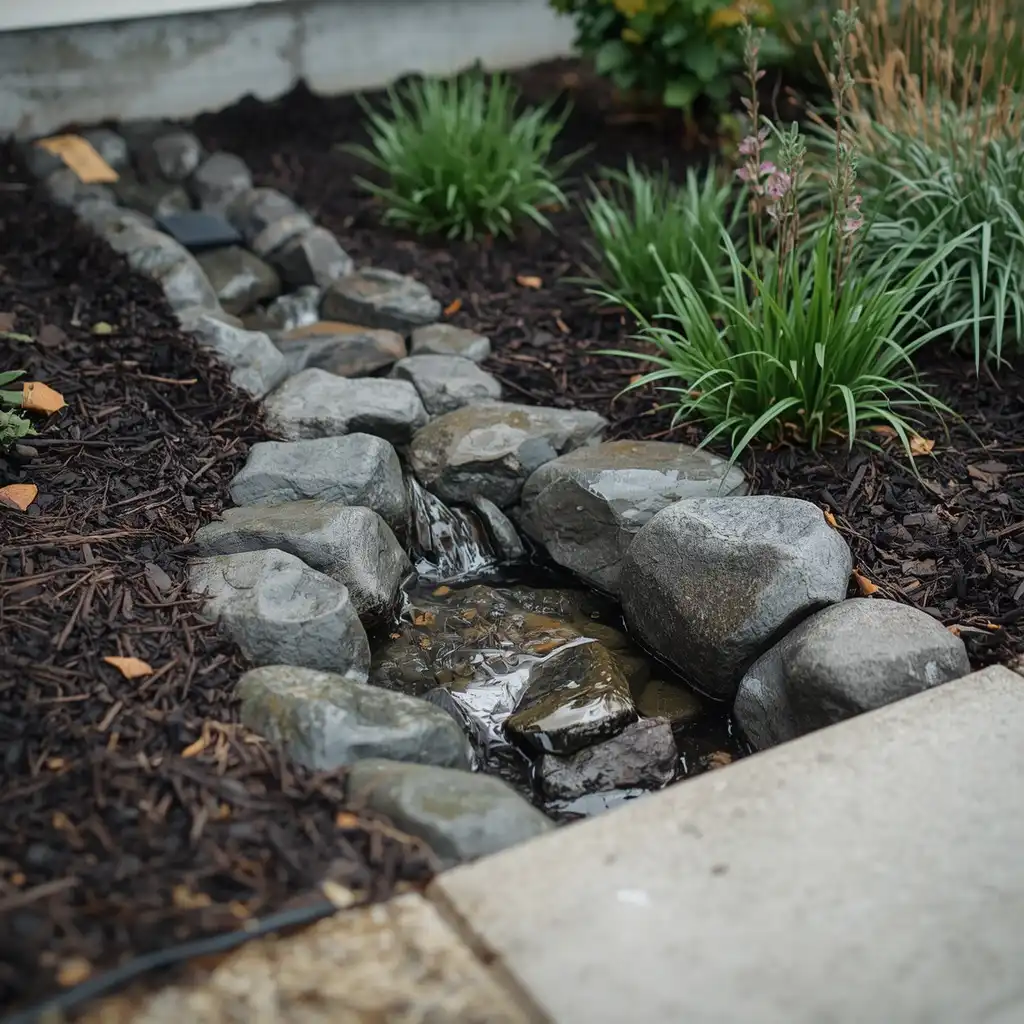
Best for: Low areas that receive downspout water
Main materials: River rock, mulch, and water-tolerant plants
Maintenance level: Moderate
A rain garden collects runoff for a short time and lets it soak into the ground. It should not stay flooded for long periods.
Use river rock where water enters the garden. The stone helps protect the soil from the force of moving water.
Place mulch around suitable plants in the basin. Choose plants based on your soil, local rain, sunlight, and winter weather.
The garden needs a safe overflow path. Water must have somewhere to go during a heavy storm.
Do not build a rain garden beside a foundation without checking the site. Underground pipes, septic systems, steep slopes, and poor soil can affect placement.
Local stormwater guides can help you choose the size and location. Native plant groups may also suggest plants that can handle both wet and dry periods.
A river rock inlet can look natural while giving the water a clear path into the planted bed.
19. Divide the Front Yard into Clear Rock and Mulch Zones
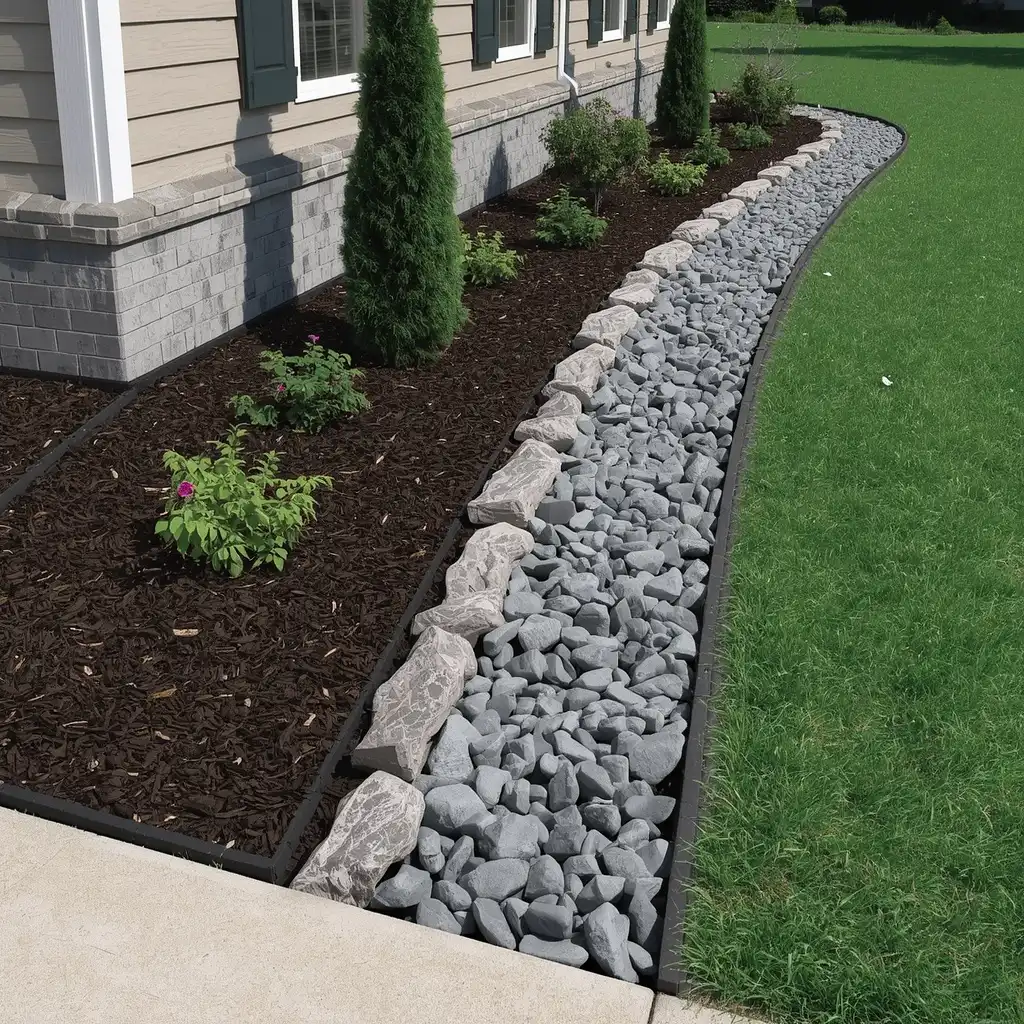
Best for: Front yards with wet, dry, and planted areas
Main materials: Mulch, gravel, river rock, and repeated edging
Maintenance level: Moderate
A front yard may have several different needs. Foundation plants need soil care, while a narrow side strip may stay too dry for grass.
Use mulch in planted beds around shrubs and flowers. Use gravel in hard-to-water spaces or along a dry side path.
Repeat the same stone color in more than one place. Gray river rock near the walkway can match a gray gravel strip beside the house.
Keep one material in charge. If mulch covers most of the planted space, use rock as a border or small accent.
Look at the design from across the street. This view helps you spot shapes that feel too small, busy, or disconnected.
Good front yard rock and mulch landscaping should look like one plan. It should not look like several leftover materials placed in separate corners.
This is one of the most useful rock landscaping with mulch ideas for yards with mixed light, soil, and water conditions.
How to Install Rock and Mulch Without Mixing Them
A good layout can still fail if you skip the setup work. Careful preparation keeps materials in place and reduces future repairs.
1. Measure the Area
Measure the length and width of each section. For curved beds, split the area into smaller shapes and measure each part.
Use a material calculator before ordering. Add a little extra for settling and small mistakes, but avoid buying far more than you need.
2. Mark the Final Shape
Use a garden hose, rope, or marking paint. Check the layout from several views.
Walk through planned paths and seating areas. Make sure they feel wide enough for real use.
3. Remove Grass and Weeds
Clear grass, roots, and large weeds. Do not cover active weeds and expect them to disappear forever.
Remove loose soil from areas that need a compact gravel base.
4. Check the Grade
Watch how water moves across the site. Correct small dips before adding the final materials.
Do not block drains, air vents, utility covers, or water outlets.
5. Install Firm Edging
Place edging between rock and mulch. Set it deep enough to stay firm but high enough to stop loose material from crossing.
Metal creates a thin line. Pavers create a wider and more visible border.
6. Prepare Each Area for Its Job
Paths and seating areas need a stable base. Planted beds need healthy soil and space for roots.
Landscape fabric may help under decorative rock in some non-planted areas. It can make future planting and soil work harder, so use it with care.
7. Add the Materials
Spread mulch in an even layer. Keep it away from tree trunks, plant stems, siding, and drains.
Add stone slowly and rake it level. Avoid creating deep piles beside plants.
8. Test the Finished Area
Water the bed lightly or inspect it after rain. Look for moving mulch, sinking stones, and blocked water paths.
Repair small problems before the materials mix.
10 Mistakes That Make Rock and Mulch Hard to Manage
A yard can look good on installation day and become a mess after one season. These mistakes often cause the problem.
1. Using Too Many Colors
White gravel, red lava rock, black mulch, and tan pavers can compete for attention. Choose a smaller color group.
2. Skipping Edging
Loose materials move during rain, mowing, raking, and walking. A clear edge saves hours of cleanup.
3. Piling Mulch Against Trees
Deep mulch around a trunk can hold moisture where it does not belong. Keep the root flare open.
4. Placing Rock Over Future Planting Areas
Removing stone later takes time. Plan for mature plant size and future changes before covering the soil.
5. Ignoring Water Flow
Rock and mulch cannot hide a drainage problem forever. Check the site during rain before changing the surface.
6. Using Loose Gravel on a Steep Path
Round stones may slide under your feet. Use firm steps or a stable surface in steep areas.
7. Building Many Tiny Beds
Small beds can make mowing and trimming harder. Fewer, wider shapes often look cleaner.
8. Placing Pale Rock Under Messy Trees
Flowers, seeds, leaves, and fruit can stain or cover light stone. Gray or brown rock may be easier to manage.
9. Covering Utility Access
Keep meters, drains, pipes, and covers easy to reach. Repairs become harder when workers must remove heavy stone.
10. Treating Low Maintenance as No Maintenance
Weeds can grow in both rock and mulch. Leaves still need removal, and borders still need checks.
How to Maintain Rock and Mulch Landscaping
Low-maintenance landscaping still needs basic care. Small tasks can prevent much larger repairs.
After heavy rain, check for washed mulch and moved stone. Rake loose materials back before they spread farther.
Remove leaves from rock beds before they break down. Fine leaf pieces can collect between stones and create a place for weeds to grow.
Pull weeds while they are small. Try to remove the root so the plant does not return right away.
Check edging each season. Lift sunken pieces and press loose sections back into the soil.
Add fresh mulch when the layer becomes thin. Do not keep adding new material without checking the total depth.
Wash pale stone when dirt or green stains become easy to see. A leaf blower can help with dry leaves, but use a low setting so small gravel stays in place.
Keep dry creek beds and drainage strips free from soil, roots, and plant waste.
Take one photo from the same place each season. The pictures will show fading mulch, growing plants, blocked borders, and changes in water flow.
Choose One Small Area and Start There
Rock and mulch work well together when each material has a clear purpose. Use mulch to protect planted soil. Use rock for borders, drainage, paths, seating areas, and visual structure.
Keep the color plan simple. Install firm edging. Check water flow before covering the ground.
You do not need to rebuild your whole yard in one weekend. Pick a flower bed, mailbox area, tree ring, or side path. Mark the shape with a garden hose and view it from several angles.
Start with one of these rock landscaping with mulch ideas and test it in a small section. You can then adjust the colors, plants, and materials to fit your home, climate, and budget.