
You do not need a large backyard to protect seedlings or grow fresh herbs longer. Many small greenhouse ideas need less room than a patio table.
The hard part is choosing the right design. A covered shelf may be enough for starting seeds. A walk-in model gives you more growing room but needs a level base and clear access. You also have to think about sunlight, wind, drainage, and summer heat.
This guide compares 17 options for patios, balconies, side yards, and compact gardens. You will see the likely footprint, cost, skill level, best use, and main limit of each design.
Whether you want a portable cover or a permanent small backyard greenhouse, start with the space you have. These greenhouse ideas for small spaces will help you find an option that fits your plants, budget, and schedule.
Small Greenhouse Ideas That Fit Patios and Tiny Yards
Permanent floor space is often the main concern in a small garden. These first four designs use walls, vertical storage, and overlooked corners to reduce the space they need.
1. Add a Lean-To Greenhouse Against a Sunny Wall
Best for: Narrow side yards and small patios
Footprint: About 4 by 6 feet or larger
Cost: Medium to high
Skill level: Intermediate
Watch out for: Drainage and attachment problems
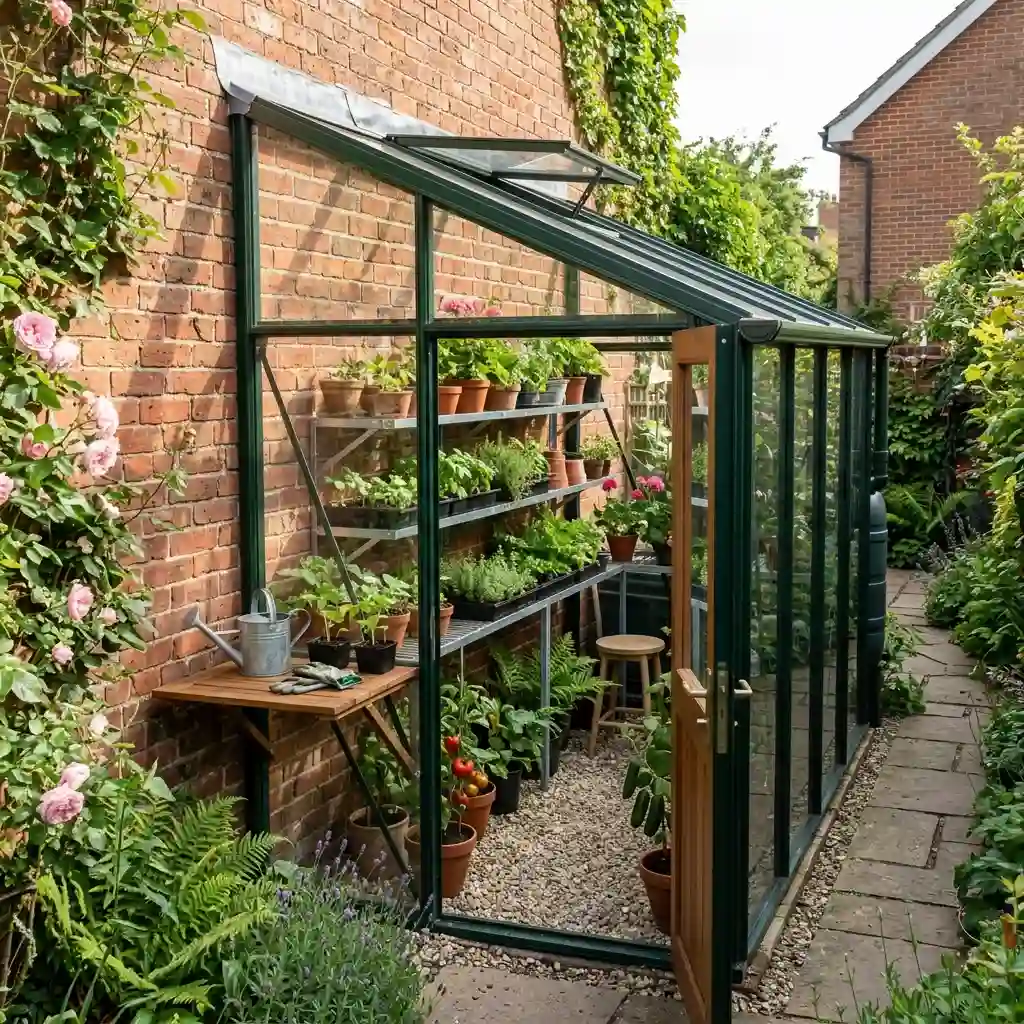
A lean-to greenhouse shares a wall with your home, garage, or shed. This can reduce the amount of framing you need. A brick wall may also hold heat during the day and release some of it after sunset.
A structure that is only four feet deep can still hold narrow shelves and a small walkway. Place the shelves against the shared wall so they do not block light.
Do not attach the frame before checking the wall, roof runoff, and local rules. Use flashing where the greenhouse meets the building. Add an upper vent because warm air will collect near the roof.
Space-saving tip: Install a folding shelf that can be lowered when you need more standing room.
2. Use a Tall Greenhouse Cabinet
Best for: Balconies, courtyards, and paved patios
Footprint: About 2 by 3 feet
Cost: Low to medium
Skill level: Beginner
Watch out for: Tipping in strong wind
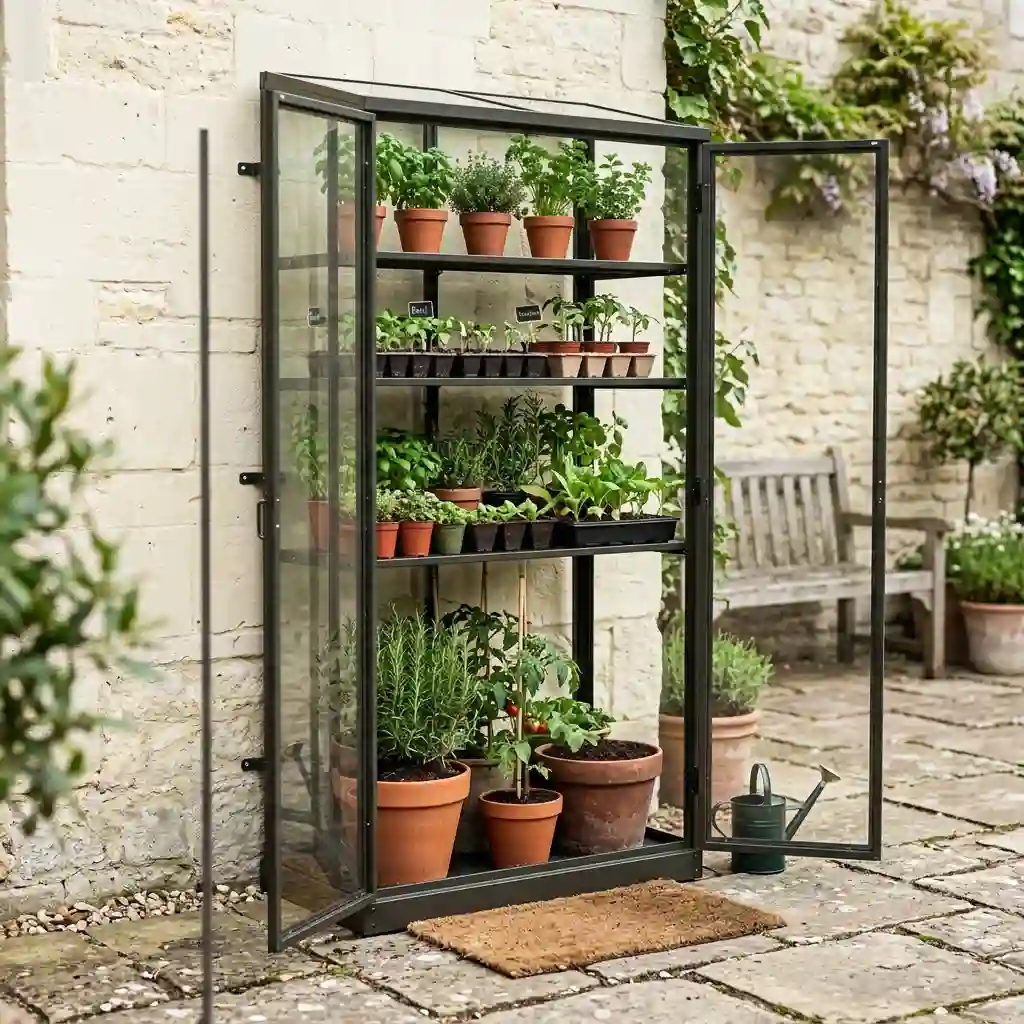
A greenhouse cabinet gives you several growing levels without using much floor space. It works well for seed trays, herbs, cuttings, and small potted plants.
Choose a model with clear panels and doors that open fully. Adjustable shelves are helpful because seedlings and mature plants need different amounts of headroom.
Secure the cabinet to a solid wall if your lease and building rules allow it. You can also connect it to a heavy planter or weighted base.
Space-saving tip: Store empty pots in a waterproof box beneath the lowest shelf.
3. Choose a Compact Walk-In Greenhouse
Best for: Gardeners who want protected space they can enter
Footprint: About 4 by 6 feet or 6 by 6 feet
Cost: Medium
Skill level: Beginner to intermediate
Watch out for: A narrow door and blocked aisle
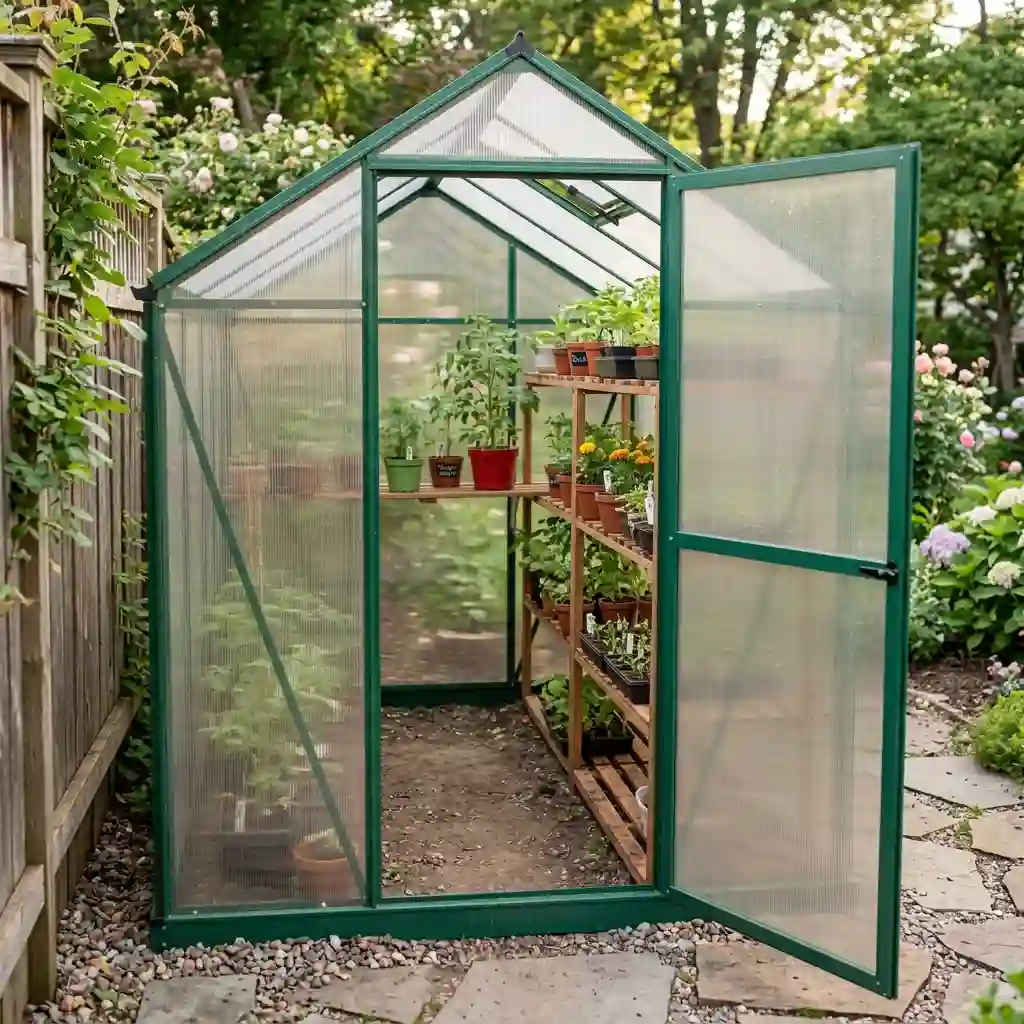
A compact walk-in greenhouse gives you room to tend plants during poor weather. Narrow models can fit beside a fence, shed, or garage.
Soft plastic covers cost less and are easier to move. Rigid polycarbonate panels often last longer and offer better protection. Even so, product quality varies. Check the frame material, panel thickness, wind rating, and warranty before buying.
Keep shelves on one side if the structure is very narrow. Make sure the door can open without hitting a fence, planter, or wall.
Space-saving tip: Hang light hand tools from the frame instead of placing them on shelves.
4. Put a Corner Greenhouse in an Unused Area
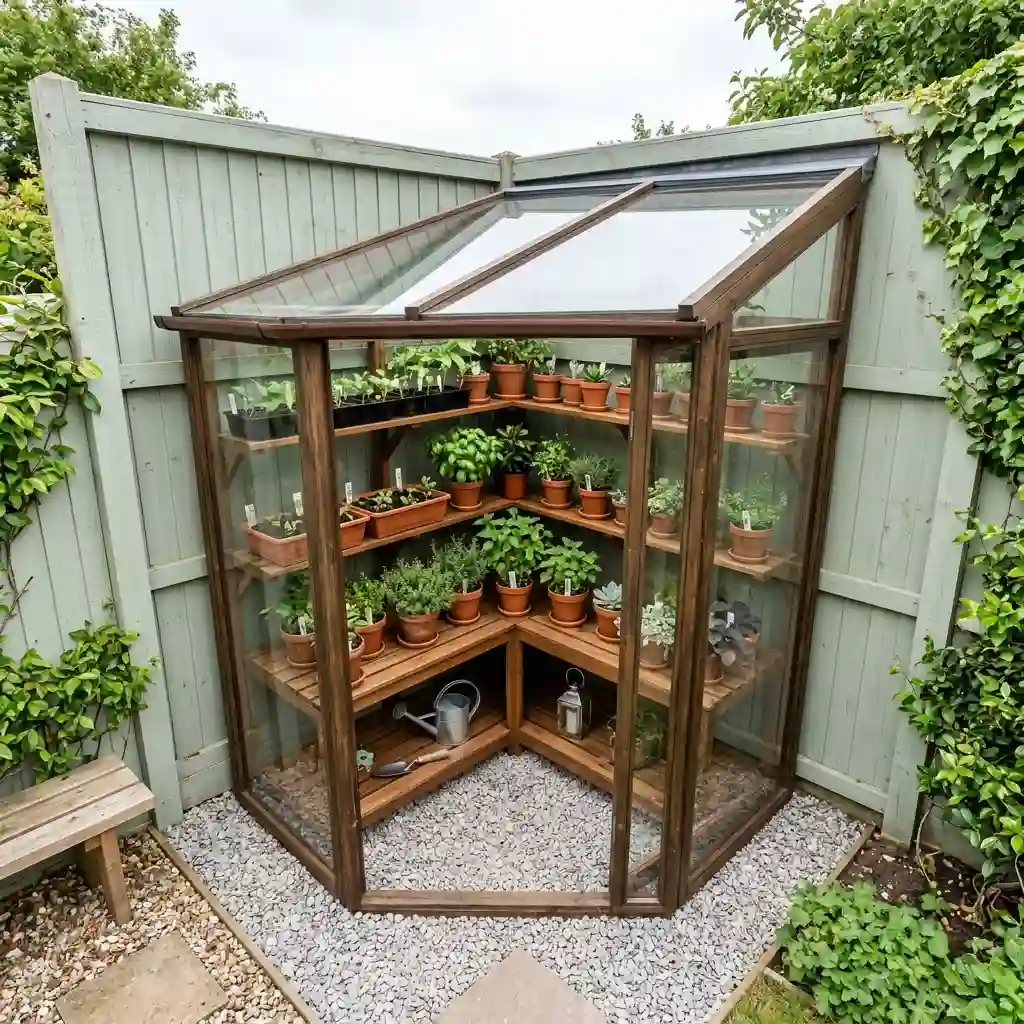
Best for: Awkward garden corners
Footprint: Depends on the corner
Cost: Medium to high
Skill level: Intermediate
Watch out for: Low light and falling branches
An angled greenhouse can turn an empty corner into useful growing space. A kit may work if your fences meet at a clean right angle. An uneven area may require a custom frame.
Watch the corner throughout the day before building. A convenient location may still be too shaded for the plants you want to grow. Pale walls or fencing can reflect some light, but they cannot replace strong natural light.
Do not place the structure beneath weak branches. Leave enough room to clean the panels and repair the fence.
Space-saving tip: Fit triangular shelves into the deepest part of the corner.
Portable Greenhouses You Can Use Without a Permanent Base
Renters and seasonal growers may need plant protection without concrete footings or permanent building work. These designs can be moved, stored, or removed when the weather changes.
5. Try a Pop-Up Greenhouse
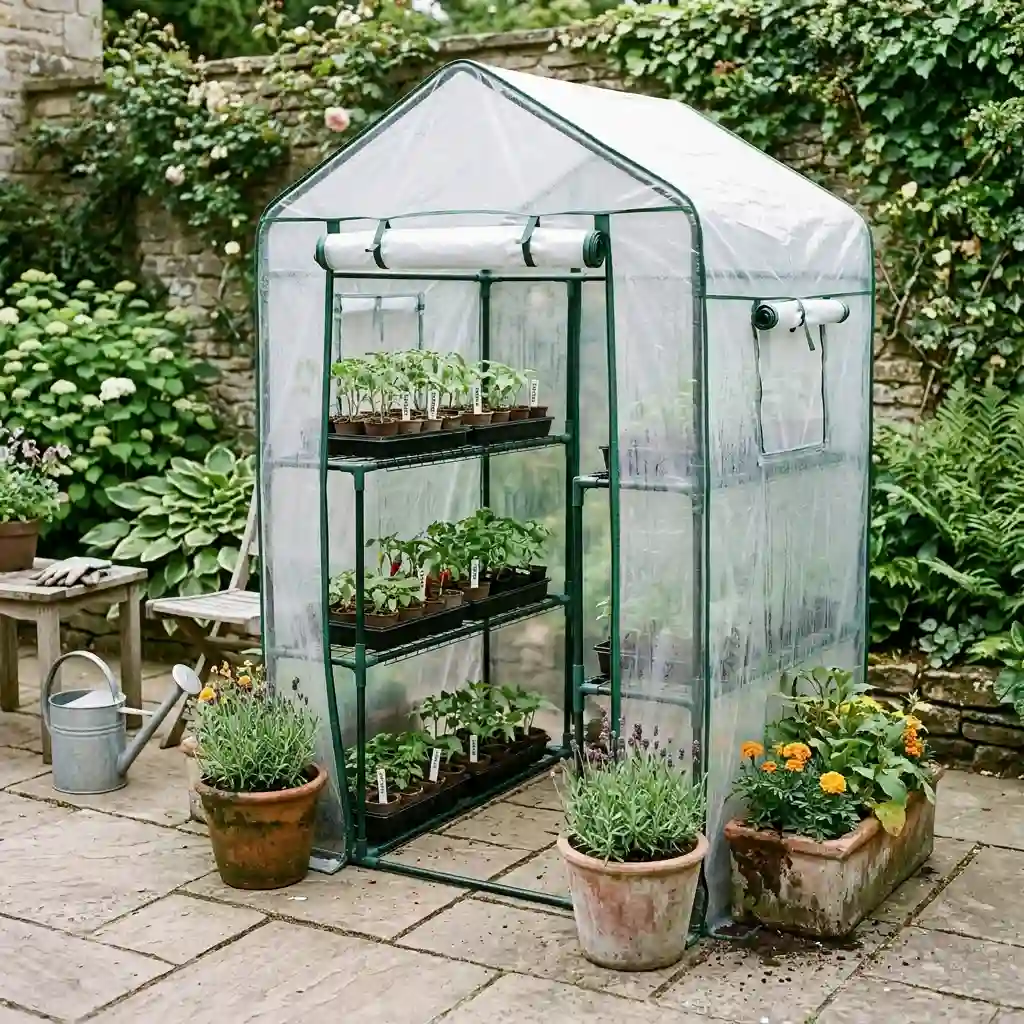
Best for: Hardening seedlings and protecting patio pots
Footprint: About 3 by 3 feet to 6 by 6 feet
Cost: Low to medium
Skill level: Beginner
Watch out for: Wind damage
A pop-up greenhouse can be assembled quickly and stored at the end of the season. Look for screened vents and a roll-up door. Both features make heat control easier.
Thin covers may split after long exposure to sun, wind, and cold. Check whether replacement covers are sold separately before buying.
Portable does not mean windproof. Use ground anchors in soil. On hard paving, connect the frame to sandbags or heavy planters.
Space-saving tip: Choose a model that folds into a storage bag when it is not needed.
6. Use a Shelving Greenhouse with a Zipped Cover
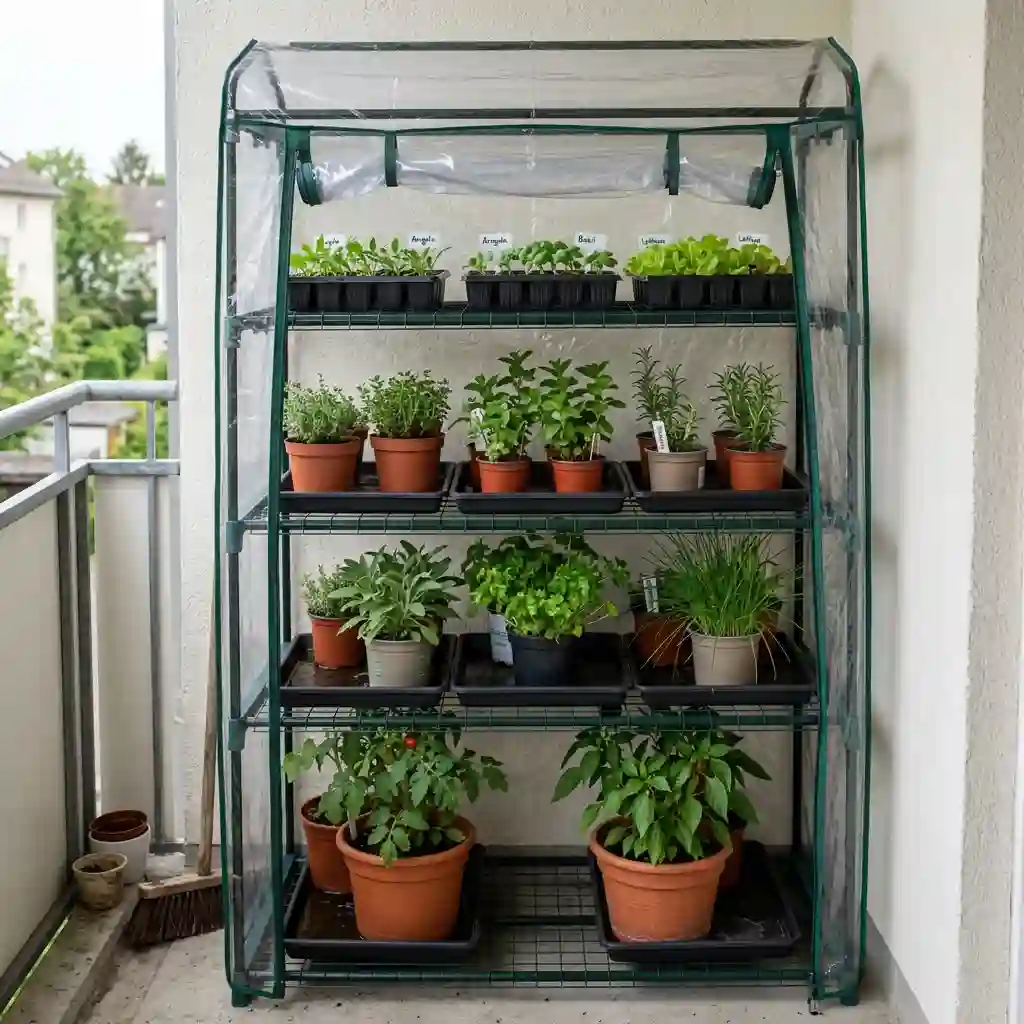
Best for: Seed trays, herbs, and plant cuttings
Footprint: About 1½ by 2½ feet
Cost: Low
Skill level: Beginner
Watch out for: Fast temperature changes
A four-tier shelf greenhouse is one of the smallest and least costly choices. It can sit against a wall on a balcony or patio.
Place heavier pots on the bottom to make the frame more stable. Do not overload thin wire shelves. Waterproof trays will catch drainage and keep the lower plants clean.
Open the zipped cover on warm days. Small covered spaces can heat up quickly, even when outdoor air feels mild.
Space-saving tip: Remove one shelf when your plants become too tall.
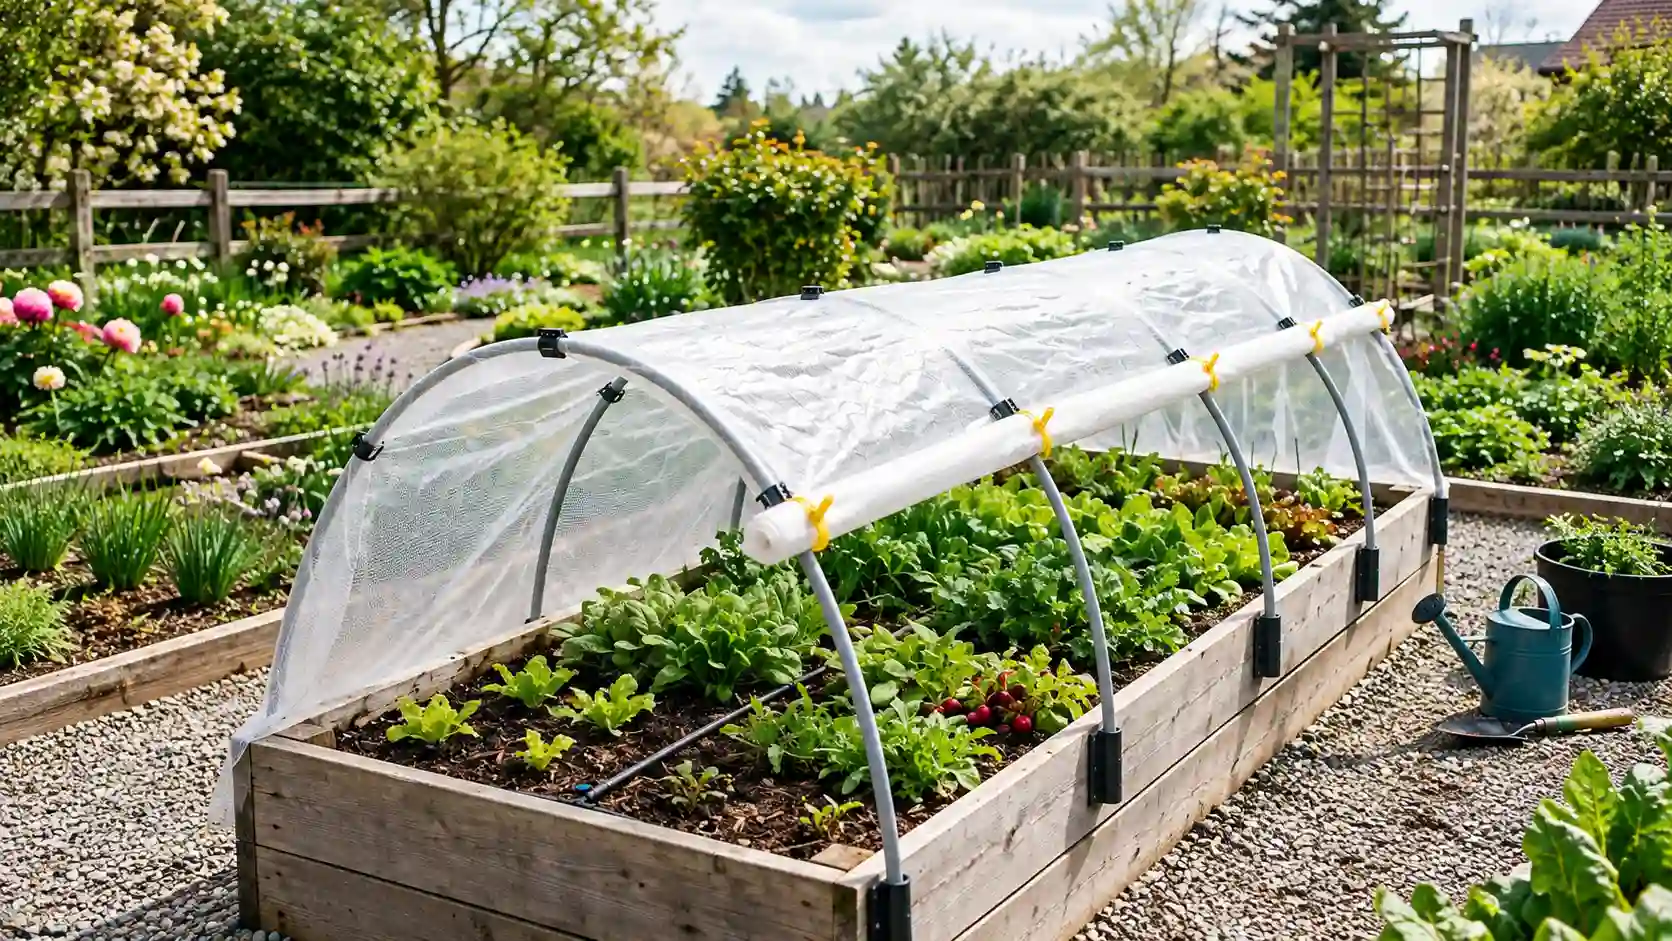
7. Cover a Raised Bed with Removable Hoops
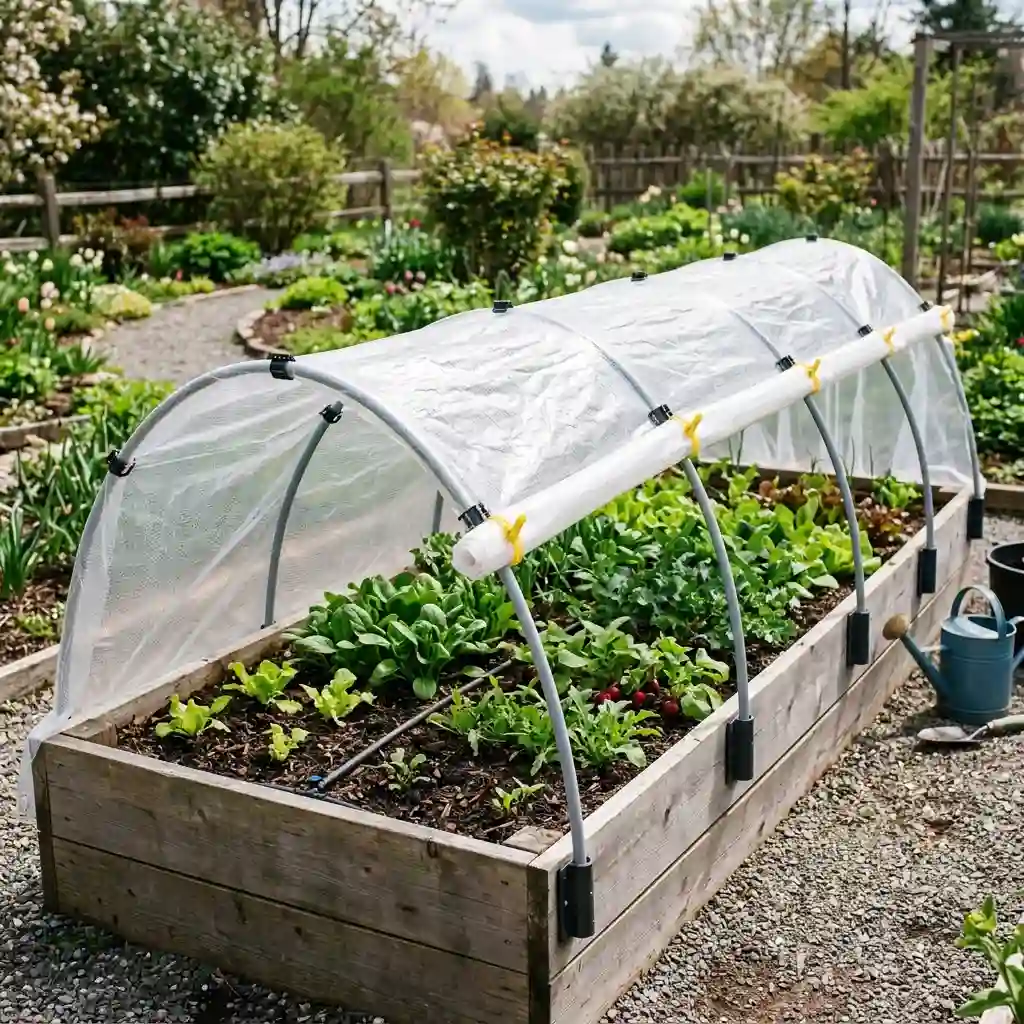
Best for: Protecting vegetables already growing in a raised bed
Footprint: The same size as your bed
Cost: Low
Skill level: Beginner
Watch out for: Plastic touching plants
Flexible hoops can turn a raised bed into a seasonal growing shelter. Cover them with greenhouse film in cool weather. Switch to insect mesh or shade cloth when conditions change.
Clips make it easier to lift one side for watering and airflow. Keep the cover above the leaves because wet plastic resting on plants can cause damage.
A 4-by-8-foot bed is a practical size for this setup. You can reach the center from either side without entering the bed.
Space-saving tip: Add sockets along the bed so the hoops can be removed and stored flat.
8. Build a Lightweight PVC Hoop House
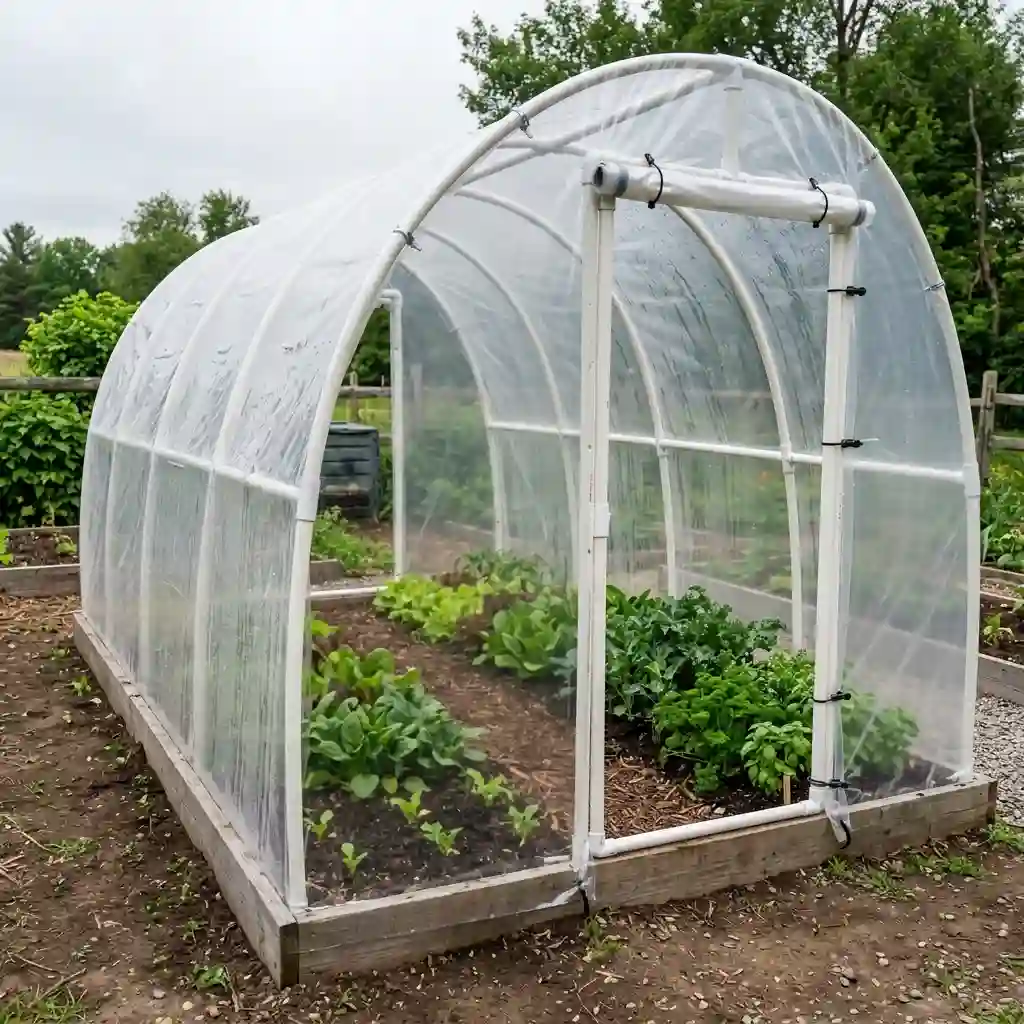
Best for: Low-cost seasonal growing
Footprint: About 4 by 6 feet or larger
Cost: Low to medium
Skill level: Beginner to intermediate
Watch out for: Weak frames in snow or wind
A PVC hoop house offers more space than a covered shelf. It is also easier to move than a greenhouse with rigid panels.
Use UV-treated greenhouse film. Basic plastic sheeting may become cloudy or brittle much sooner. Oregon State University notes that UV-treated 6-mil greenhouse plastic can carry a three-year guarantee, while untreated plastic may degrade after one year. Its published raised-bed cloche design measures about 4 feet wide, 8 feet long, and 5 feet high.
Reinforce the base and roof ridge if your yard is exposed. This light structure is not suited to every snow or wind zone.
Space-saving tip: Build the frame over an existing garden bed instead of adding a new growing area.
DIY Small Greenhouse Ideas Made from Existing Items
Reused materials can lower waste and add character. They can also bring hidden costs. Inspect every item for rot, rust, unsafe paint, and broken glass before you build.
9. Turn an Old Window into a Cold Frame
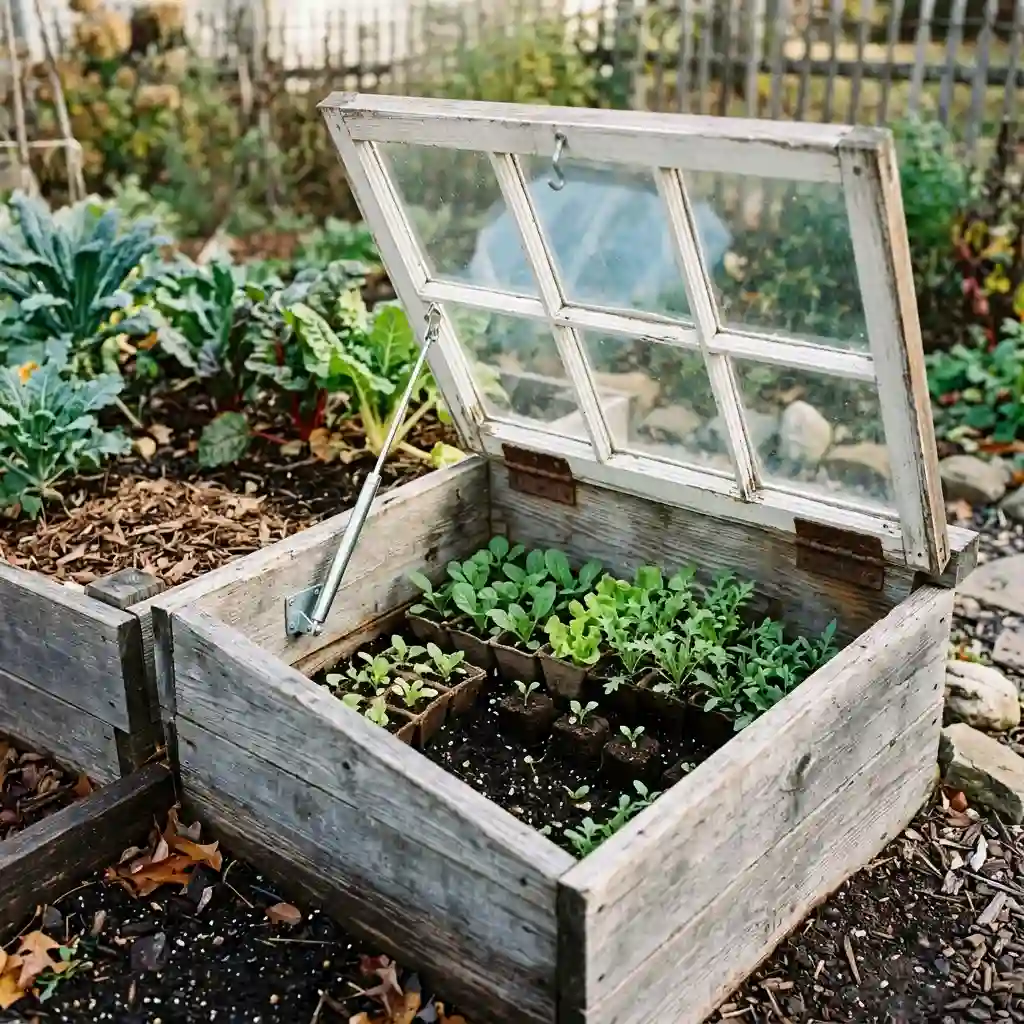
Best for: Hardening seedlings and growing low crops
Footprint: About 2 by 4 feet
Cost: Low
Skill level: Beginner
Watch out for: Lead paint and unsafe glass
Attach an old window to a wooden box with strong hinges. Slope the lid so it captures sunlight and sheds rain.
Face the cold frame south when possible. The University of Minnesota recommends a location that receives direct sun for at least half the day. It also warns that the lid may need to be opened to prevent overheating.
Add a strong prop or automatic opener. Test old painted frames for lead before sanding, drilling, or cutting them.
Space-saving tip: Build the box to match the width of an existing raised bed.
10. Turn a Glass Cabinet into a Mini Greenhouse
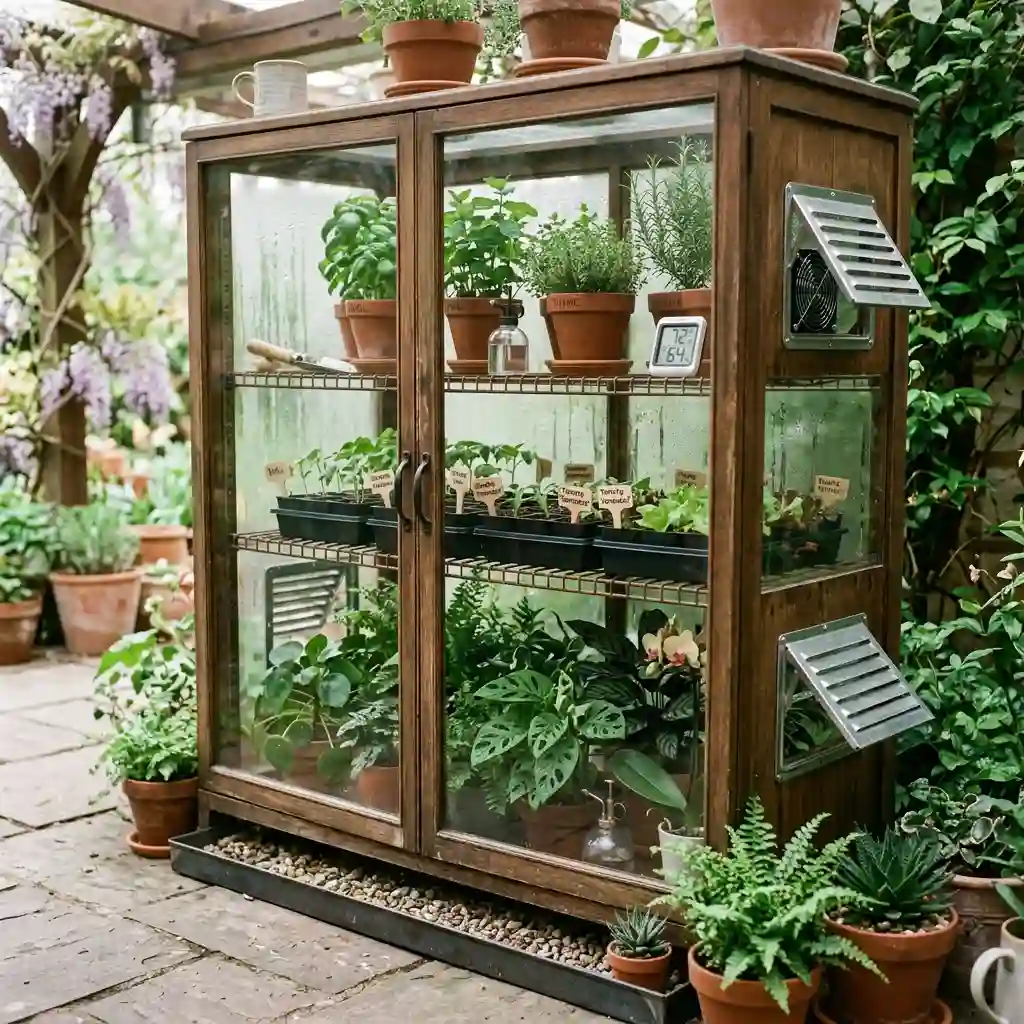
Best for: Sheltered patios, balconies, and sunrooms
Footprint: About 1½ by 3 feet
Cost: Low to medium
Skill level: Intermediate
Watch out for: Moisture and broken glass
A glass-front cabinet can become an attractive home for tropical plants, herbs, or seed trays. Use rust-resistant shelves and protect the base from standing water.
Seal large gaps, but do not make the cabinet airtight. Adjustable vents or small fans can reduce trapped humidity. A hygrometer will show you when moisture remains too high.
Tempered safety glass is a better choice for busy areas. Keep the cabinet away from play spaces and narrow paths.
Space-saving tip: Add magnetic hooks for scissors, labels, and small tools.
11. Convert Part of a Shed into a Greenhouse
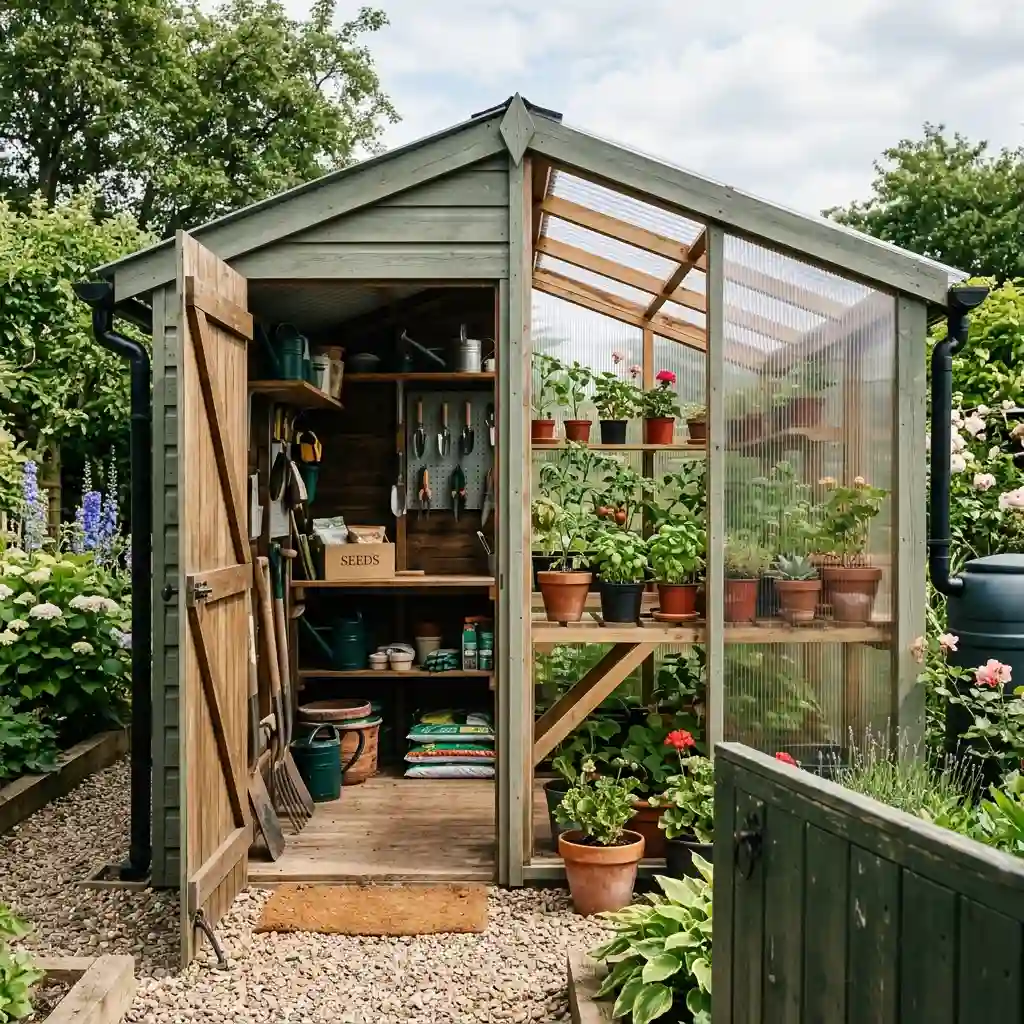
Best for: Combining plant space with tool storage
Footprint: Uses part of an existing shed
Cost: Medium to high
Skill level: Advanced
Watch out for: Structural and moisture problems
Replacing part of a shed wall or roof with clear panels can give one building two uses. Put the growing shelves close to the new glazing. Keep tools and stored materials in the darker section.
Separate damp planting areas from outlets, batteries, fertilizer, and metal tools. Add gutters so roof water does not collect beside the base.
Before removing boards or roof panels, confirm that the remaining frame can support the building. Hire a qualified professional if you are unsure.
Space-saving tip: Place deep storage at the back and shallow plant shelves near the light.
12. Build a Narrow Greenhouse from Reclaimed Materials
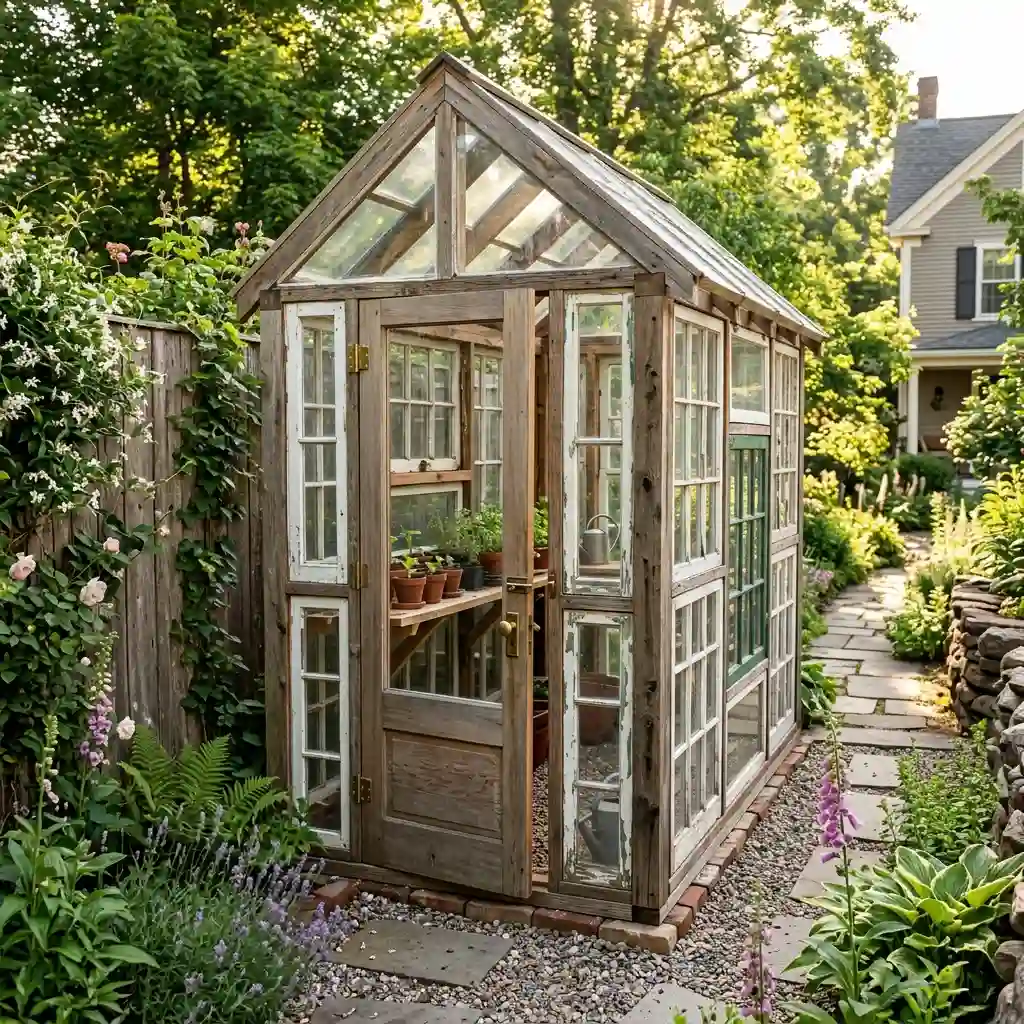
Best for: Custom side yards and low-waste garden projects
Footprint: About 3 by 6 feet or based on the site
Cost: Low to medium
Skill level: Advanced
Watch out for: Uneven materials and repair costs
Collect your windows and doors before designing the frame. Arrange them by size on the ground. This helps you plan wall sections with fewer gaps.
Reclaimed does not always mean free. You may need new hinges, framing lumber, sealant, fasteners, and safe glazing.
Do not force cracked glass into an uneven opening. Sound framing matters more than a rustic look.
Space-saving tip: Use one narrow outward-opening door so the entrance does not take up interior room.
Check before you build: Look for rotten wood, sharp glass, rusted hardware, peeling paint, and weak joints. Replace unsafe parts before construction begins.
Space-Saving Greenhouses That Hold More Plants
The size of the frame is only part of the answer. A good interior plan can double your useful growing area while leaving room for watering and plant care.
13. Install a Narrow-Aisle Greenhouse
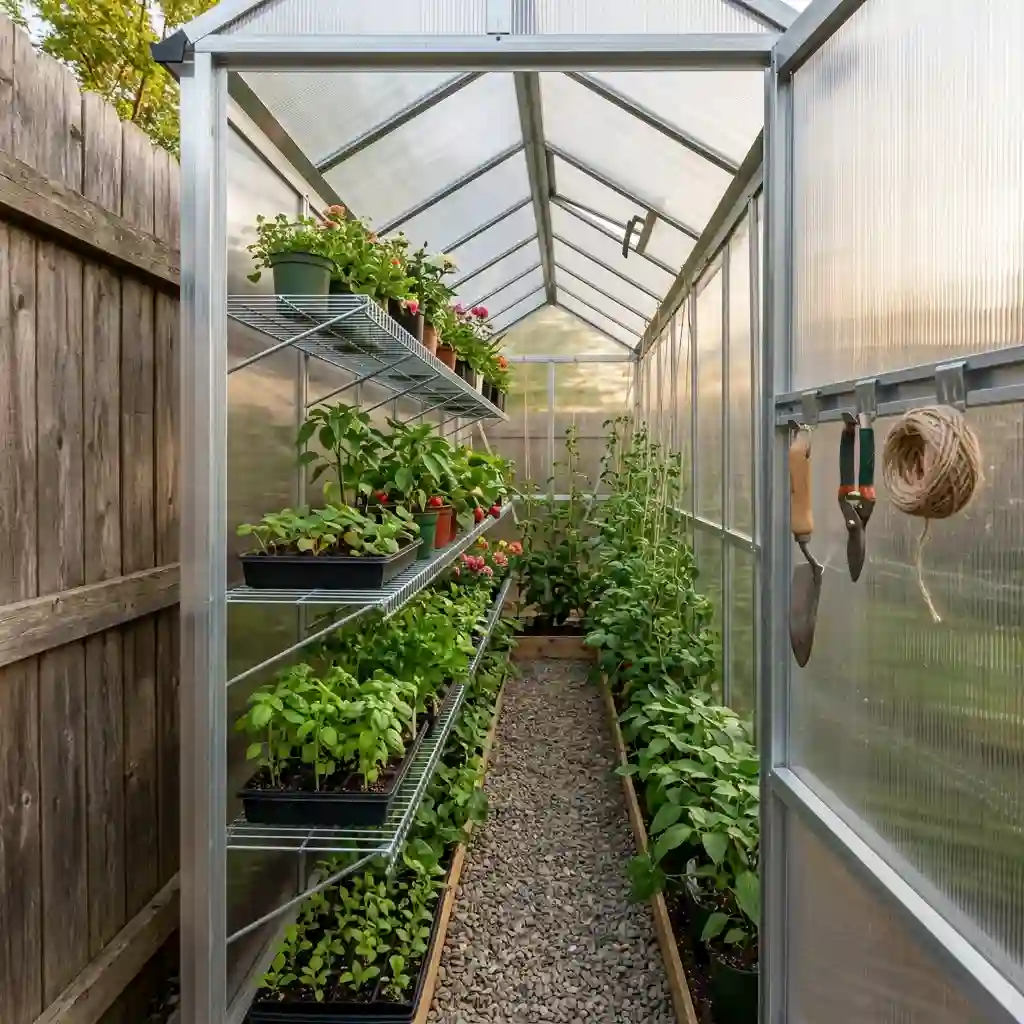
Best for: Long, slim spaces beside a fence
Footprint: About 4 by 8 feet
Cost: Medium
Skill level: Intermediate
Watch out for: Crowded access
Run shelves along one wall instead of both. Shelves about 12 to 18 inches deep can hold trays without taking over the walkway.
Aim for an aisle of about 24 inches when space permits. Test the width before fixing the shelves. Carry a watering can through the empty structure and check whether you can turn comfortably.
Place tall plants where they will not shade smaller ones. Keep the door and central path clear.
Space-saving tip: Use wall clips for tools and a narrow bin for potting mix.
14. Use Tiered Shelves for Seed Starting
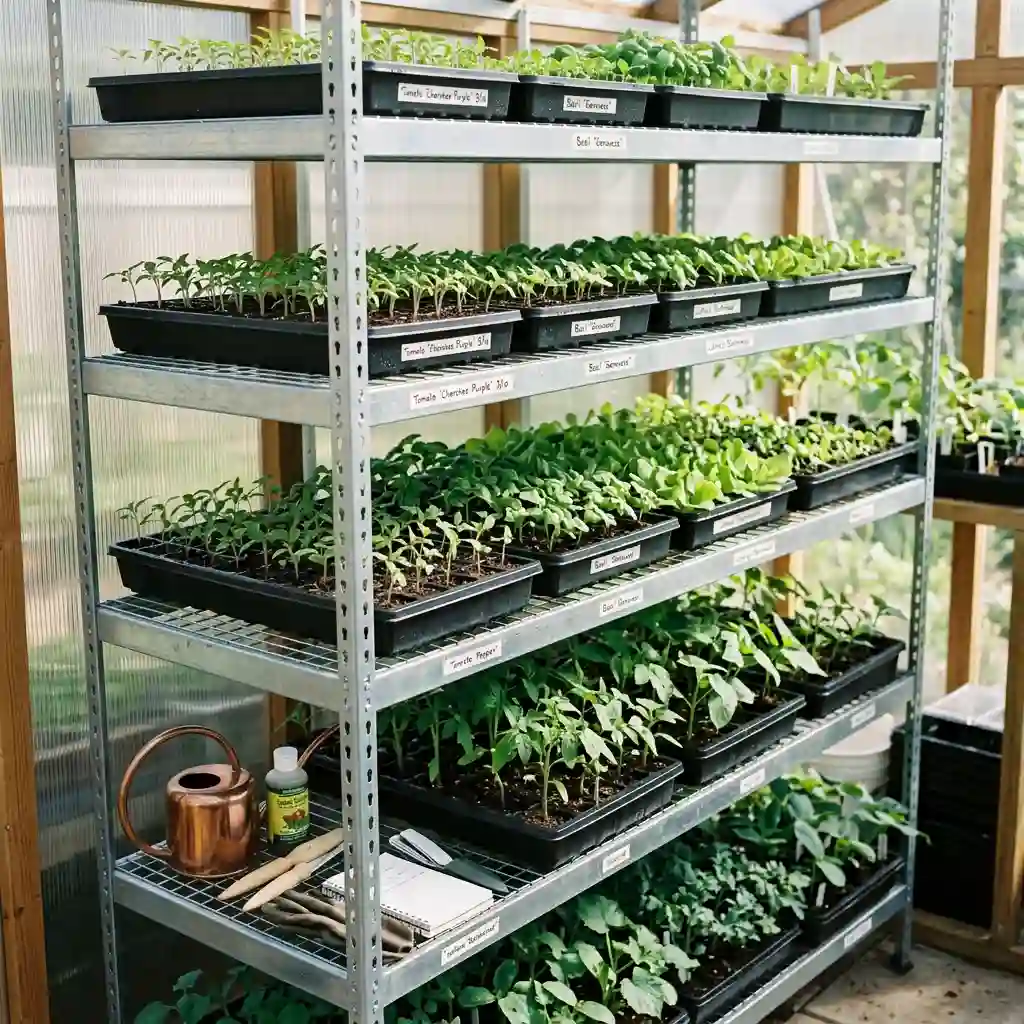
Best for: Growing many seedlings in a small area
Footprint: Fits most greenhouse sizes
Cost: Low to medium
Skill level: Beginner
Watch out for: Upper shelves shading lower trays
Vertical shelves let you use space that would otherwise remain empty. Put shorter plants on upper levels and taller plants lower down, where they have more headroom.
Use removable shelves so the layout can change as plants grow. Rotate trays if one side receives more light.
Place waterproof trays beneath pots. This controls drainage and helps keep wet soil away from the frame.
Space-saving tip: Save one shelf for supplies instead of adding a separate storage unit.
15. Create a Small Hydroponic Greenhouse
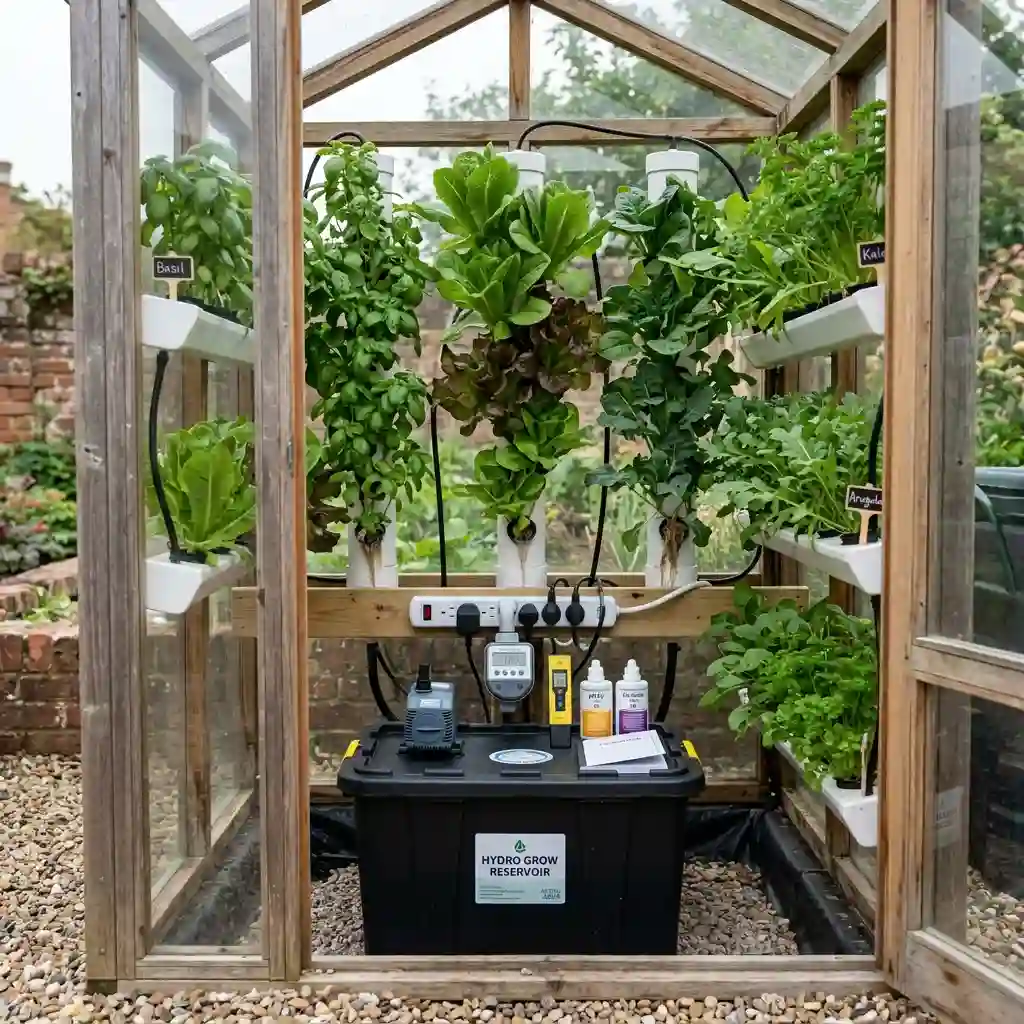
Best for: Herbs and leafy greens
Footprint: About 3 by 4 feet or larger
Cost: Medium to high
Skill level: Intermediate
Watch out for: Water, power, and daily upkeep
Vertical towers and wall channels can produce several plants without using much floor space. However, hydroponics needs more equipment than pots and soil.
You may need a pump, reservoir, plant lights, timer, and water-testing tools. Keep plugs and power strips above the water line. Use outdoor-rated equipment where required and follow local electrical rules.
Air movement is important, and plant roots still need oxygen. The University of Minnesota also advises keeping hydroponic systems clean because warm water can support harmful bacteria and viruses.
Space-saving tip: Choose a slim vertical system with an easy-to-reach reservoir.
16. Combine the Greenhouse with a Potting Bench
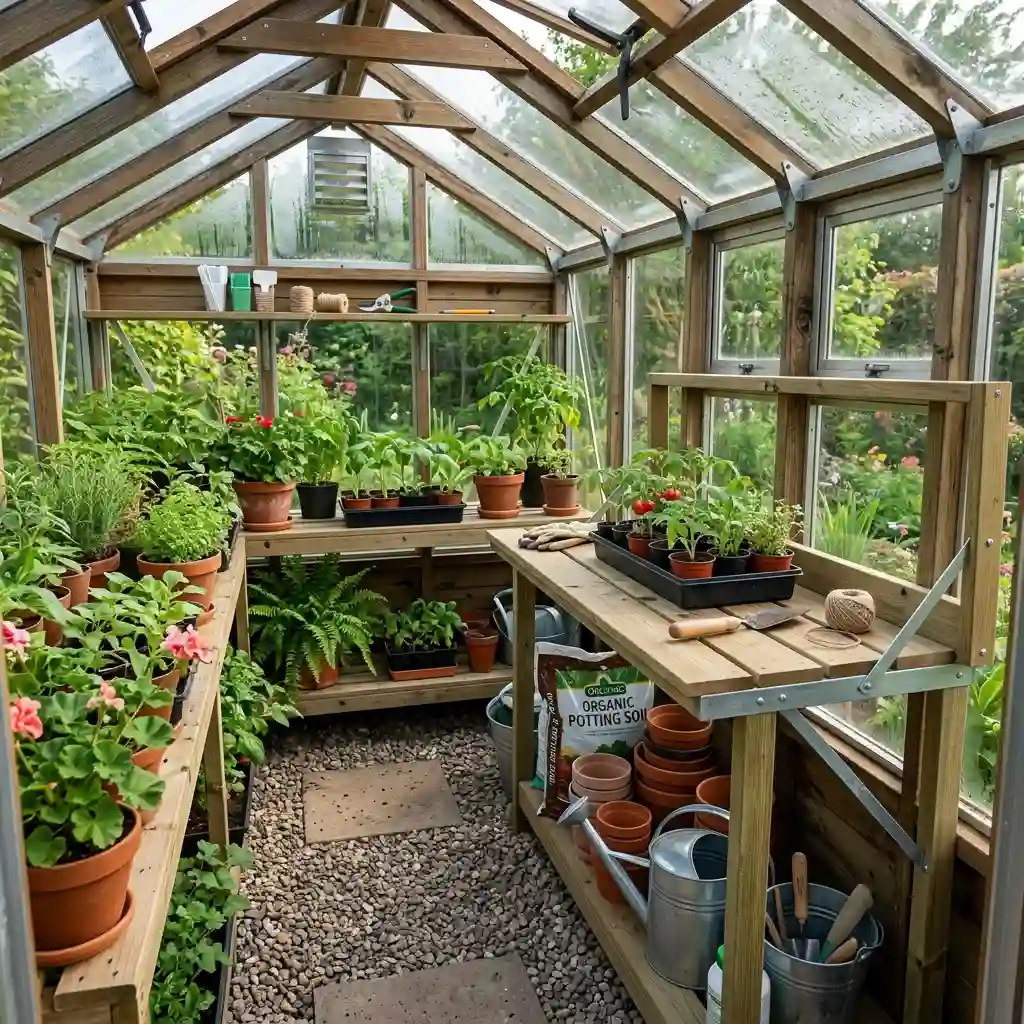
Best for: Gardeners who need growing and work space
Footprint: Fits a 4-by-6-foot greenhouse or larger
Cost: Medium
Skill level: Beginner to intermediate
Watch out for: Blocking light and movement
A potting bench gives you a clean place to fill trays, label plants, and handle small jobs. Storage beneath it can hold pots, soil, and watering tools.
In a tight greenhouse, use a fold-down worktop. Close it after potting so you can move through the aisle.
Select moisture-resistant materials. Position the bench where it will not shade your main growing shelf.
Space-saving tip: Add a shallow shelf above the bench for labels and hand tools.
A Simple 4-by-6-Foot Layout
Use one 16-inch-deep shelf along the six-foot wall. Leave the other long wall open for tall pots or grow bags. Place a 24-inch fold-down bench at the back. Store tools on wall hooks and keep the center clear for watering.
Make Your Greenhouse Look Like Part of the Garden
A useful structure can also improve how your yard looks. Keep the design simple so decorations do not reduce airflow or growing room.
17. Create a Mini Greenhouse Garden Room
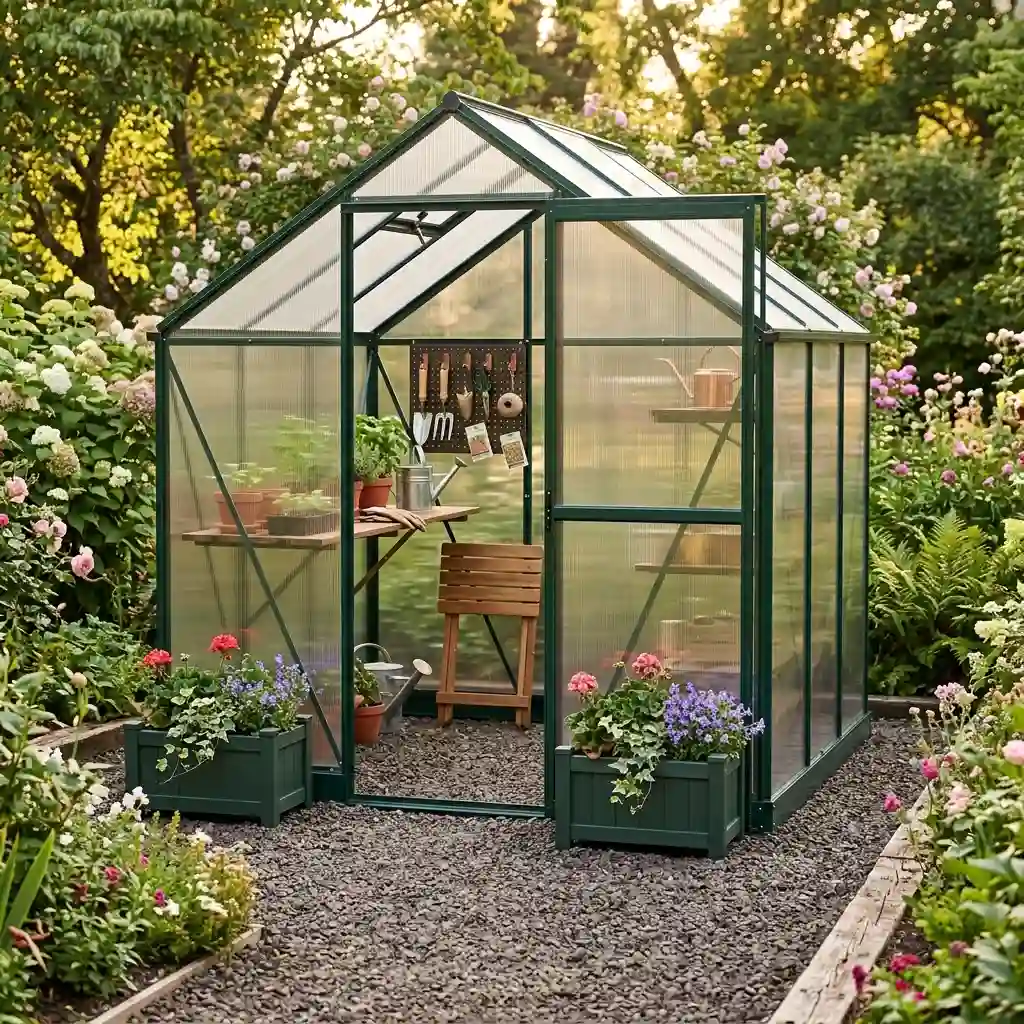
Best for: Growing plants and enjoying a quiet garden corner
Footprint: About 6 by 6 feet
Cost: Medium to high
Skill level: Intermediate
Watch out for: Giving seating too much space
Place a compact polycarbonate greenhouse on a level gravel pad. Add one narrow growing shelf, hanging tools, and a folding stool. Matching containers beside the entrance can connect the structure with the rest of the garden.
Use one paint color on nearby raised beds, trim, or pots. This creates a finished look without filling the greenhouse with decorations.
Treat seating as a bonus. Your plants still need room for light, airflow, watering, and growth.
Space-saving tip: Hang the folding stool on the wall when you are working.
How to Choose the Right Small Greenhouse
Choose the structure by its job, not its appearance. A pretty greenhouse will still disappoint you if it is too hot, too dark, or hard to enter.
Ask these five questions:
- How much space can you use? Measure the footprint, door swing, walkway, and overhead clearance.
- How much direct sun does the site receive? Keep a sunlight log before choosing the location.
- What will you grow? Seed trays need less height than tomatoes, climbing cucumbers, or citrus trees.
- What weather must it handle? Check wind exposure, snow loads, summer heat, and drainage.
- How much work do you want? Flexible covers may need replacement. Permanent models require more site preparation.
| Greenhouse type | Best for | Cost | Portability | Main drawback |
| Shelf greenhouse | Seed trays and herbs | Low | High | Limited capacity |
| Pop-up greenhouse | Seasonal protection | Low–medium | High | Vulnerable to wind |
| Lean-to greenhouse | Narrow side yards | Medium–high | Low | Wall and drainage work |
| Cold frame | Seedlings and low crops | Low | Medium | No walk-in access |
| Polycarbonate kit | Longer-term use | Medium–high | Low | More site preparation |
Glass offers a clear view and can last for years, but it is heavy and may break. Polycarbonate is lighter and more impact-resistant, though it can scratch or become cloudy over time. Flexible film costs less, but it normally has a shorter life.
The best small greenhouse is often the smallest model that gives you room to care for your plants without feeling cramped.
Small Greenhouse Setup Mistakes That Cause Trouble
A strong structure can still perform poorly if you put it in the wrong place. Avoid these common problems:
- Choosing a shaded site: Do not pick a location only because it looks convenient. Track the light first.
- Forgetting about summer heat: Cooling can be harder than heating. Plan for vents, shade cloth, and easy watering.
- Failing to anchor the frame: Lightweight greenhouses can move or tip during strong wind.
- Using every inch for plants: You still need room to reach pots, inspect leaves, and clean spills.
- Ignoring drainage: Water should move away from the base instead of forming puddles.
- Skipping local checks: Rules for attached structures, setbacks, and permits differ by location.
Covered beds and greenhouses can overheat much faster than many new gardeners expect. Oregon State University advises opening low-tunnel sides to release heat, while Utah State University recommends monitoring covered tomatoes and adding ventilation when temperatures rise above 80°F.
Set up a min/max thermometer before moving valuable plants inside. Monitor the empty greenhouse for several warm days. This simple test can expose heat, airflow, and drainage problems early.
Start with the Space You Already Have
These small greenhouse ideas range from covered shelves to permanent lean-to structures. Your best choice depends on your available space, climate, plants, budget, and free time.
Begin by measuring the area, including the door path and working space. Then record how much direct sun it receives. Pick three designs that match both your measurements and gardening goals.
A DIY small greenhouse can be a smart first project if you want seasonal protection. If you need a longer growing season and more room, a compact walk-in model may serve you better. Start small, plan for airflow, and leave enough space to care for every plant.
Meta title: 17 Small Greenhouse Ideas for Every Tiny Yard
Meta description: Explore 17 small greenhouse ideas for patios, balconies, and tiny yards. Compare footprints, costs, skill levels, benefits, and limits.