
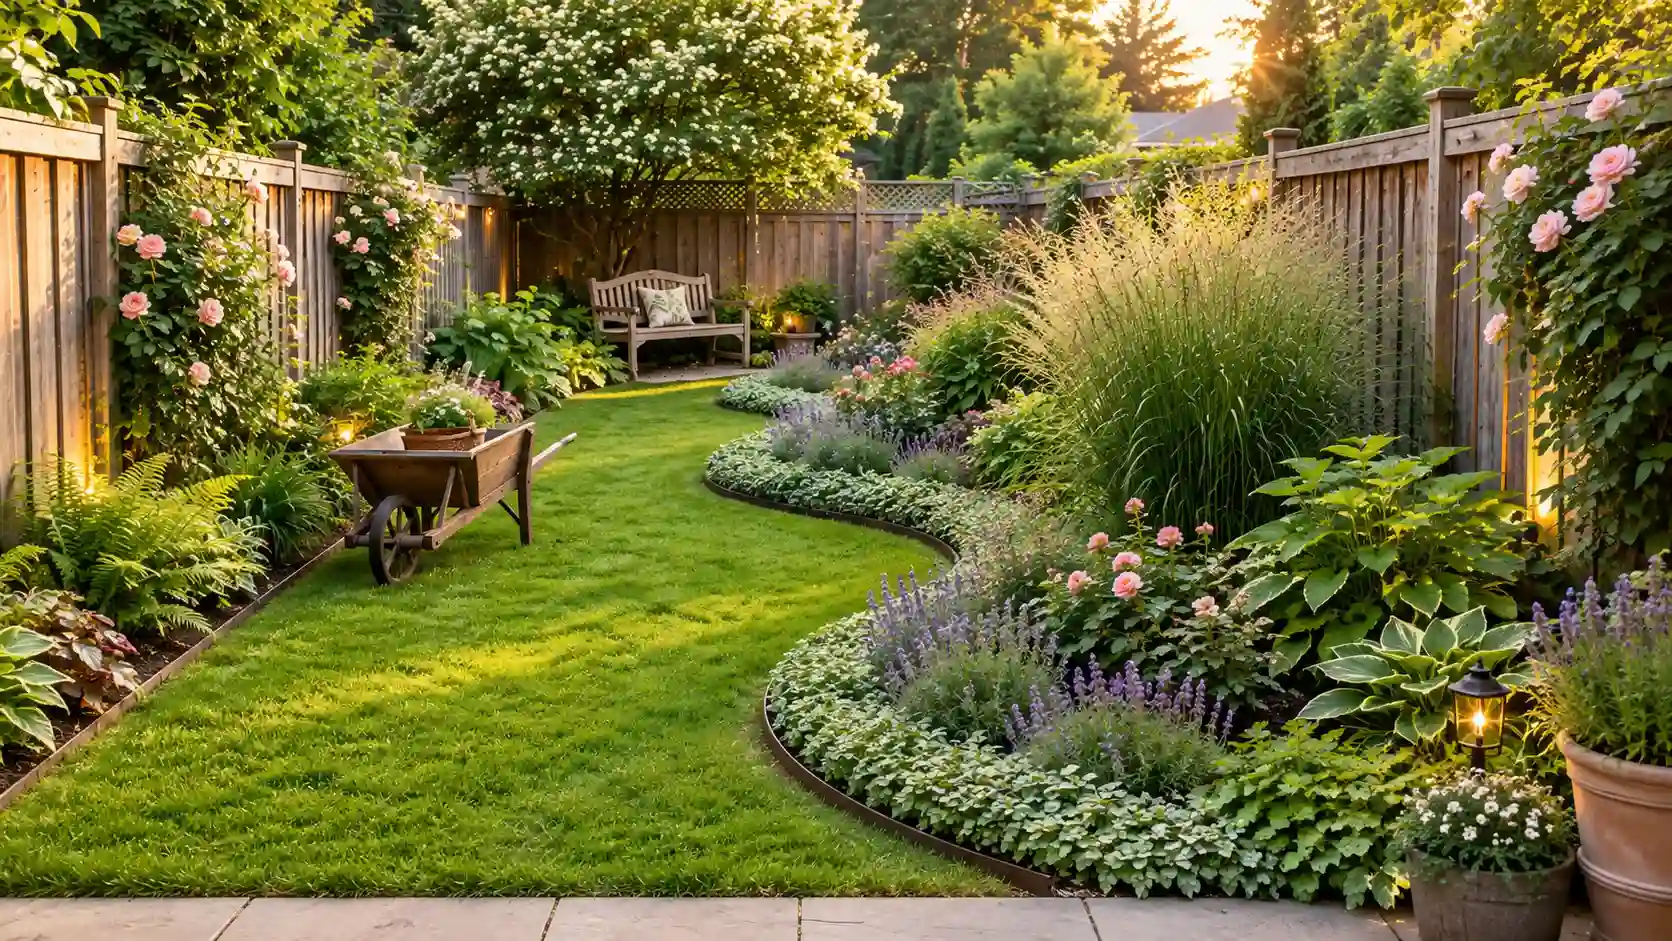
Straight property lines may define your yard, but your garden beds do not have to follow them. These curved garden bed ideas can soften a boxy lawn, connect separate outdoor areas, and make a small space feel more inviting.
The hard part is creating a curve that looks planned. A line with too many small bends can appear messy. A bed that is too narrow may leave no room for layered plants. It can also create tight corners that are hard to mow.
The best curved flower bed ideas begin with one broad, simple line. That line should connect to something that is already in your yard. It may lead from your front steps to the driveway. It could wrap around a tree, patio, fence, or walkway.
Below, you will find 15 designs for large lawns, narrow yards, slopes, patios, and small front gardens. You will also learn how to mark a curved garden border, choose flexible edging, and arrange plants without hiding the shape.
1. Make Your Front Lawn More Inviting With a Sweeping Bed
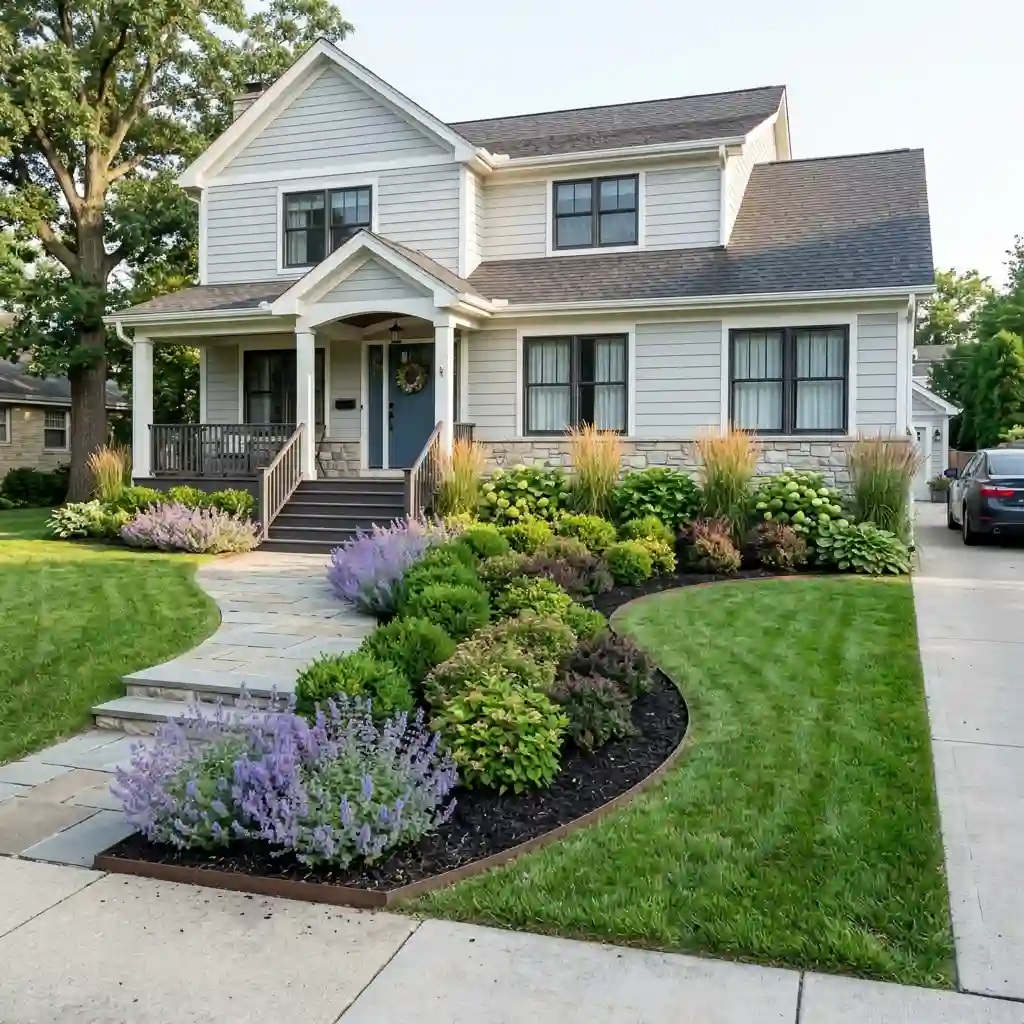
A sweeping front-yard bed can soften the hard lines of your house and driveway. It also gives you more planting room than a thin strip against the foundation.
Begin the curve near your front steps. Let it move across the lawn and finish near the driveway or property corner. The bed might start at three feet wide and grow to six or eight feet at its deepest point.
Use short plants beside the steps and driveway. Place taller shrubs between windows or near blank walls. This keeps views clear from inside the house.
Repeat two or three plants along the full curve. For example, use groups of catmint, compact shrubs, and ornamental grasses. Repeated plants will make the curved landscape bed feel connected.
View the marked shape from the street before digging. The curve may look balanced up close but uneven from farther away.
2. Soften a Hard Driveway Edge With Low Plants
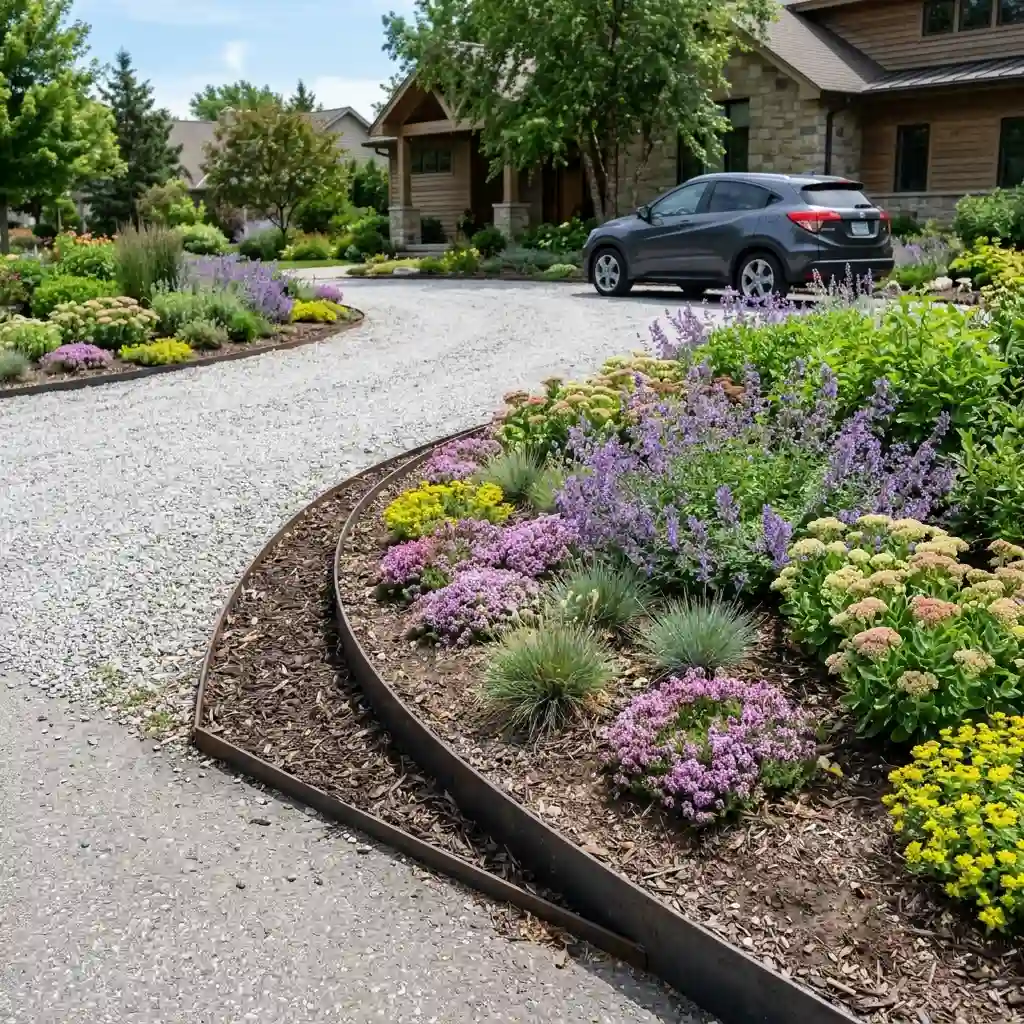
A curved driveway garden bed can break up a long strip of pavement. It also creates a smoother link between the driveway and front lawn.
Place the widest part of the curve away from the street. Keep the area near the road open so plants do not block your view while driving. Low plants also make it easier for guests to open car doors.
Driveways can reflect a lot of heat. Choose plants that can handle hot, dry soil if the area receives full sun. Sedum, catmint, creeping thyme, and compact ornamental grasses may work well in the right climate.
Use a firm edge beside the pavement. Steel, brick, or a clean spade-cut edge can stop mulch from washing onto the driveway.
Leave enough room for trash bins, snow removal, and regular car use. A pretty bed becomes a problem if it blocks daily tasks.
3. Protect a Mature Tree With a Wide Curved Bed
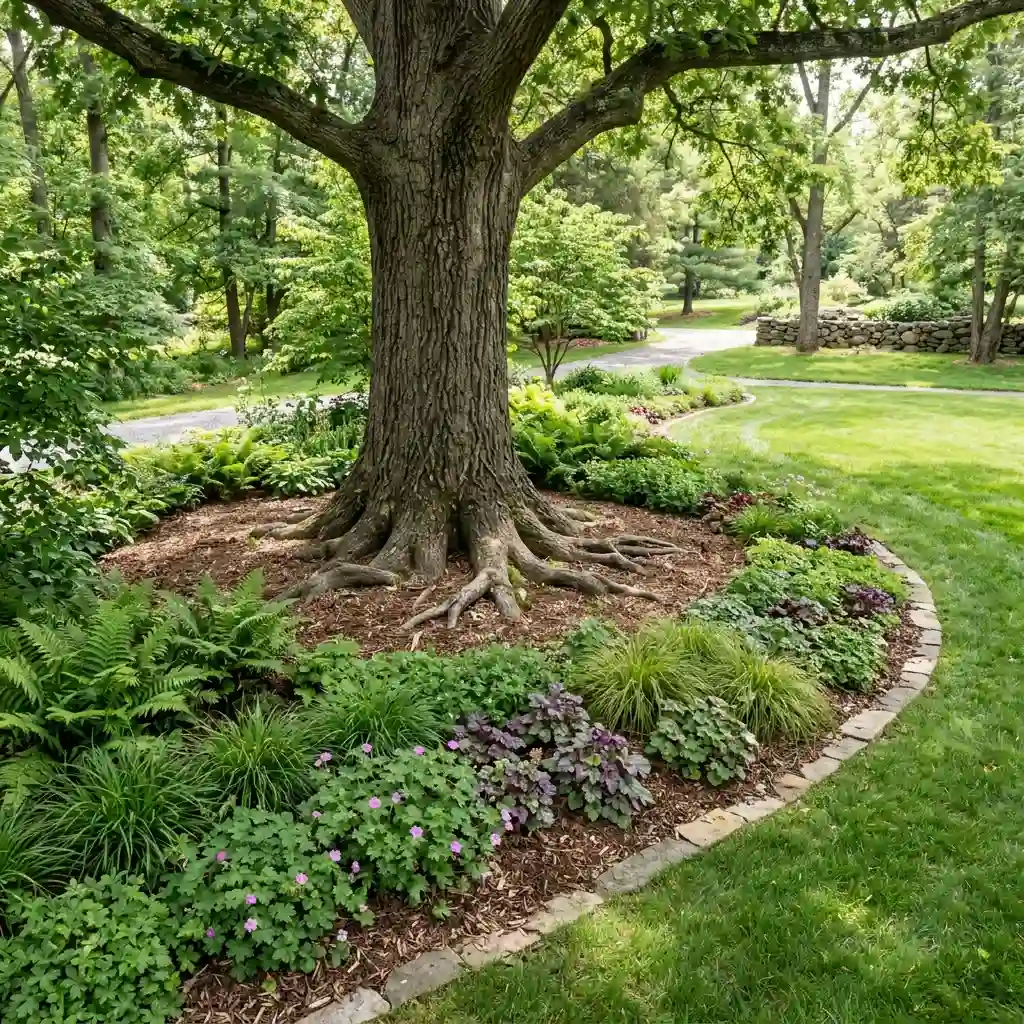
A wide curved garden bed around a tree looks more natural than a small raised ring. It can also protect the trunk from lawn mowers and string trimmers.
Do not cut through large surface roots to create the bed. Work around them and use a light layer of organic mulch. Adding deep soil over the roots can reduce the air and water they receive.
Keep the tree’s root flare visible. This is the wider area where the trunk meets the roots. Penn State Extension recommends a two- to four-inch mulch layer and says mulch should remain away from the trunk. Spreading mulch out is safer than piling it up like a volcano.
For planting, use small, shallow-rooted plants suited to dry shade. Sedges, ferns, hardy geraniums, and native ground covers may work, depending on your location.
4. Add a Kidney-Shaped Island Bed to an Open Lawn
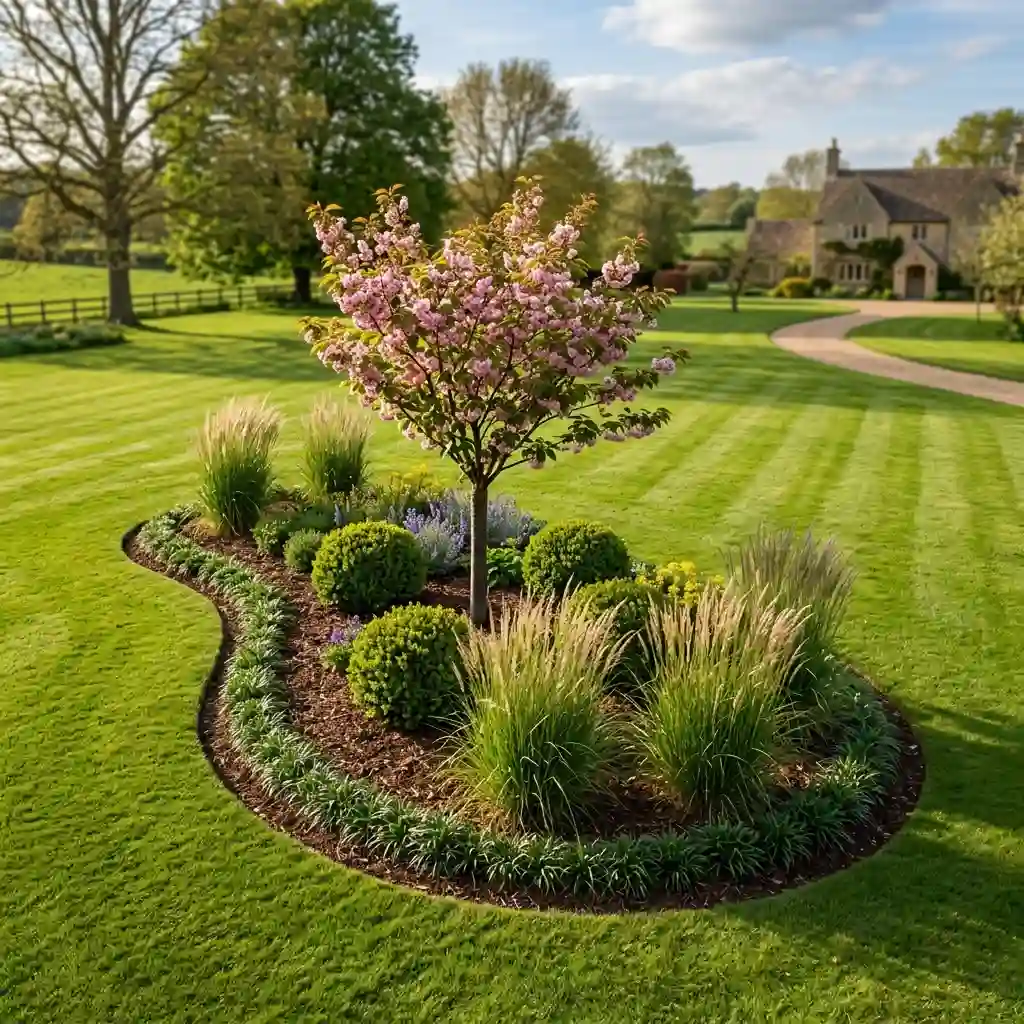
A kidney-shaped flower bed gives a large, empty lawn a clear focal point. Its soft outline also looks good from several sides.
Place the tallest plant slightly away from the center. A small flowering tree, large shrub, or group of ornamental grasses can serve as the main feature. Surround it with shorter shrubs, flowers, and ground covers.
Plant in groups of three, five, or more. Scattered single plants often make an island bed look unfinished. Repeated groups produce a stronger shape and are easier to notice from a distance.
Walk around the marked bed before removing grass. Check that your mower can pass through every gap. Tight spaces between the bed and fence will add extra trimming work.
A simple design could include one small tree, three compact shrubs, five grass clumps, and a low ground-cover edge.
5. Make a Curved Walkway Feel More Welcoming
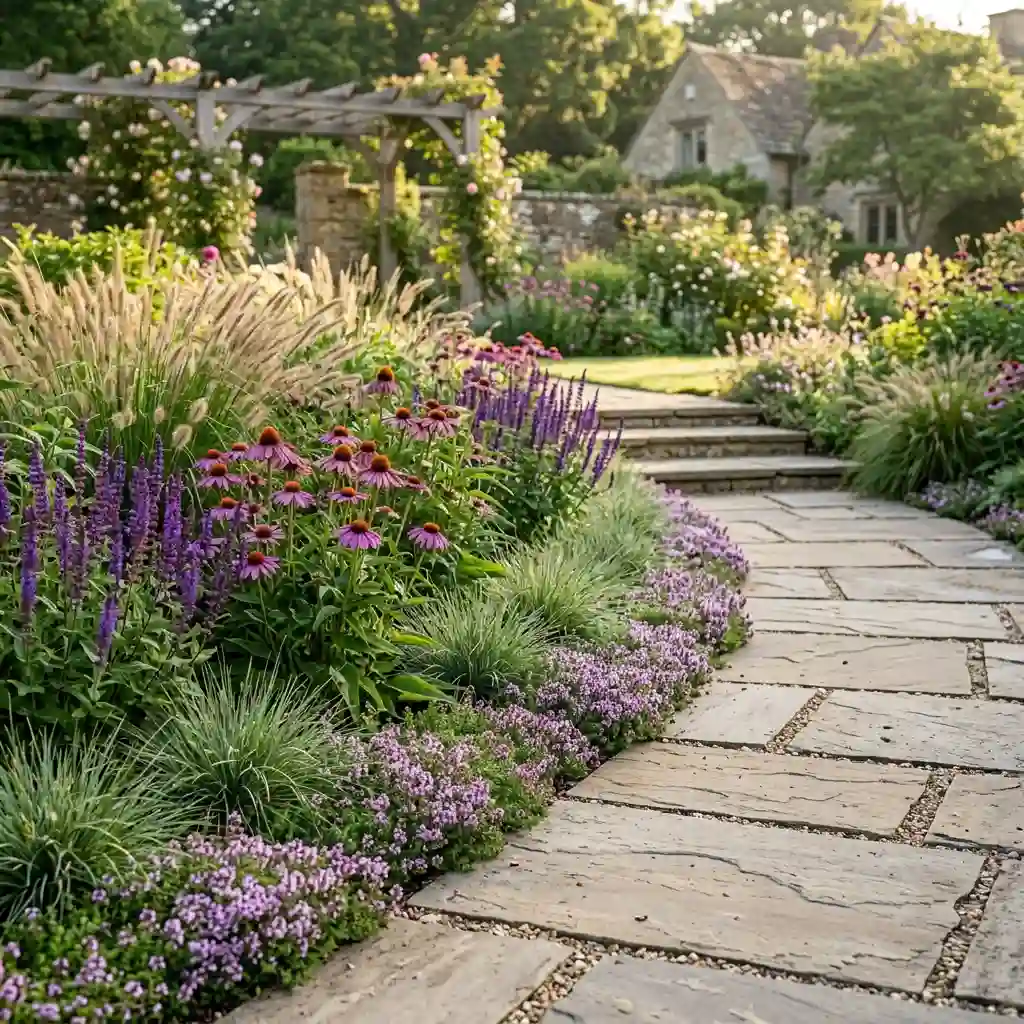
A curved garden border can make a plain walkway feel like part of the garden. The best result comes from following the path’s shape instead of adding a second curve that fights against it.
Place low plants beside the walking surface. Creeping thyme, alyssum, compact sedges, or other small plants can soften the edge. Set spreading plants far enough back so they do not cover the path.
Add medium-height flowers behind the first layer. Salvia, coneflowers, and compact grasses can provide color and movement. Taller plants should sit at the back of the bed.
Fragrant plants can make the path more pleasant. Use them where visitors can notice the scent without brushing against thorny stems or large numbers of insects.
Leave open gaps beside steps and path crossings. Clear access matters more than filling every inch with plants.
6. Add Color Around a Patio With a Crescent Bed
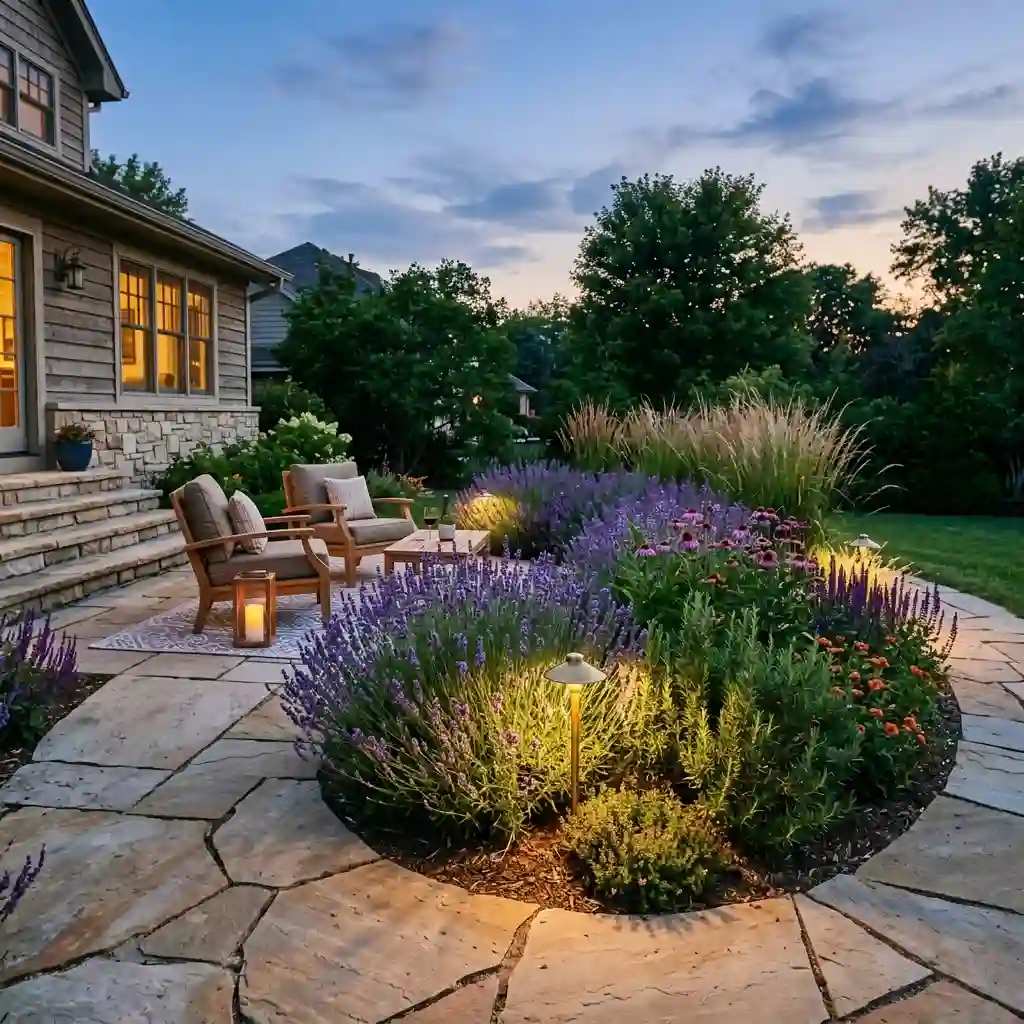
A crescent flower bed softens the hard edge of a square or round patio. It can also provide privacy without closing off the entire sitting area.
Wrap the bed around one side of the patio. Keep the other side open for people, furniture, and garden equipment. A bed that surrounds the whole patio can make the space feel crowded.
Use plants that stay within their planned area. Avoid thorny shrubs, heavy fruit-dropping trees, or plants that need constant cutting. Lavender, rosemary, dwarf grasses, and seasonal flowers can create a simple mix in warm, sunny conditions.
Place taller plants where you want a light screen. Keep lower plants near steps and main walking routes.
One or two low-voltage lights can show the curve after dark. Aim them at plants or the bed edge instead of seating areas to limit glare.
7. Make a Narrow Yard Feel Longer With an S-Curve
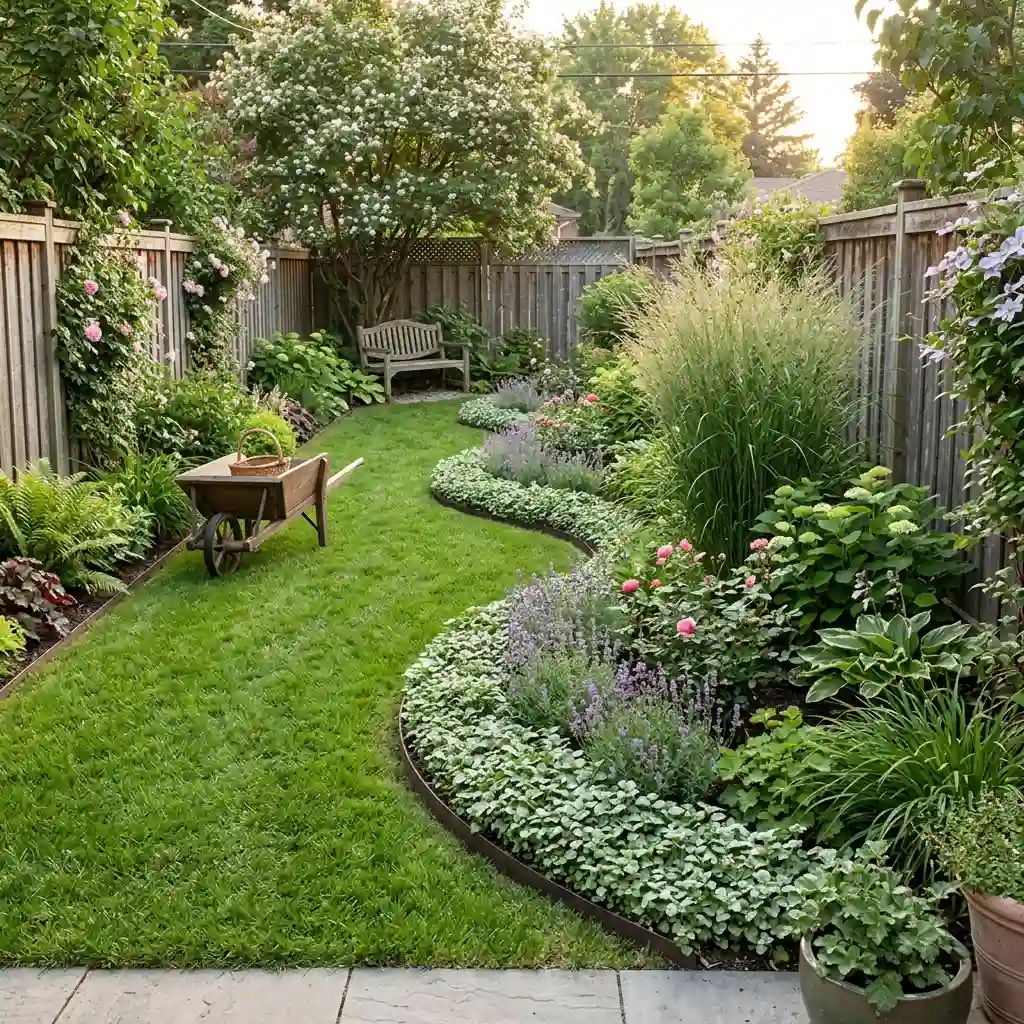
An S-shaped garden bed can make a short or narrow yard appear longer. The line pulls your eye through the space instead of letting you see the whole yard at once.
Use one relaxed S-curve. Several tight waves can look forced and create awkward mowing areas. Mark the line with a garden hose, then smooth out any sharp turns.
Let part of the bed disappear behind a shrub, trellis, or tall grass. Place a bench, birdbath, urn, or flowering shrub near the far end. This gives your eye a reason to follow the curve.
Keep enough open space for walking, mowing, and moving a wheelbarrow. Do not make both sides of the yard match. A slightly uneven layout usually feels more natural.
Repeat the same ground cover or edging material along the curve to hold the design together.
8. Hide an Empty Fence Corner With Layered Plants
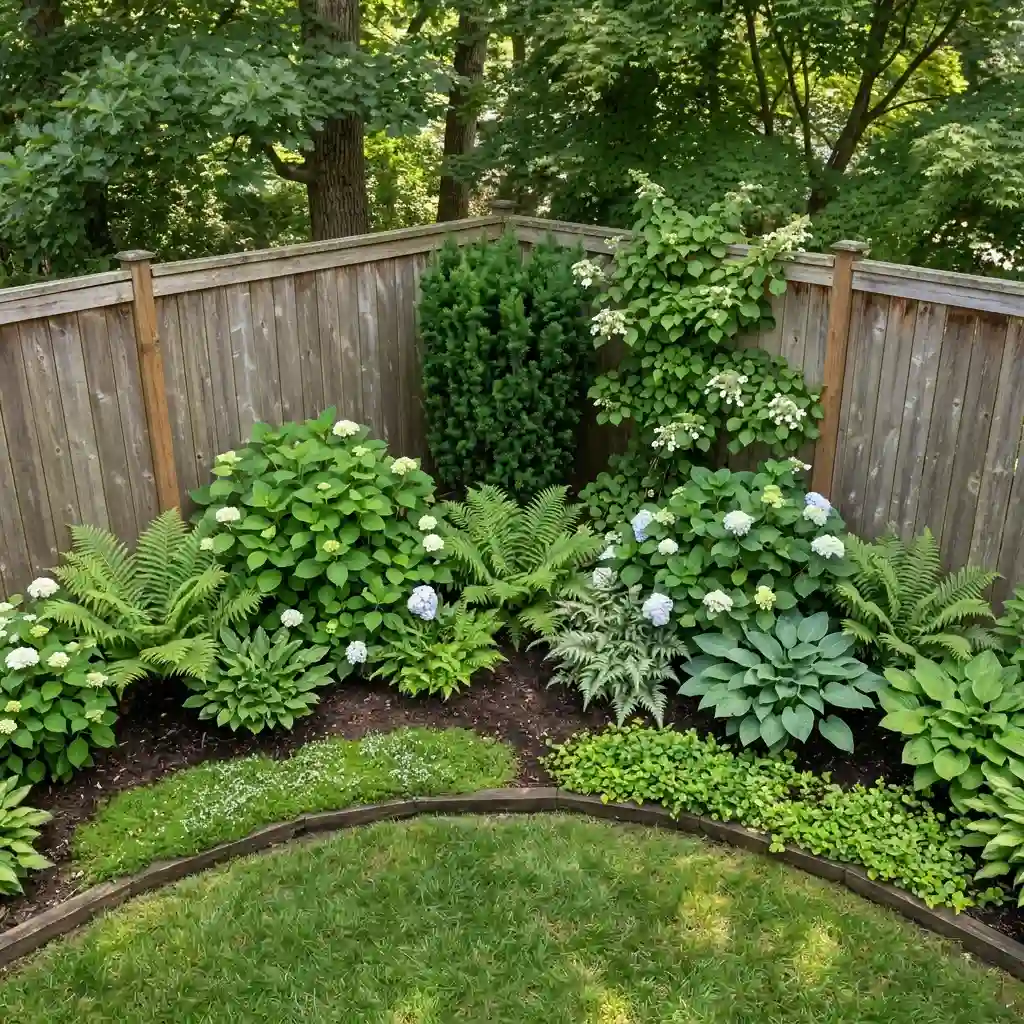
The point where two fence sections meet often looks bare and harsh. A curved corner flower bed can hide that hard angle and provide year-round interest.
Create a broad curve across the corner rather than placing a small circle directly in front of it. The added depth gives you room for several plant layers.
Start with an evergreen shrub or climbing plant at the back. Add flowering shrubs, ferns, or perennials in the middle. Finish with low ground cover beside the lawn.
Check every plant’s mature width before buying it. A small nursery shrub may spread several feet after a few years. Crowded plants can block air, hide the curve, and create more cutting work.
For a partly shaded corner, you could combine an evergreen shrub with hydrangeas, ferns, and a low native ground cover suited to your region.
9. Keep a Cottage Border Pretty With a Clean Edge
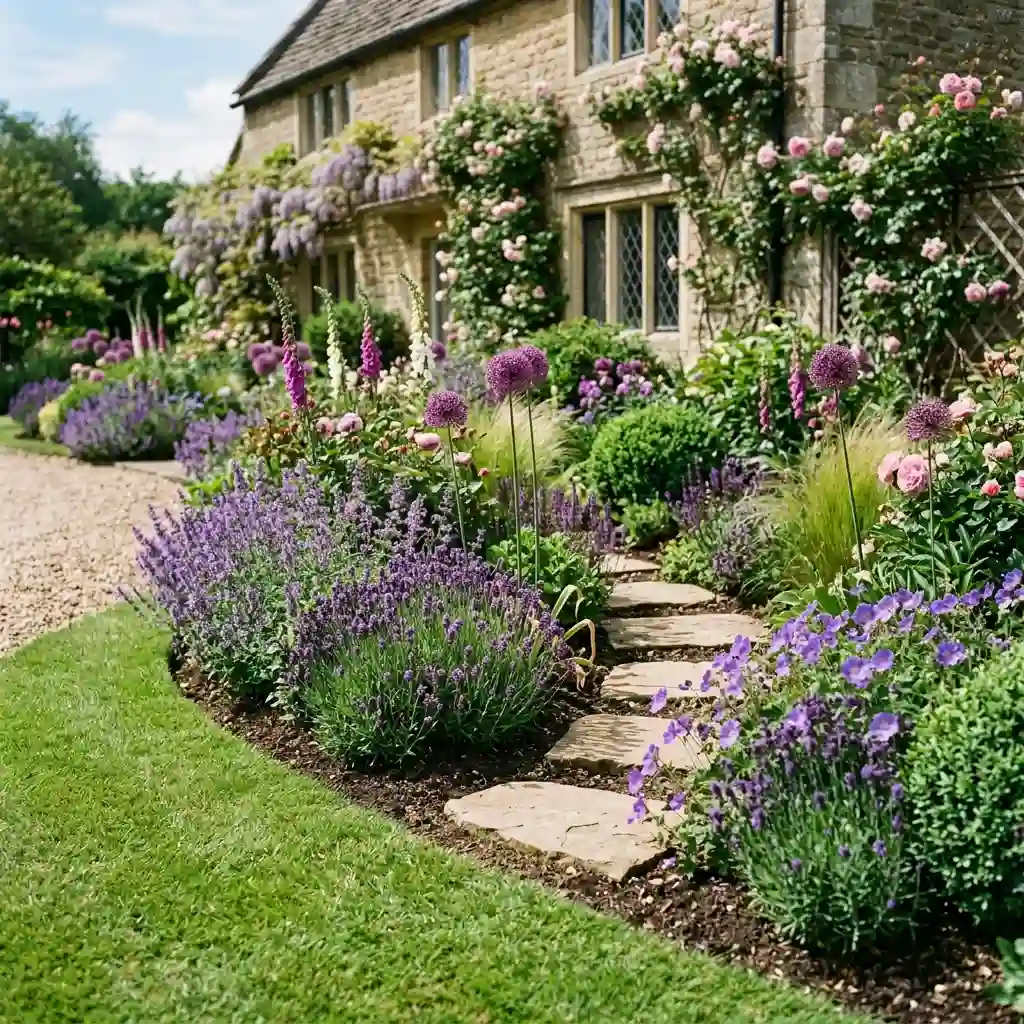
A cottage garden can look relaxed without becoming messy. The secret is pairing loose planting with a clear curved edge.
Mix perennials, annuals, herbs, bulbs, and a few compact shrubs. Roses, hardy geraniums, catmint, alliums, lavender, and foxgloves can create a classic look where growing conditions suit them.
Repeat key plants and colors along the border. For example, use the same purple flower in three or five places. This connects the different parts of the bed.
Plan for several seasons. Spring bulbs can appear before summer flowers. Ornamental grasses, seed heads, and evergreen shrubs can add interest later in the year.
Leave a few flat stepping stones inside deep beds. They will give you a place to stand when pulling weeds or cutting flowers.
These curved flower bed ideas work because the planting feels free while the outer line stays neat.
10. Show Off the Curve With Ornamental Grasses
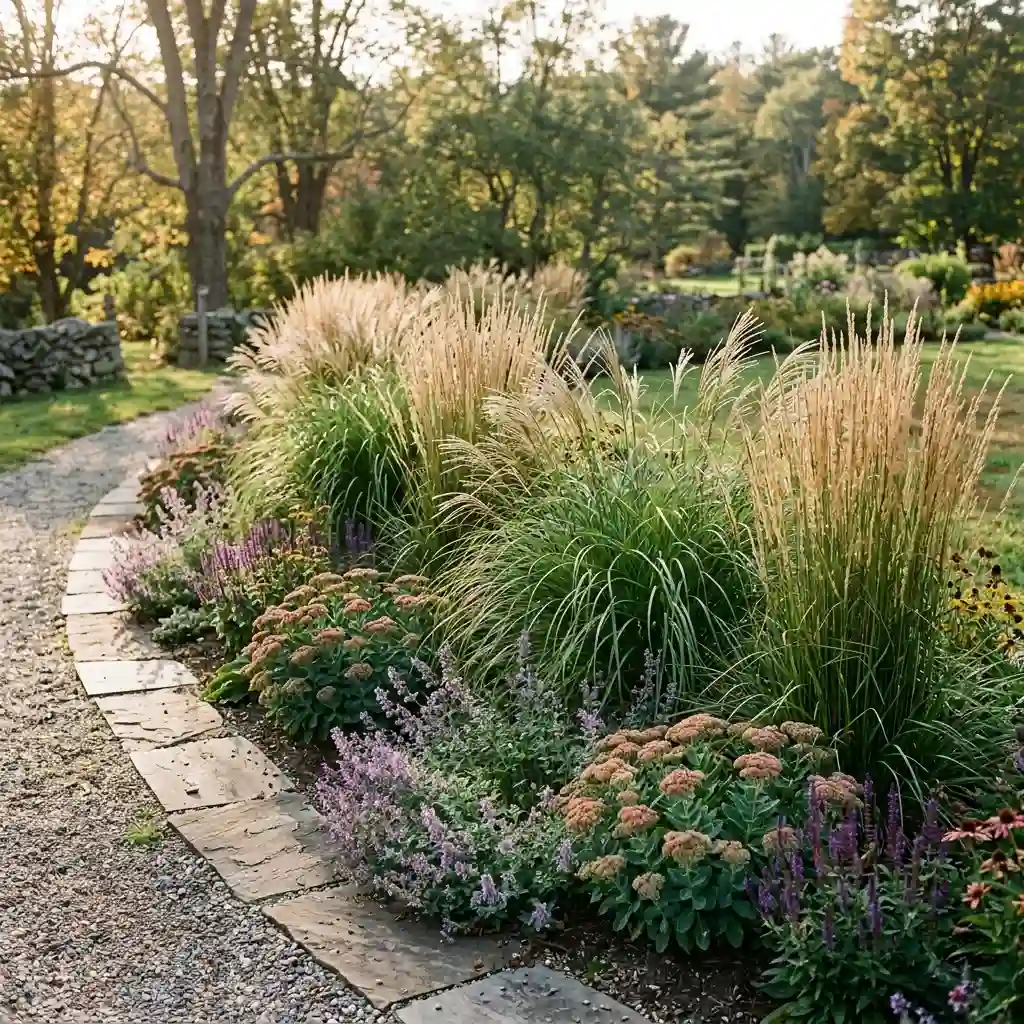
Ornamental grasses add movement and make a long curve easier to see. Their upright or arching shapes also contrast well with low, rounded plants.
Repeat three, five, or seven grass clumps along the bed. Odd-numbered groups often feel less rigid than matching pairs. Leave enough space between clumps for their mature width.
Mix upright grasses with low plants such as sedum, catmint, or compact flowering perennials. The lower plants show the edge while the grasses add height.
Choose grasses for your climate, soil, and available sunlight. Some types spread by seed or underground stems and may require extra control. Check their growth habit before planting.
Do not cut every grass at the first sign of cold weather. Some provide useful winter shape. However, damaged or weak growth may need removal based on the plant and local climate.
11. Improve Your Curb Appeal With a Small Mailbox Bed
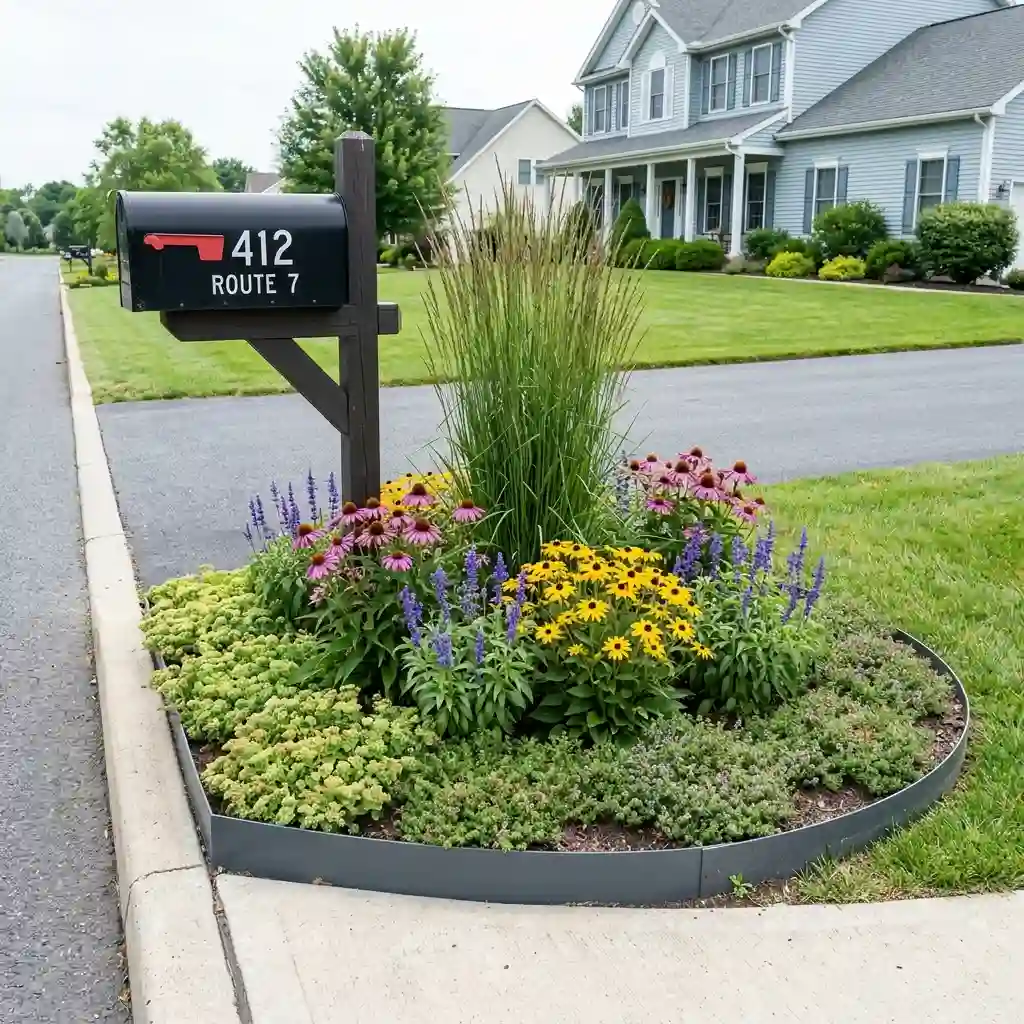
A small curved flower bed around a mailbox is a good weekend project. It adds color without changing the full front yard.
Keep the bed in scale with the mailbox. A simple oval, half-circle, or gentle curve is usually enough. Leave a clear path for mail delivery and avoid blocking the house number.
Roadside conditions can be hard on plants. The soil may be compacted, hot, dry, or exposed to road salt. Choose dependable plants that can handle your local conditions.
Use a simple three-part layout:
- One compact shrub or sturdy grass as the main plant
- A group of hardy perennials for color
- A low ground cover along the edge
Avoid tall, floppy flowers near the road. They may fall into traffic or hide the mailbox. A small design with three plant types is often easier to care for than a crowded mix.
12. Slow Water on a Slope With Curved Planting Bands
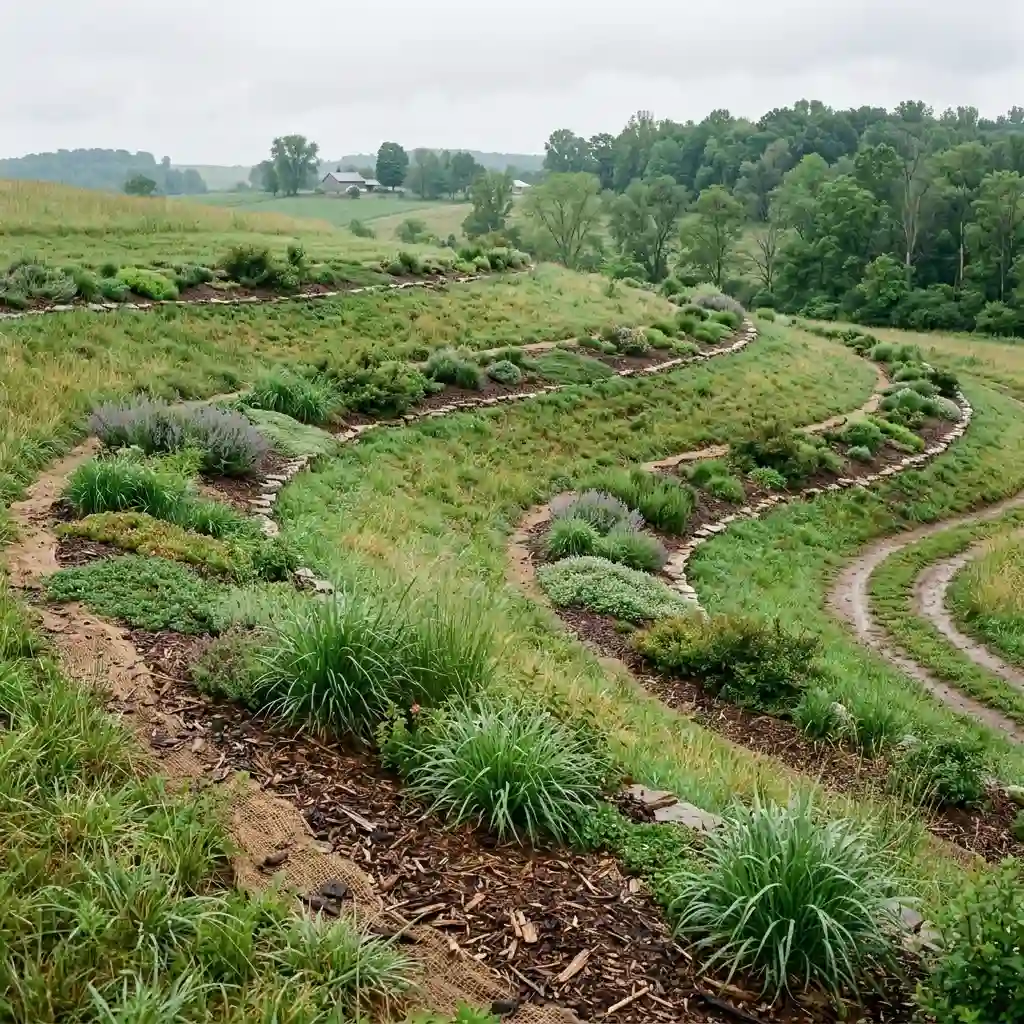
Curved garden beds on a slope can help break up a plain bank. When planned well, the bands may also slow water moving across exposed soil.
Run the planting lines across the slope instead of straight down it. Water can move quickly through channels that point downhill. Curves that follow the land can break up those direct routes. Iowa State Extension notes that planting along land contours can limit easy paths for runoff.
Use spreading ground covers, grasses, shrubs, and other plants suited to the site. Their leaves help shield soil, while roots can help hold the surface.
New plants need support before their roots fill the bed. Mulch, erosion-control fabric, or small terraces may be needed.
Steep or unstable slopes require extra care. Ask a qualified landscape or drainage professional for help if you see moving soil, deep channels, or water near a building.
13. Turn a Drainage Route Into a Curved Dry Creek
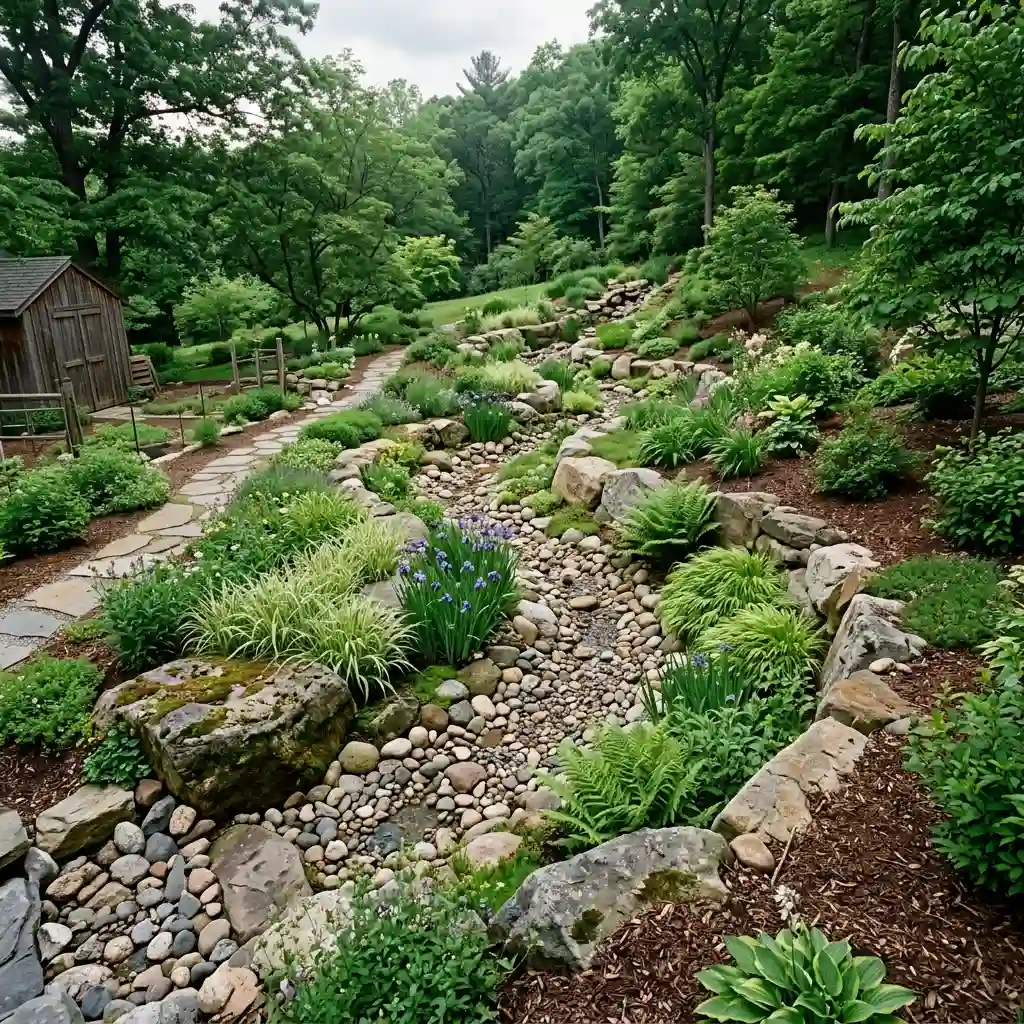
A curved dry creek bed can guide rainwater while adding a natural-looking feature. It works best when water already follows a clear path through the yard.
Mark a loose curve from the high point to a safe outlet. Avoid a perfect wave. Natural streams have wider bends, narrow sections, and small changes in direction.
Use several stone sizes. Place larger rocks at bends and grade changes. Fill the center with smaller river rock or gravel. Set some stones partly into the soil so they do not appear placed on top.
Add sedges, irises, ferns, or moisture-friendly native plants beside areas that stay damp. Use dry-soil plants near the upper edges.
A dry creek should never send water at your house or a neighboring property. Check local drainage rules before changing the route. For serious flooding, get advice from a drainage professional.
14. Give a Modern Bed a Clean Steel Edge
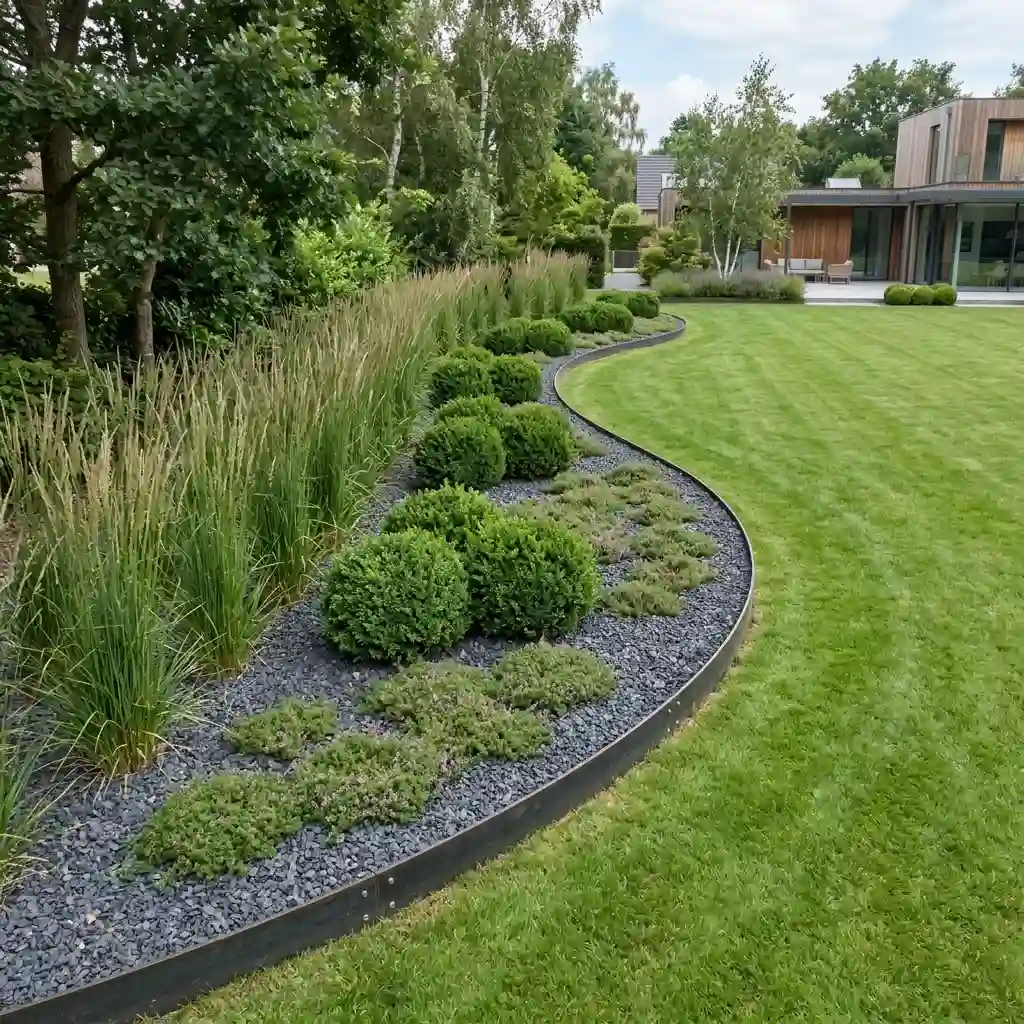
Steel or aluminum edging can hold a smooth curve without creating a heavy border. It works well in modern yards with a limited range of plants and materials.
Use one broad curve beside a patio, walkway, or open lawn. Fill the bed with repeated blocks of plants instead of many single varieties. Upright grasses, rounded shrubs, and low ground covers make a strong mix.
Dark mulch or charcoal gravel can create contrast with green leaves. Gravel is not perfect for every location. It can move onto the lawn and may become hot in full sun.
Set metal edging deep enough to remain stable. Follow the maker’s directions and cover or connect exposed ends. Sharp edges should never sit beside a play area or busy walkway.
Corten steel develops a rusty finish. Aluminum does not rust, but it may shift if the soil is loose.
15. Add Height With a Curved Brick or Stone Bed
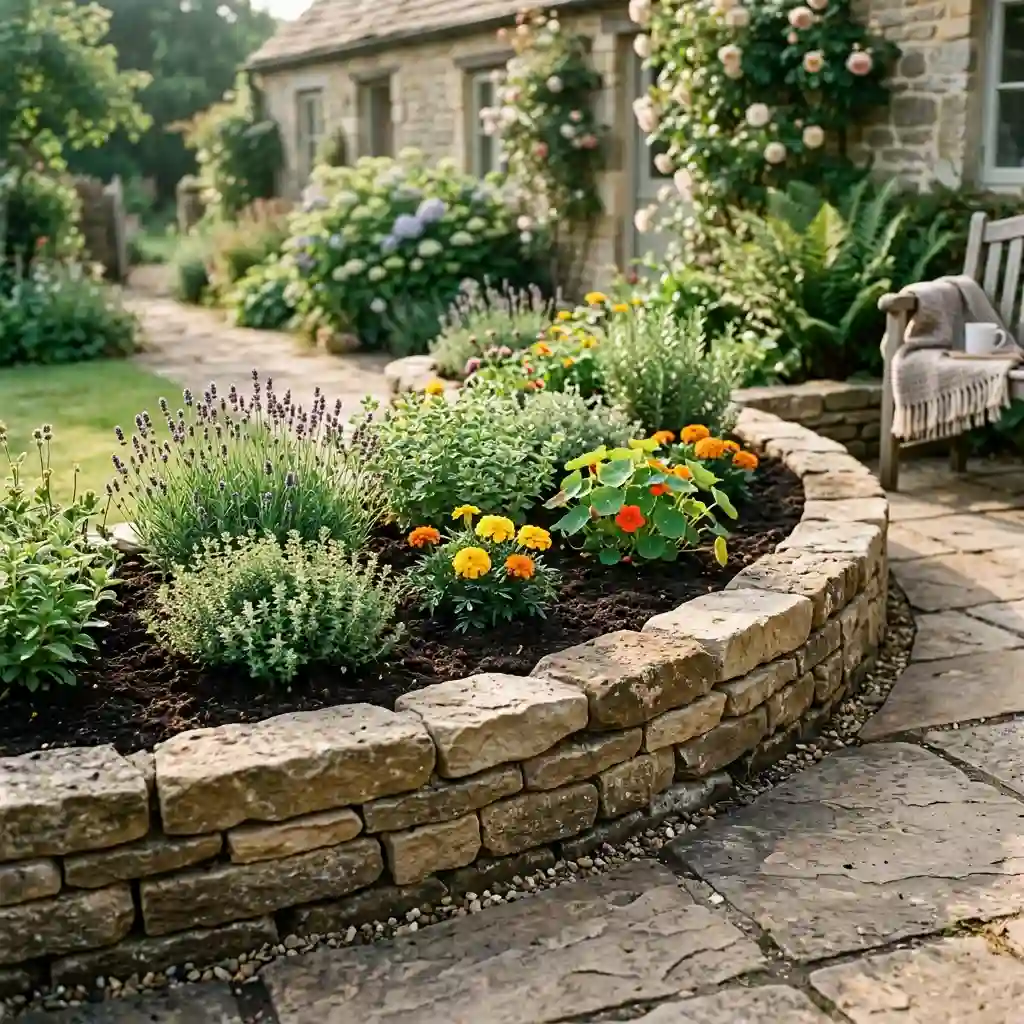
A curved raised garden bed brings plants closer to eye level. It can also add seating and structure beside a patio.
Use brick, natural stone, or modular blocks that can form gradual curves. Small pieces handle bends better than long, rigid materials. Lay out the first row before using mortar or adhesive.
Keep the bed narrow enough to reach the center without stepping on the soil. If you can approach it from one side, a reach of about two feet is comfortable for many people. A bed with access from both sides can be wider.
Make sure water can leave the bed. Trapped water may damage plants or push against the wall. Taller walls may require a firm base and professional construction.
Match the material to your house or patio. A low stone bed filled with herbs and compact flowers can make the two areas feel connected.
How to Mark a Natural Curve Before You Start Digging
A good curve should look planned from every place where you will see it. Test the shape before removing any grass.
Start with a flexible garden hose, rope, or extension cord. Place it where you want the new edge. Use a few broad bends instead of many small waves.
Next, view the line from several spots:
- Your main windows
- The front or back door
- The driveway
- The street
- The patio or deck
- The main walking path
Adjust any area that looks too narrow or sharp. Measure the bed at several points. Make sure the deepest sections can hold your planned plant layers.
Push your mower or wheelbarrow around the marked line. This quick test will show you where a turn is too tight.
When you are happy with the shape, mark it with flour or landscape paint. Cut the edge with a half-moon tool or flat spade. A sod cutter can save time on a large bed.
Check for buried utility lines before you dig or install stakes. In the United States, 811 provides a free contact service for utility marking. Rules and contact services differ by country, so use your local service. Call 811
Plants need room to reach their full size. A new bed may look open at first. That is better than filling every gap and moving crowded plants later.
How to Pick Edging That Follows the Curve
The right edging holds the shape without making installation harder than it needs to be. Each material has a different cost, look, and care level.
| Edging material | Best use | What to consider |
| Steel | Thin, modern curves | Can cost more and may have sharp ends |
| Aluminum | Flexible curves | May move in loose soil |
| Plastic | Low-cost projects | Can warp or rise above the soil |
| Brick | Traditional gardens | Tight curves create more joints |
| Natural stone | Cottage-style beds | Uneven pieces take longer to set |
| Concrete blocks | Curved raised beds | Broad curves are easier to build |
| Spade-cut edge | Natural lawn borders | Needs regular recutting |
A spade-cut edge is the least visible option. It can look clean, but grass may move back into the bed. Plan to recut it during the growing season.
Metal edging creates a thin, steady line. Brick and stone add more visual weight. They work best when the same material appears elsewhere in your yard.
These garden bed edging ideas can all work. Choose based on your soil, budget, climate, and the amount of care you can provide.
How to Layer Plants Without Hiding Your Curve
A clear planting plan will help the curve remain visible after the plants grow. Arrange plants by height, width, and viewing angle.
Use this simple three-layer formula:
- Low plants at the edge: Ground covers and compact flowers keep the outline visible.
- Medium plants in the middle: Perennials and small grasses create fullness and color.
- Tall plants as anchors: Shrubs, large grasses, or small trees add height and structure.
In a bed viewed from one side, place tall plants near the back. In an island bed, place them near the center. Set the tallest feature slightly off-center for a less formal look.
Repeat plant groups along the line. Repetition helps your eye follow the shape. It also creates a calmer design than using a different plant in every space.
Check mature plant sizes before deciding how many to buy. Nursery plants may look small, but some can double or triple in width.
Finally, match every plant to the site. Check sunlight, soil moisture, drainage, climate, and local growing guidance. A strong layout cannot fix a plant that is growing in the wrong conditions.
Start With One Simple Curve
You do not need to reshape your whole yard at once. Start with one area that feels stiff, empty, or hard to maintain.
Connect the bed to an existing feature such as a tree, walkway, driveway, fence, or patio. Mark one broad curve with a hose. Then view it from several places before you cut the lawn.
Choose edging that can hold the shape. Repeat a few dependable plants and leave room for growth. These steps will help the bed look planned instead of crowded.
Use these curved garden bed ideas as a starting point. Adjust the size, plants, and materials to fit your climate, budget, and the way you use your yard.
Meta description: Explore 15 curved garden bed ideas for lawns, trees, patios, slopes, and small yards, plus practical tips for edging, layout, and planting.