
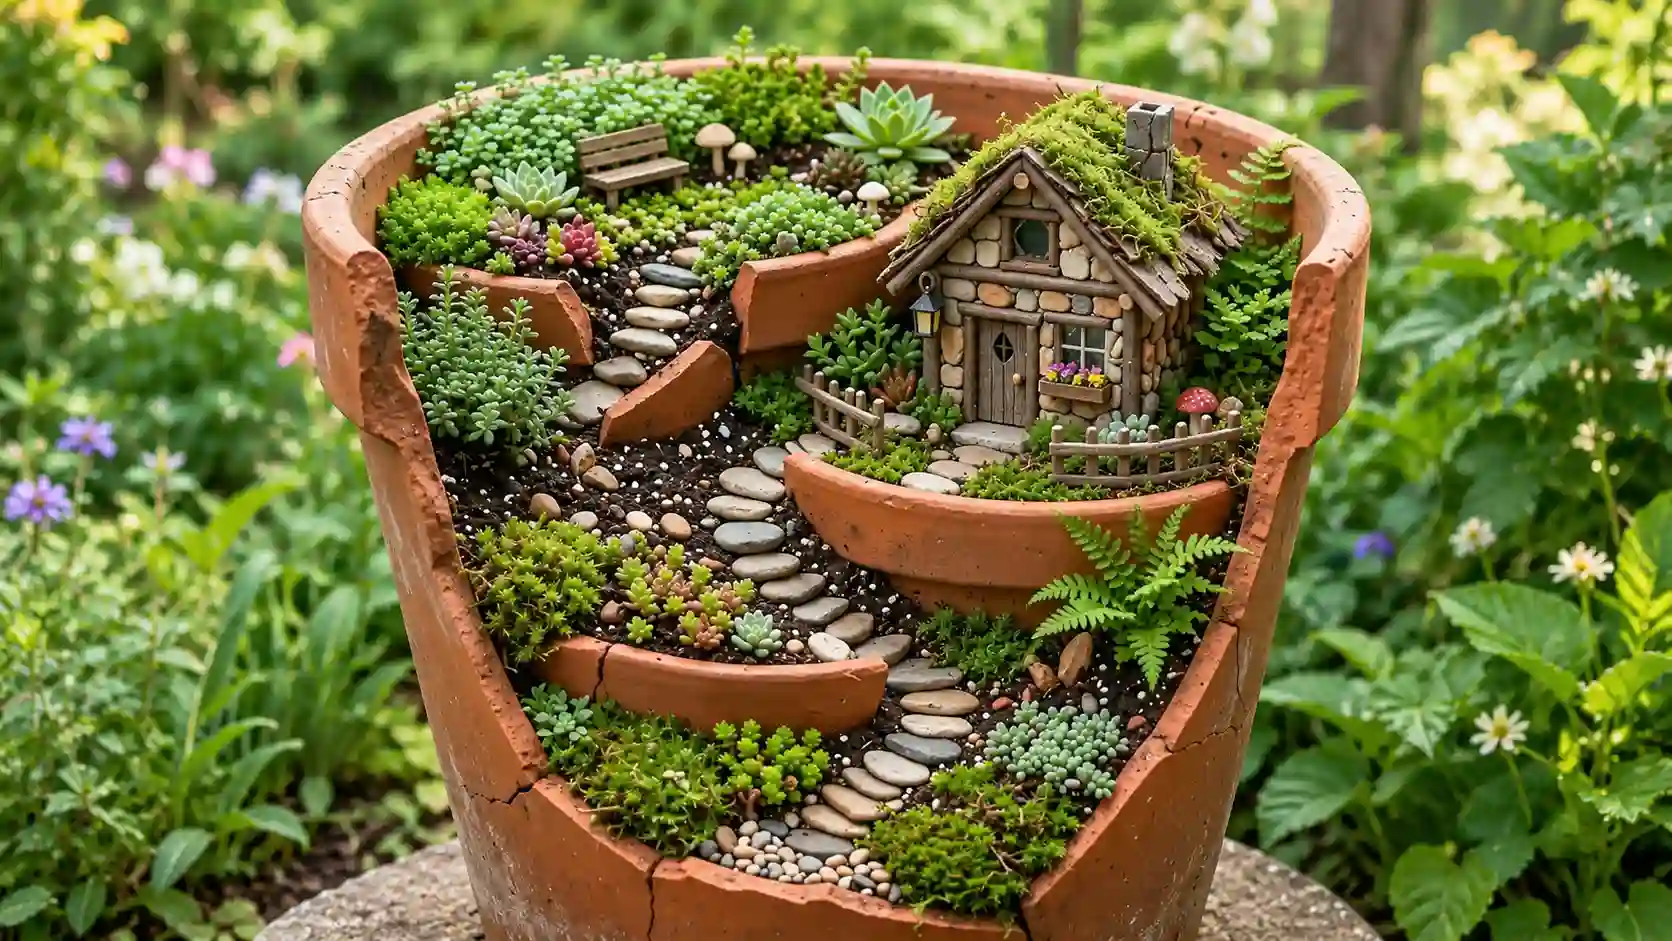
You do not need a large yard to create a tiny garden full of character. Still, many fairy garden ideas look easier in photos than they are in real life.
Where should you place the garden? Which plants will stay small? How do you stop the scene from looking crowded? You may also wonder if the decorations will survive rain, sun, and curious children.
The good news is that you do not need an expensive kit. You can use an old pot, fallen twigs, small stones, thrifted dishes, or a quiet corner beneath a shrub.
Below, you will find 19 designs for containers, flower beds, tree bases, balconies, and indoor shelves. These DIY fairy garden ideas include plant suggestions, setup tips, and simple ways to care for each scene. You will also learn how to choose durable fairy garden accessories and keep every detail in scale.
Start small. One house, one path, and a few well-placed plants can tell a complete story.
Plan a Fairy Garden That Fits Your Space
Choose the location before you buy plants or decorations. Check how much direct sun the spot receives each day. A sunny patio needs different plants from a shaded shelf or tree base.
Next, decide if you want a living garden or a decorative display. Living gardens need drainage, suitable soil, sunlight, and regular care. Plant-free scenes work well in dark rooms or homes where watering may be missed.
Think about size as well. A 12-inch pot may have room for one house, one plant, and a short path. A half-barrel can hold several plants and a wider scene.
Scale matters in every fairy garden layout. Place the door beside your largest figure before arranging the full display. If the figure looks too large for the door, the finished scene may feel uneven.
Choose one main feature. It might be a cottage, bridge, tree door, or campsite. Add two or three supporting details instead of filling every open space.
Use this quick planning check:
- How much sun does the spot receive?
- Can extra water drain away?
- How large is the available space?
- What theme will guide your choices?
- How much do you want to spend?
Quick Comparison of the 19 Ideas
| Idea type | Best location | Care level | Cost |
| Pot or teacup | Patio or indoors | Low to medium | $ |
| Crate or wheelbarrow | Porch or yard | Medium | $$ |
| Natural woodland scene | Shaded outdoor area | Medium | $ |
| Tree or flower-bed scene | Garden | Medium | $–$$ |
| Family theme | Patio or yard | Medium | $ |
| Plant-free display | Shelf or covered porch | Low | $ |
Cost key: $ uses mostly found or reused pieces. $$ may need a container, plants, or several bought accessories.
Container Fairy Garden Ideas for Small Spaces
Containers are useful when you rent, have a small garden, or want a portable display. You can move them when sunlight changes or severe weather arrives.
1. Create a Fairy Garden in a Terracotta Pot
Best for: Patios, balconies, and beginners
Light: Based on your chosen plants
Cost: $–$$
Difficulty: Easy
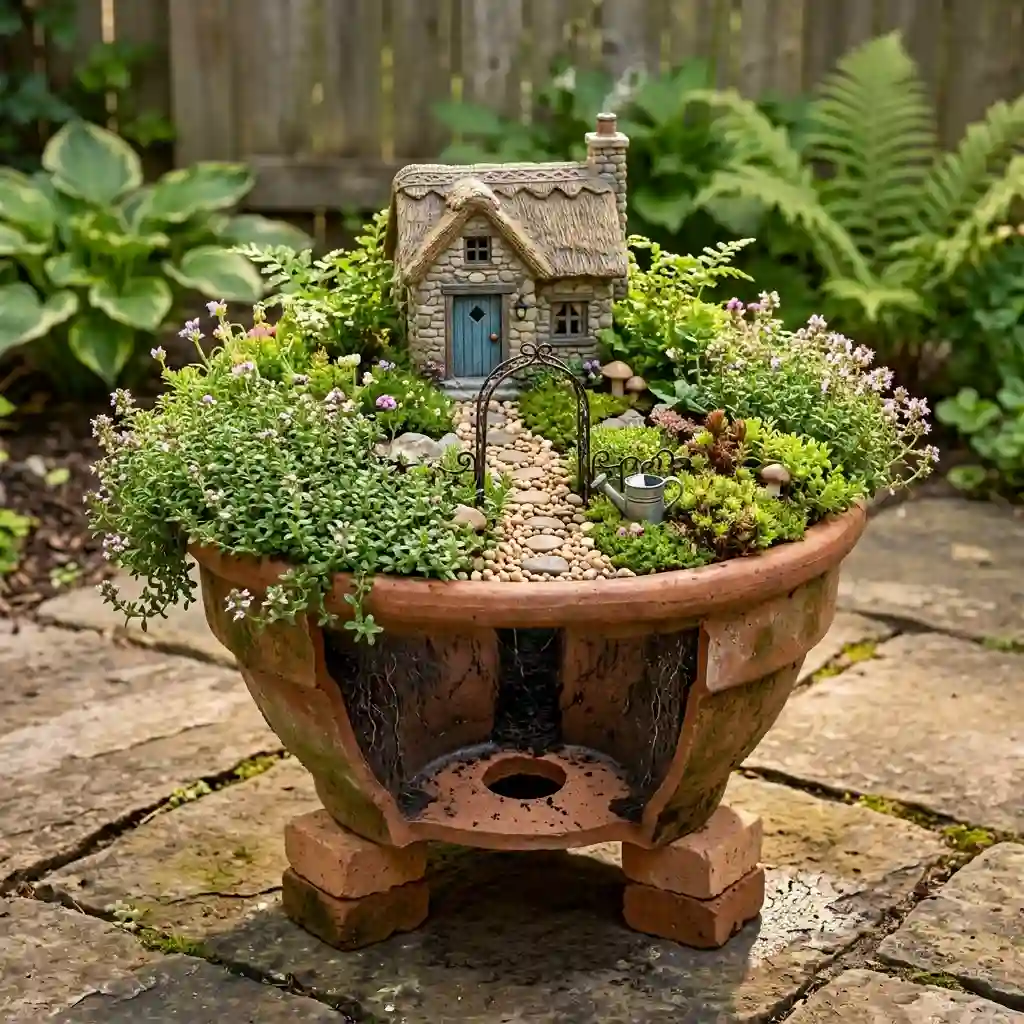
A wide terracotta pot gives you enough room to create a clear scene. Choose one with a drainage hole so plant roots do not sit in wet soil.
Place a small house near the back. Build a path from the front edge to the door. Add creeping thyme around the sides if the pot receives strong sun and the plant suits your climate.
Paint the outside if you want more color. Leave the inside unpainted unless the product is made for plant containers.
Set outdoor pots on feet or small blocks. This keeps the drainage hole open and helps water escape.
2. Build a Broken-Pot Fairy Village
Best for: Layered outdoor displays
Light: Sun or partial shade
Cost: $
Difficulty: Moderate
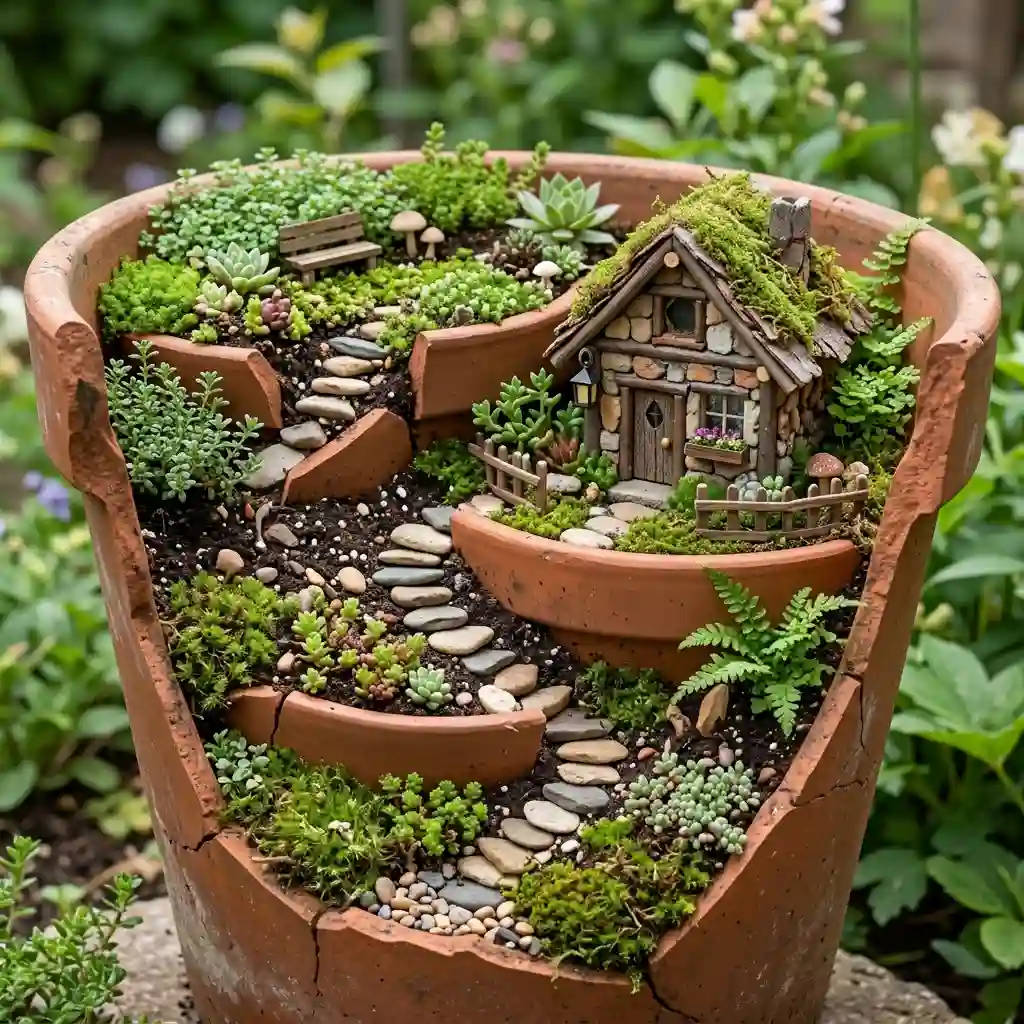
A cracked terracotta pot can become a small village with steps and raised planting areas. Use clean pot pieces to form terraces inside a larger container.
Cover or sand every sharp edge. Press each piece firmly into the soil so it cannot fall. Small flat stones can form steps between the levels.
Plant low ground cover at the top and place the main house on the widest level. Keep paths clear so the different areas remain easy to see.
This project is less suitable for young children. Even covered pottery pieces can move and expose a sharp edge.
3. Turn a Wooden Crate Into a Miniature Garden
Best for: Rustic porch or balcony displays
Light: Based on plant choice
Cost: $–$$
Difficulty: Easy
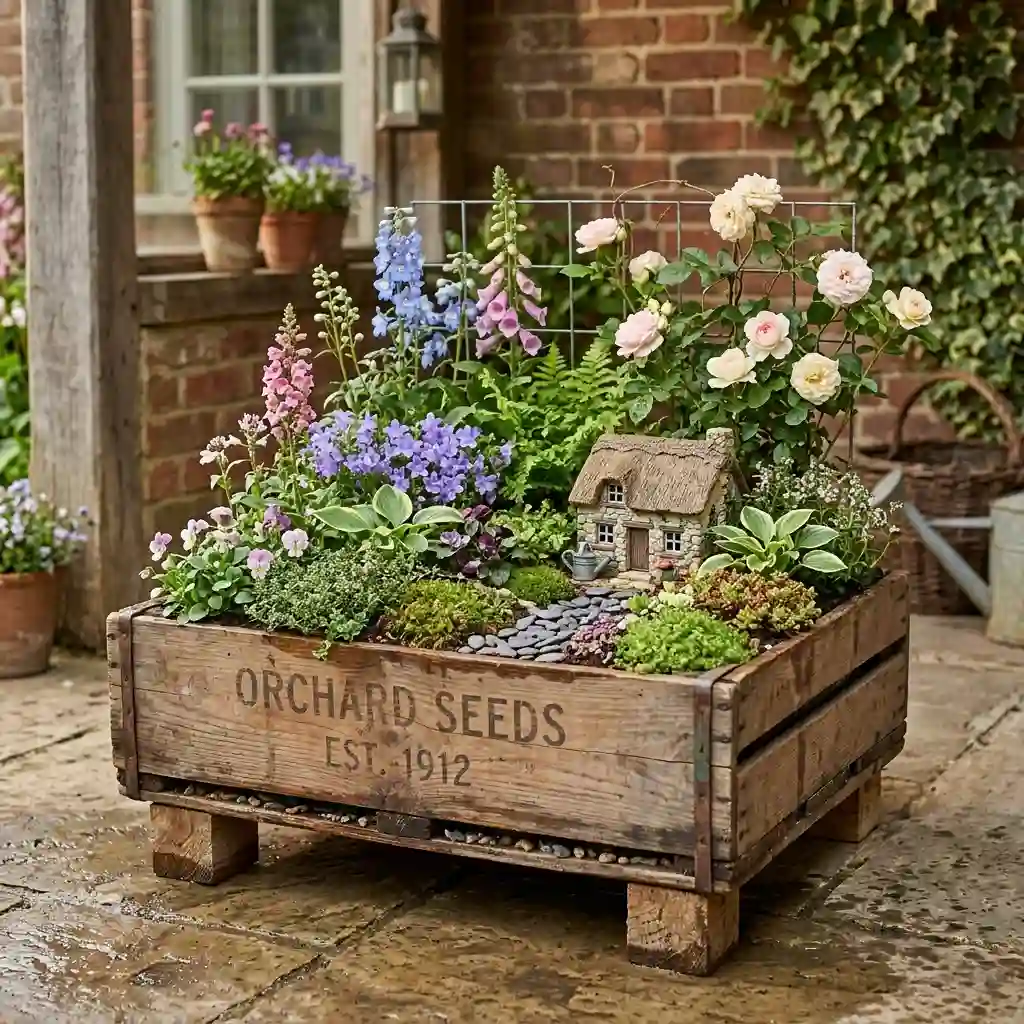
A reclaimed wooden crate creates a wide planting area without taking up much floor space. It works well for a farm, cottage, or tiny market theme.
Line the inside with a suitable planter liner. Make openings where water can escape. Do not cover existing drainage gaps.
Raise the crate above wet paving or soil. Untreated wood can rot if it remains damp. A plant-safe outdoor finish may help, but even protected wood will age.
Place taller plants at the back and open story areas at the front. This makes the scene easier to view.
4. Use a Wheelbarrow as a Portable Fairy Garden
Best for: Large patios and changing seasons
Light: Sun or partial shade
Cost: $$
Difficulty: Moderate
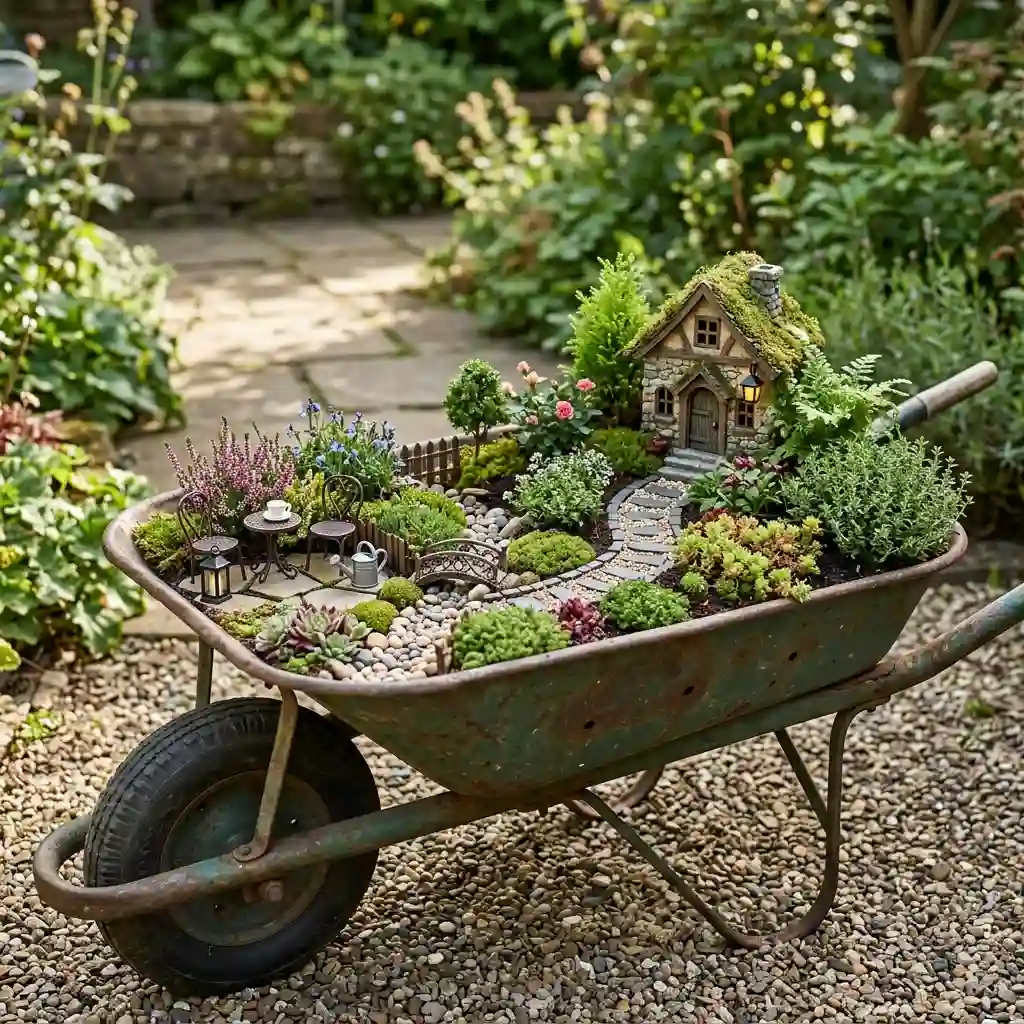
An old wheelbarrow offers more room than a standard pot. It also lets you move the garden if a spot becomes too hot or shaded.
Make sure the tray has drainage holes. Add potting mix suited to your plants, then divide the space into planting and story areas.
A cottage can sit near the handles. A curved path can lead past plants to a small seating area near the wheel.
Check the tire and handles before moving it. Remove or secure loose figures first. A sudden bump can scatter pebbles and break small decorations.
5. Make a Teacup Fairy Garden
Best for: Desks, shelves, and party tables
Light: Bright indoor light
Cost: $
Difficulty: Easy
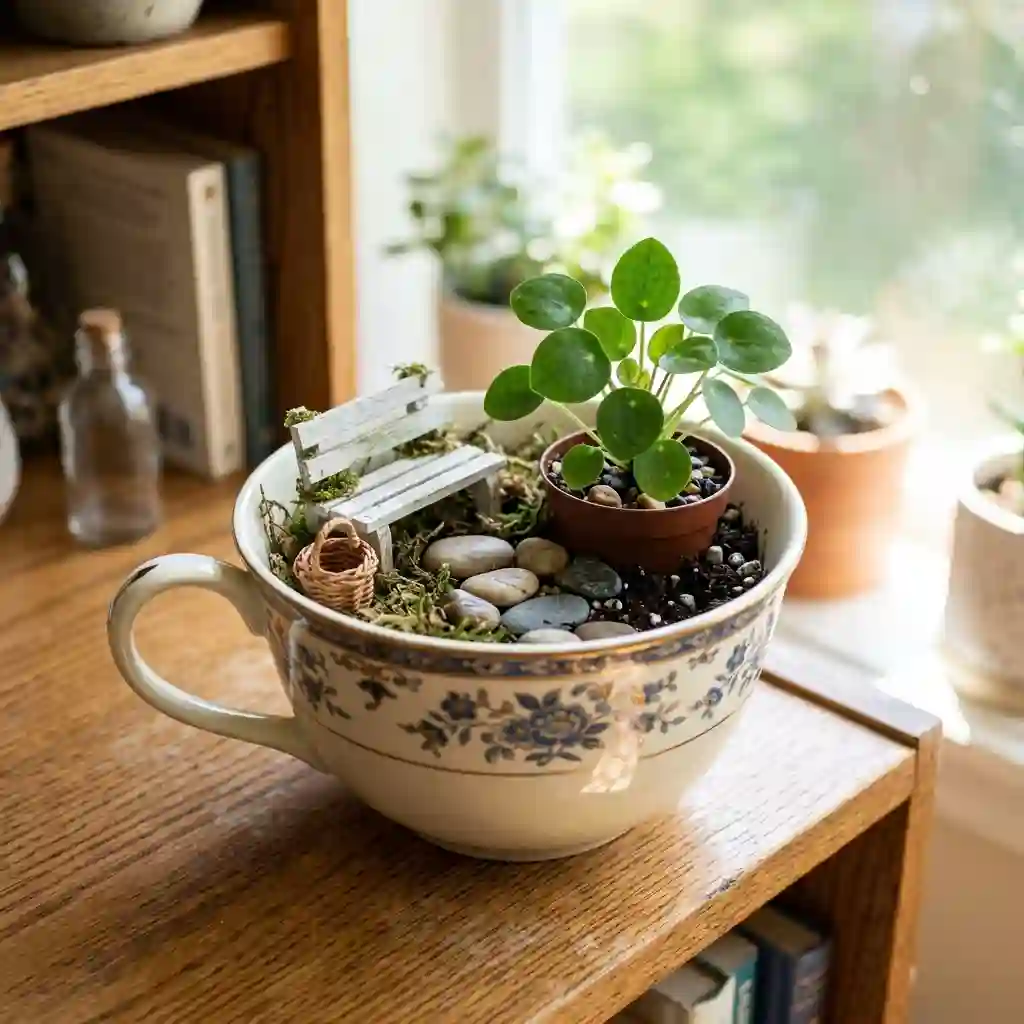
An oversized teacup makes a sweet indoor display. Use one small plant, a tiny seat, and a few stones. More pieces may make the cup look crowded.
Many teacups lack drainage holes. If yours does, add a small plant in a removable nursery pot. Take it out for watering and let extra water drain before returning it.
You can also make a plant-free scene with preserved moss. Preserved moss is decorative and does not need water.
Do not use live moss in a dry, sunny room. It needs the right moisture and light to remain healthy.
DIY Fairy Garden Ideas Using Natural Materials
You may already have useful supplies in your yard. Twigs, bark, pinecones, stones, and acorn caps add texture without making the scene feel too polished.
Collect natural materials where it is allowed. Do not remove living branches or protected plants.
6. Build a Twig Fairy House
Best for: Woodland and cottage themes
Light: Shade or partial shade
Cost: $
Difficulty: Moderate
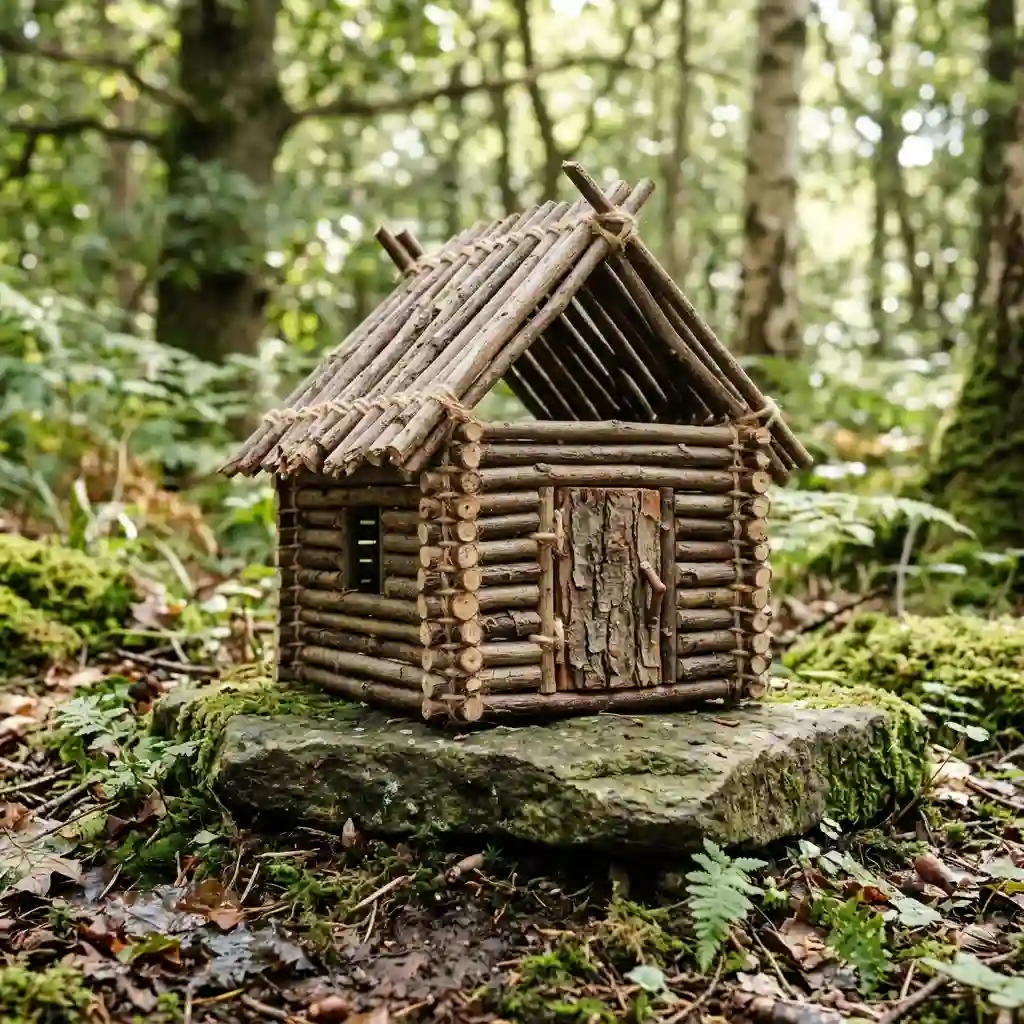
Gather dry fallen twigs of a similar thickness. Cut or snap them into short pieces for the walls and roof.
Tie the pieces with jute or join them with outdoor-safe adhesive. Leave small gaps between the twigs. Airflow helps the house dry after rain.
A bark piece can form the door. Use a flat stone as the base so the house does not sit in wet soil.
The wood will fade and break down over time. Check the house each season and replace soft or damaged pieces.
7. Create a Pebble Path and Tiny Patio
Best for: Almost any fairy garden
Light: Any
Cost: $
Difficulty: Easy
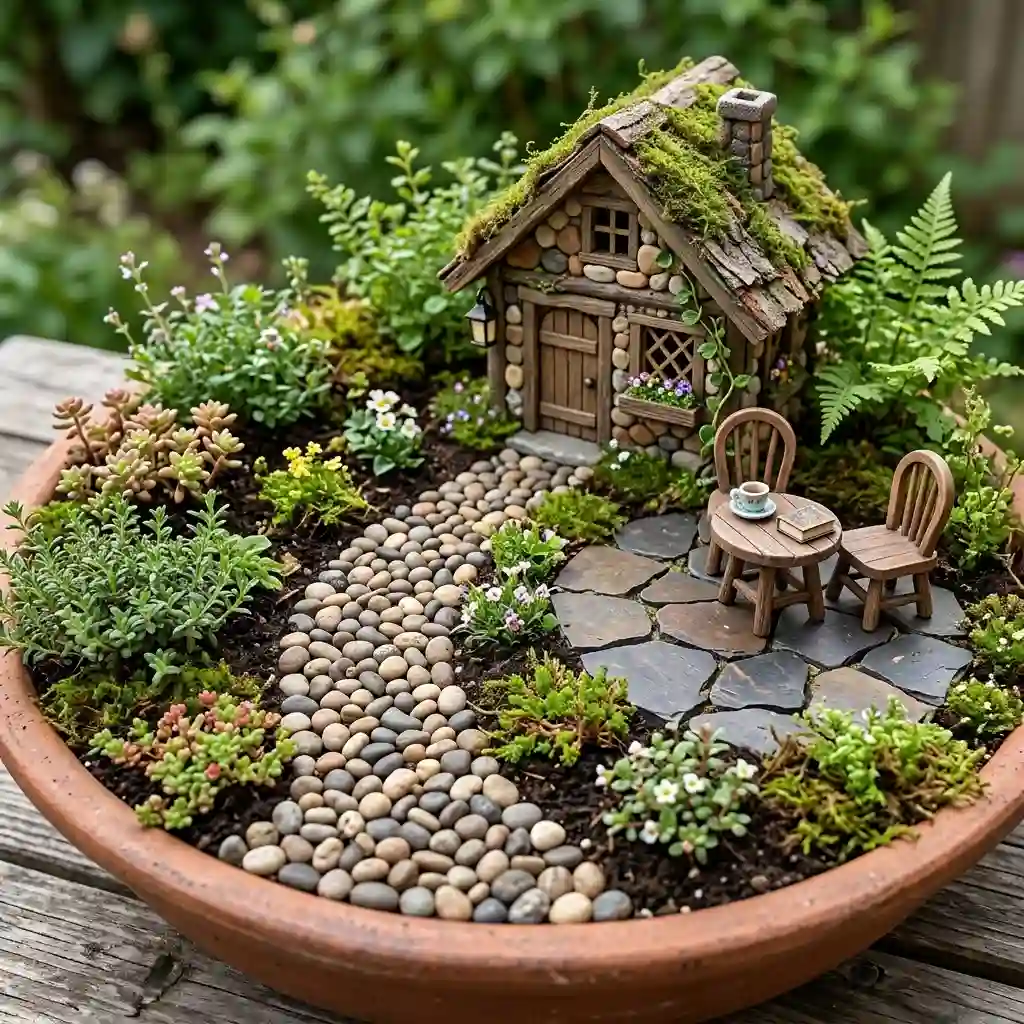
A path gives the garden a clear shape. Use aquarium gravel, small pebbles, or flat stones.
Make the path wider near the front and narrower near the house. This simple trick makes the scene appear deeper.
Press the stones into firm soil so they stay in place. For a larger ground-level path, landscape fabric beneath the stones may help reduce weeds.
Add a flat-stone patio beside the house. One table and two chairs are enough to make it feel used.
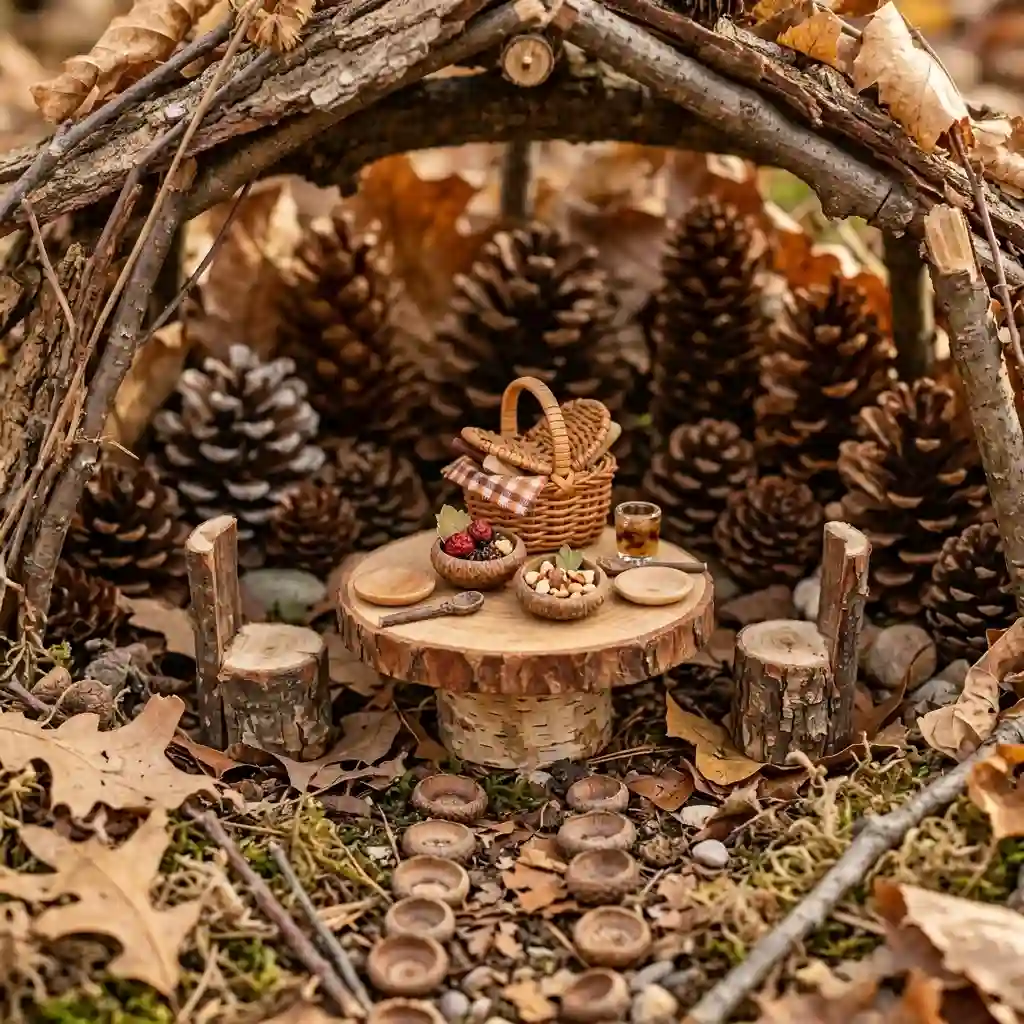
8. Make an Acorn and Pinecone Picnic Area
Best for: Fall displays and family projects
Light: A dry, covered spot
Cost: $
Difficulty: Easy
Turn acorn caps into tiny bowls or stepping stones. Use a short wood slice as a picnic table. Pinecones can become trees, fences, or woodland decorations.
Dry each item before placing it in the garden. Damp pieces may grow mold or break down quickly.
Keep the layout simple. A table, two log seats, and a small basket can tell the full story.
Natural pieces will decay outside. Treat that as part of the design and replace them when needed.
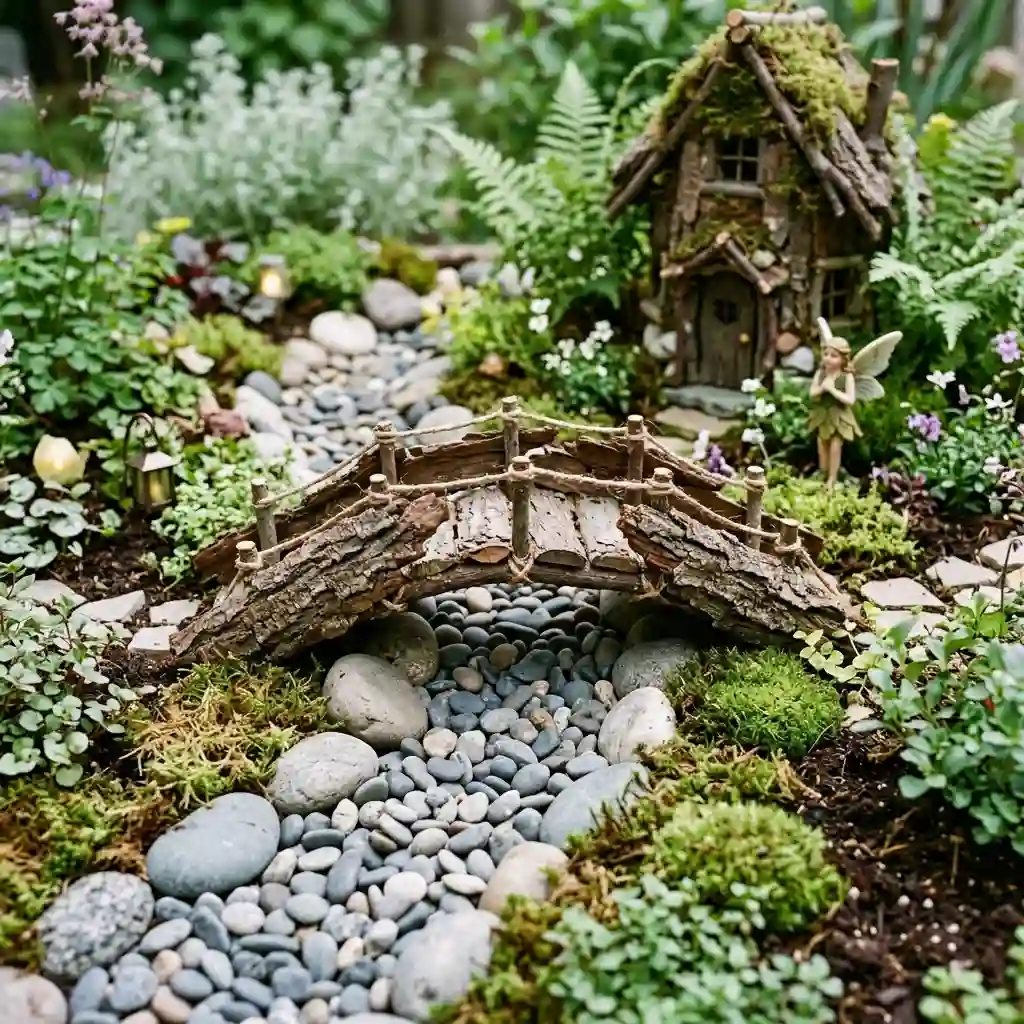
9. Add a Bark Bridge Over a Dry Creek
Best for: Outdoor pots and flower beds
Light: Any
Cost: $
Difficulty: Easy
Create a dry creek with pale gravel, blue glass stones, or smooth gray pebbles. Curve it through the garden so it looks more natural.
Lay a sturdy bark piece across the creek. Two flat twigs can also form a simple bridge. Keep it wide enough for the figures but small enough to match the house.
A dry creek is easier to care for than a tiny pond. It also avoids standing water, which may attract mosquitoes.
Secure glass pieces if children use the garden. Large, smooth stones are a safer choice for younger children.
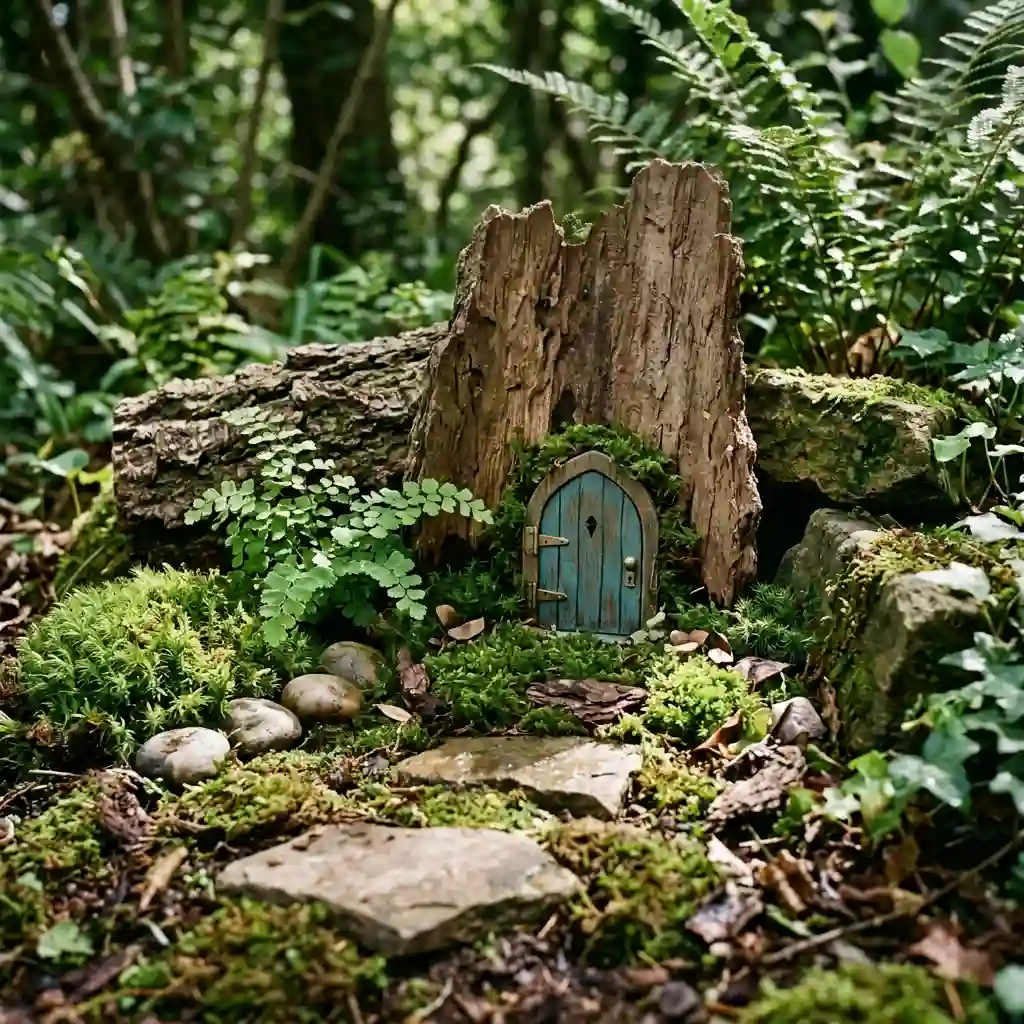
10. Build a Mossy Woodland Corner
Best for: Shaded, protected spaces
Light: Shade
Cost: $–$$
Difficulty: Moderate
Use bark, stones, a small fern, and a tiny door to create a woodland scene. Add moss only if it suits the location.
Live moss needs suitable shade and moisture. It may dry out in a sunny pot or heated room. Preserved moss works better for a dry indoor display, but it is no longer living and should not be watered.
Tuck the door against a stone or freestanding piece of wood. Add two or three stepping stones in front.
Keep fallen leaves from covering the scene. Wet debris can hold moisture against wooden decorations.
Fairy Garden Ideas for Flower Beds and Trees
Existing trees, shrubs, and garden paths can provide the setting. You may need only a door, a few stones, and one compact plant.
Take care around tree roots. Never pile soil or thick mulch against the trunk.
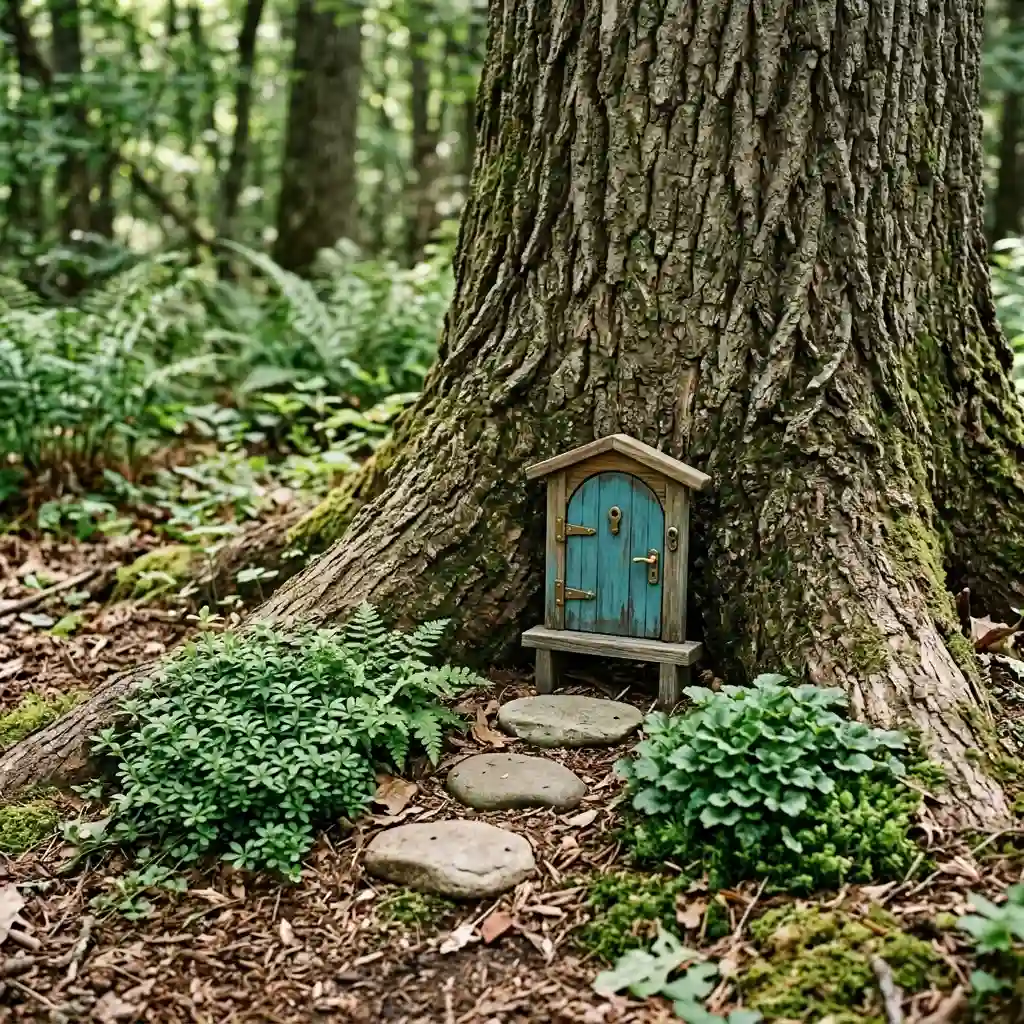
11. Add a Fairy Door to a Tree Base
Best for: Shaded yards
Light: Based on the tree canopy
Cost: $
Difficulty: Easy
A tiny door can turn a plain tree base into a complete scene. Mount it on a freestanding support when possible. Avoid nails or screws that may damage living bark.
Place three stepping stones in front of the door. Add one compact ground cover on each side if the growing conditions suit it.
Keep soil and mulch away from the trunk flare. This is the area where the trunk widens and meets the main roots.
One doorway and a short path are often enough. Extra furniture may make the area harder to clean.
12. Create a Hidden Corner Beneath Shrubs
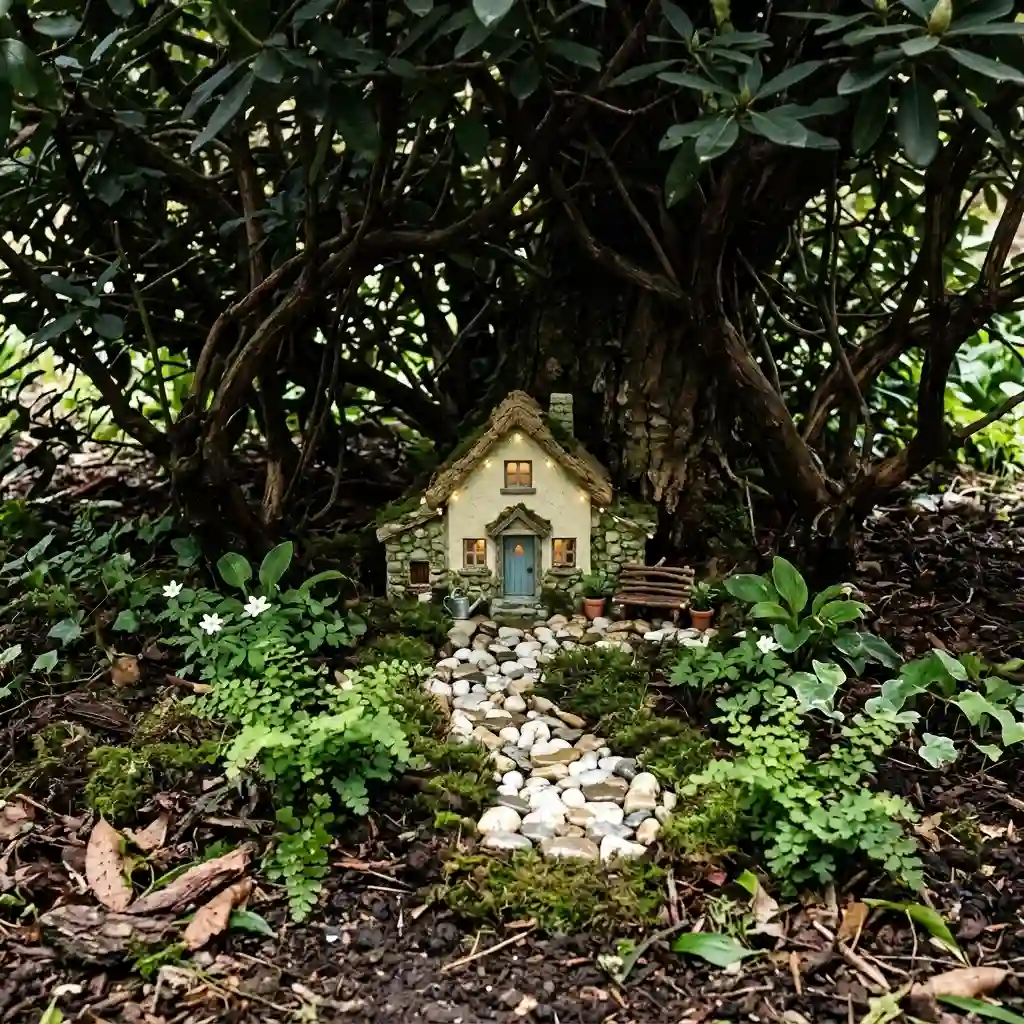
Best for: Forgotten shaded spaces
Light: Shade or partial shade
Cost: $
Difficulty: Easy
The space beneath a shrub can become a secret fairy retreat. First, check that you can reach the area for pruning, watering, and cleaning.
Choose pale stones or reflective decorations that remain visible in low light. A light-colored cottage also stands out beneath dark leaves.
Select plants for the real light and moisture levels. Small ferns may work in a moist, shaded site. Do not place sun-loving succulents there.
Leave enough open space around the shrub stems. Crowded decorations can make normal garden care difficult.
13. Build a Fairy Village Along a Garden Path
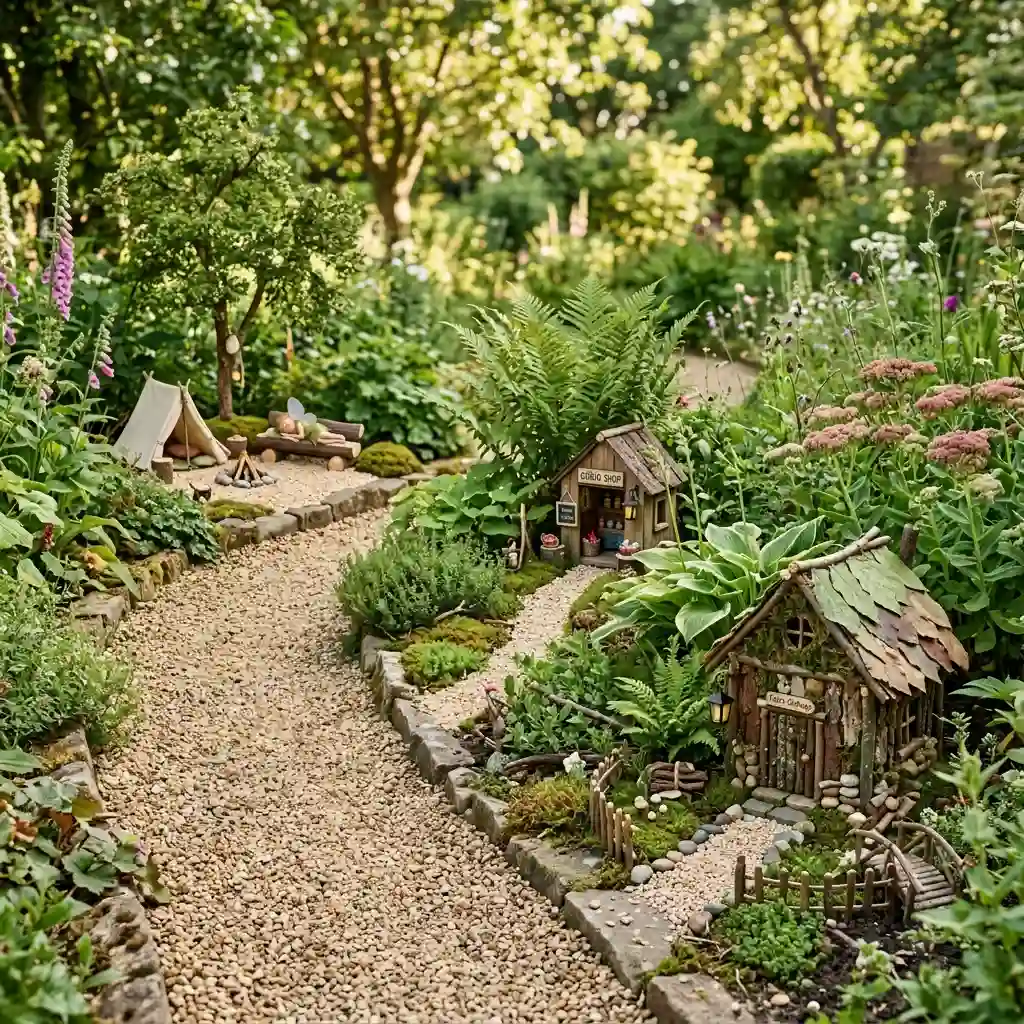
Best for: Long paths and larger gardens
Light: Mixed
Cost: $$
Difficulty: Moderate
Create several small scenes instead of crowding one large area. Place a house, shop, or campsite at different points along the path.
Connect the scenes with stones or narrow gravel trails. Repeating the same path material helps the village feel like one design.
Keep every accessory outside the normal walking area. Anchor lightweight houses and figures so wind or pets cannot move them onto the path.
Leave some empty space between each scene. It builds interest and gives visitors a reason to keep looking.
14. Turn a Tree Stump Into a Fairy Home
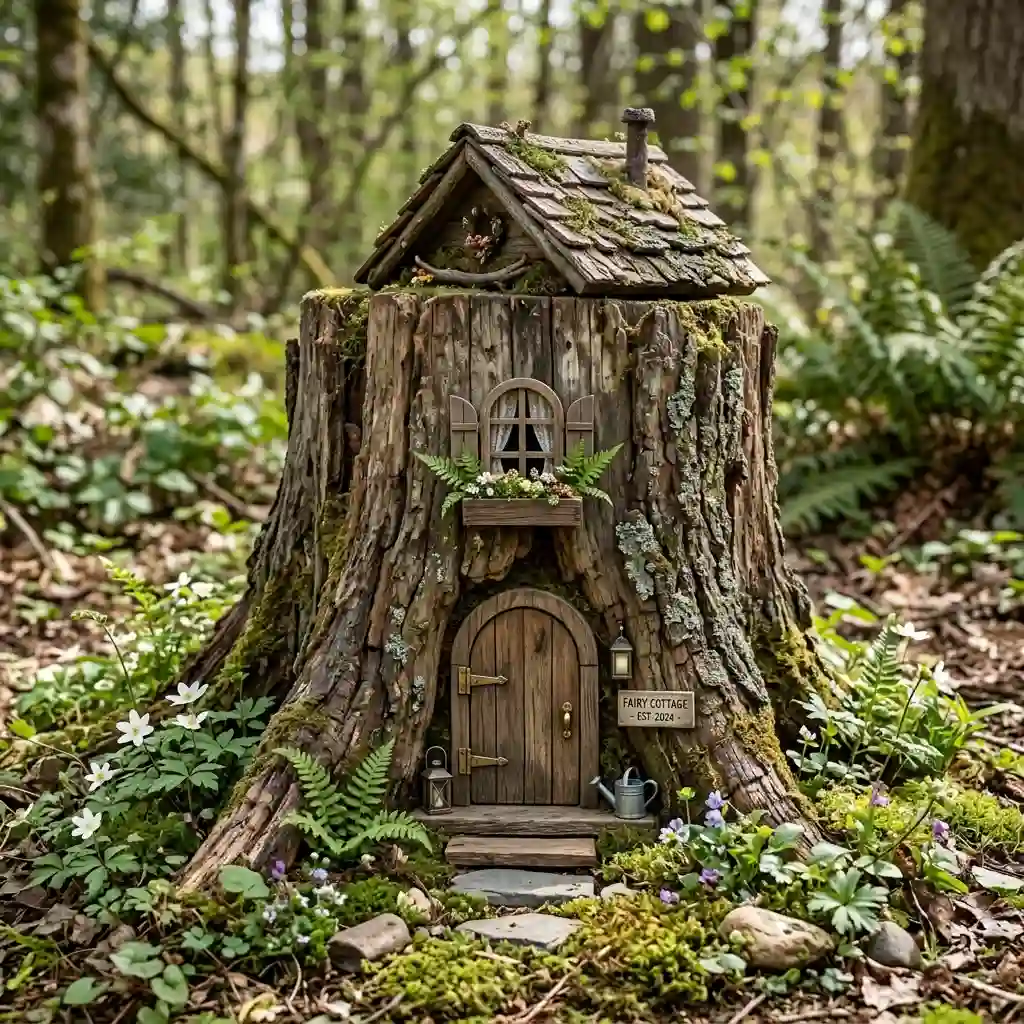
Best for: Old stumps in safe condition
Light: Sun or shade
Cost: $–$$
Difficulty: Moderate
Add a removable door and windows to make an old stump look like a fairy house. A small roof can sit on top if the surface is firm.
Inspect the stump before decorating it. Avoid one that feels unstable, contains sharp pieces, or has serious pest activity.
Do not coat the whole stump with a finish that traps moisture. Wood needs to dry after wet weather.
Plant low ground cover around the base if the site allows it. Keep enough space open so you can check the stump as it ages.
Playful Fairy Garden Themes for Children and Families
A clear story helps children choose decorations without adding too many pieces. Let them select one theme, then build the scene around it.
Adult supervision is important. Watch for sharp sticks, strong adhesives, toxic plants, and small parts that may cause choking.
15. Make a Dinosaur-and-Fairy Garden
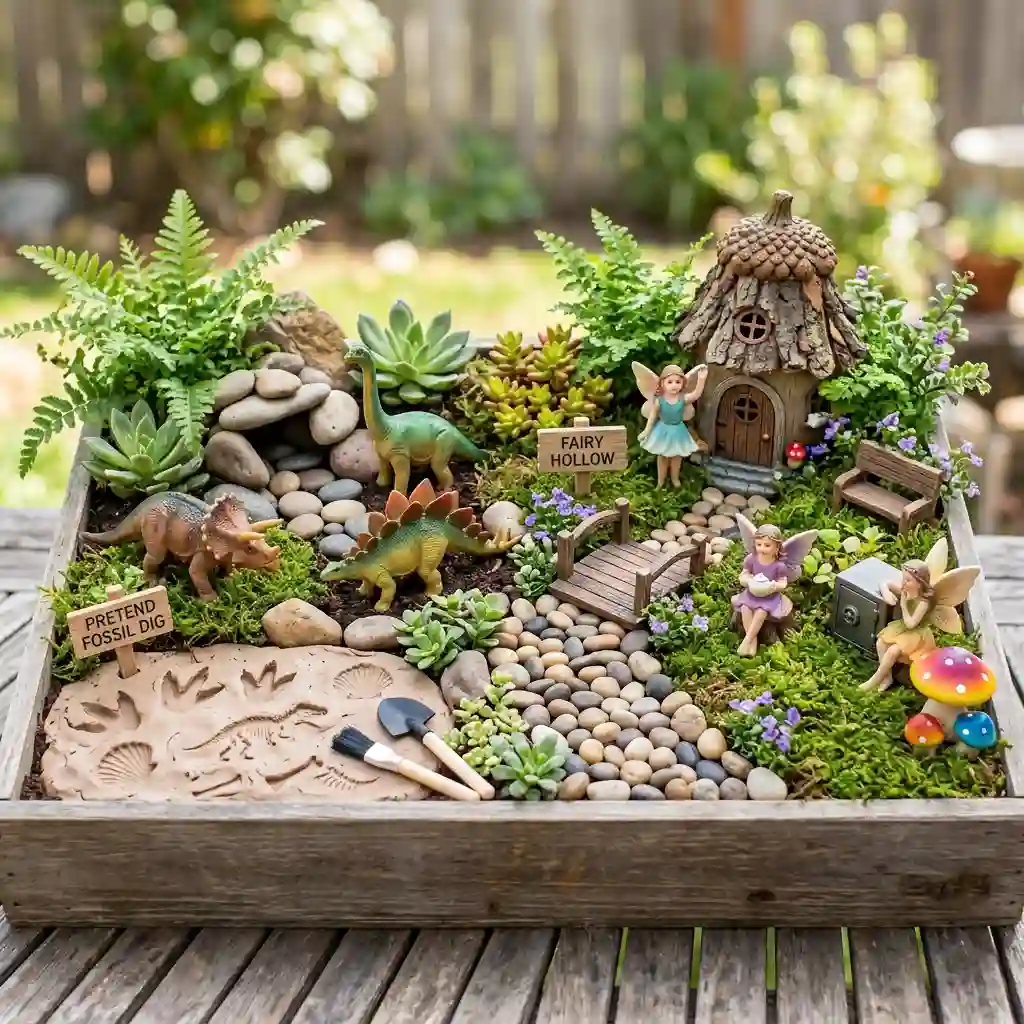
Best for: Children who enjoy bold themes
Light: Any
Cost: $
Difficulty: Easy
Mix larger fairy figures with child-safe toy dinosaurs. Create separate areas for the fairies and dinosaurs, then connect them with a pebble path.
Press shell shapes or toy footprints into damp clay to make a pretend fossil area. Let the clay dry before placing it outside.
Children can name each garden zone and make simple signs. This gives them a role without requiring delicate craft work.
Use large figures for young children. Avoid loose beads, sharp stones, or decorations that can fit inside a child’s mouth.
16. Create a Fairy Campsite
Best for: Seasonal family displays
Light: Any
Cost: $
Difficulty: Easy
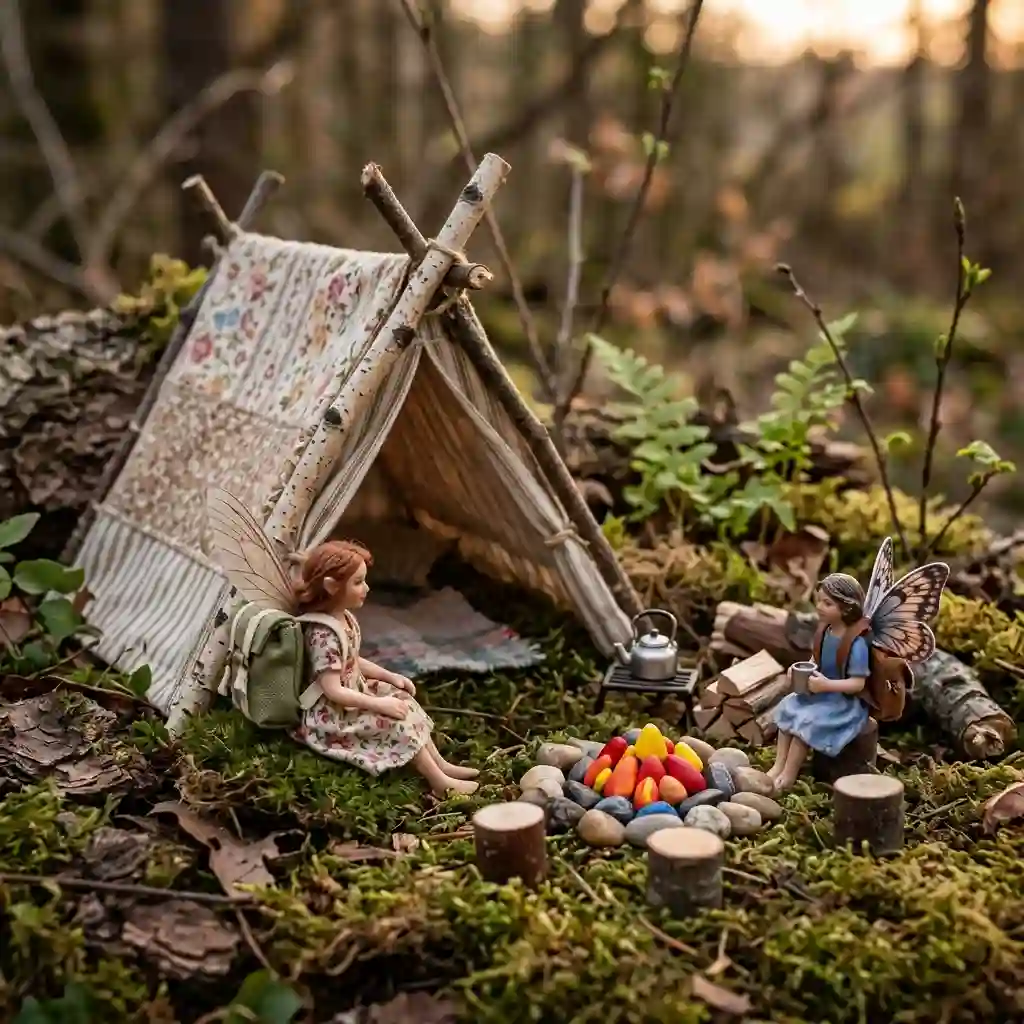
Build a tent from three or four twigs and a small piece of fabric. Add short log seats around a pretend fire circle.
Use red and orange glass pieces, painted stones, or felt for the fire. Never use a real flame.
Place the figures in active poses. One might sit near the fire while another stands beside the tent. These small choices help the scene tell a story.
Change the details with the season. Add tiny backpacks in summer or small fabric blankets in fall.
17. Design a Fairy Vegetable Patch
Best for: Herb pots and family gardens
Light: Based on the real plants
Cost: $–$$
Difficulty: Easy
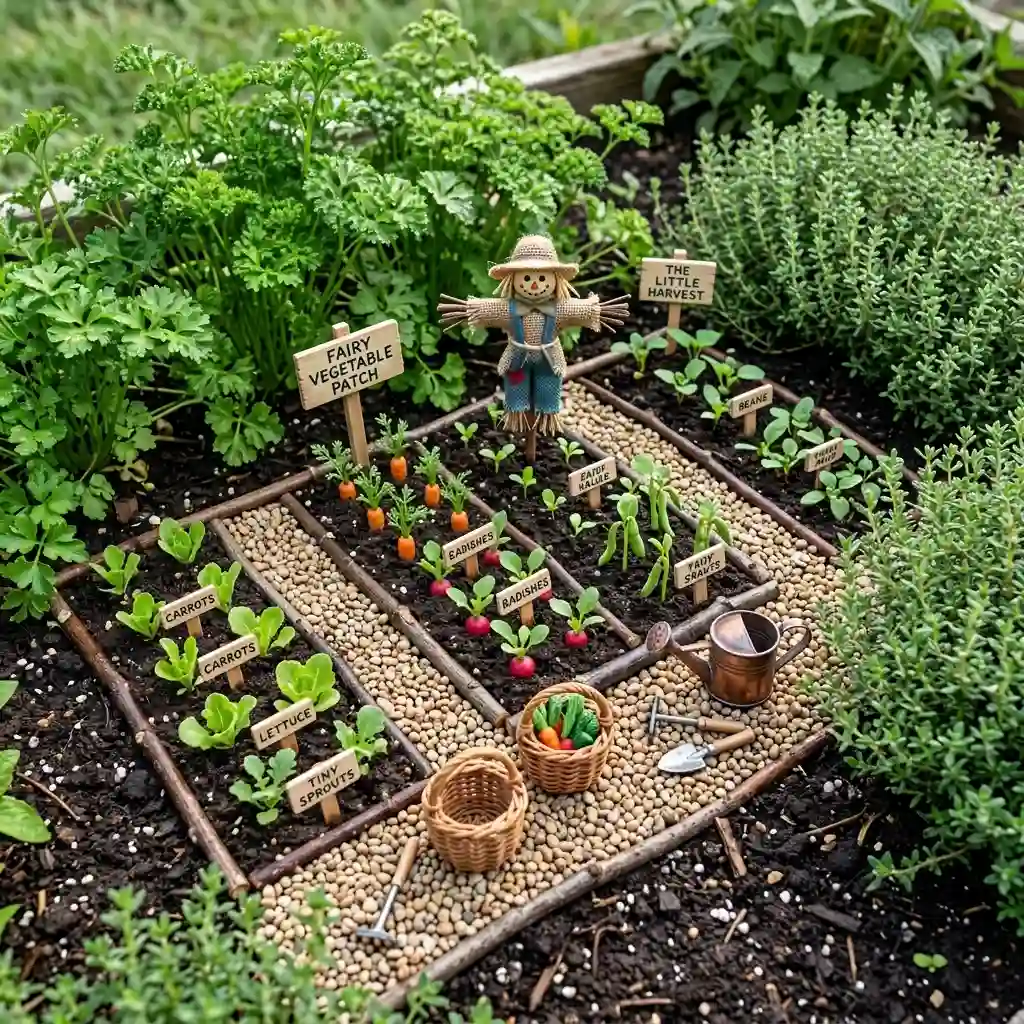
Form tiny garden rows with gravel dividers. Add miniature signs, baskets, tools, and a small scarecrow.
Place the pretend vegetable patch beside real herbs if they suit the container. Thyme can look like a tiny shrub, while parsley may act as a taller background plant.
Keep decorative pieces away from parts you plan to eat. Use clean, plant-safe materials around edible plants.
Children can make labels from craft sticks. Use blunt sticks and water-resistant, non-toxic paint.
Low-Cost and Easy-Care Fairy Garden Ideas
Special kits can be useful, but they are not required. Reused objects often make a fairy garden feel more personal.
18. Make a Fairy Garden From Thrifted Items
Best for: Small budgets and one-of-a-kind designs
Light: Based on plant choice
Cost: $
Difficulty: Easy
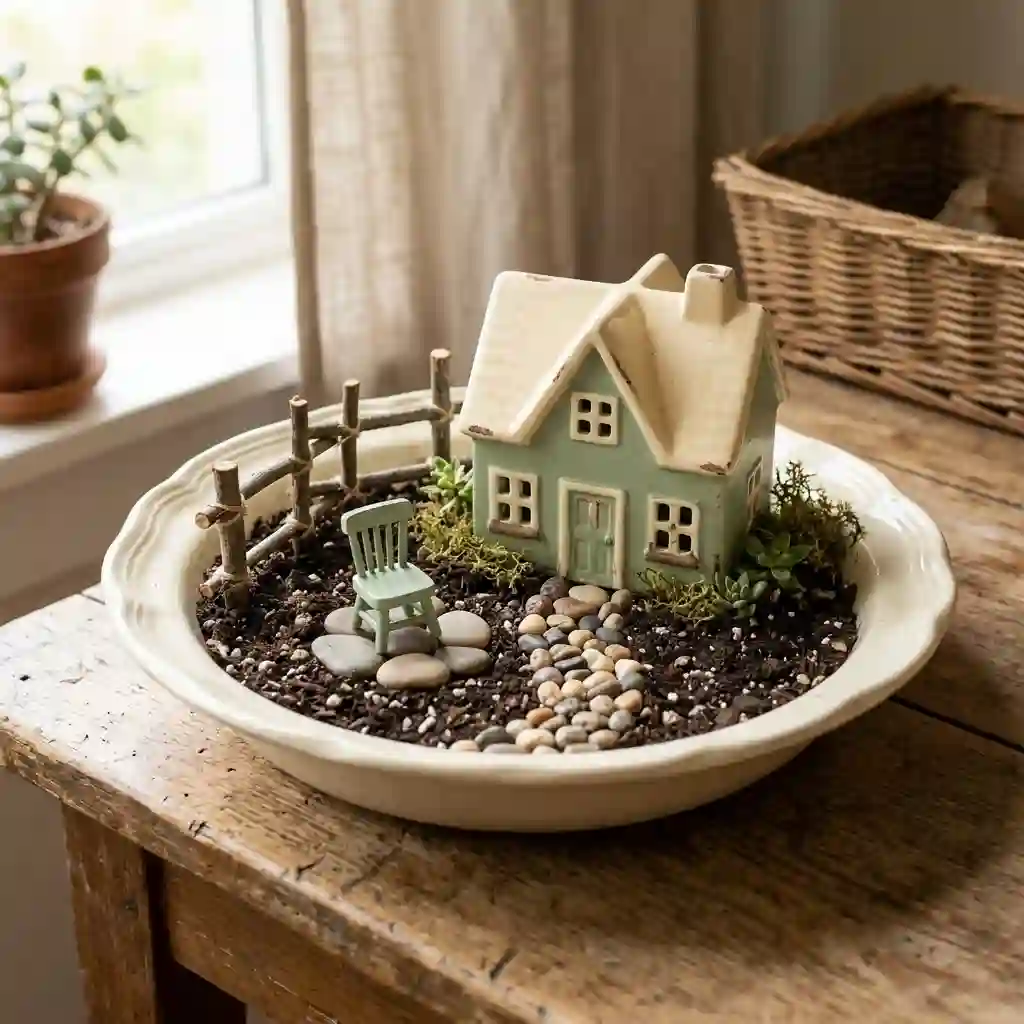
Look for shallow dishes, toy furniture, baskets, jars, and small ceramic houses. Clean every item before placing it near soil or plants.
Paint mixed items in one or two colors to help them look connected. A thrifted saucer, reused toy chair, and handmade twig fence can form a complete display.
Set a spending limit before shopping. A small budget works best when you already have a container, stones, or craft supplies at home.
Start with the focal point. Buy extra pieces only after you see an empty area that truly needs one.
19. Create a Plant-Free Fairy Garden
Best for: Dark rooms and irregular watering
Light: Any indoor light
Cost: $
Difficulty: Easy
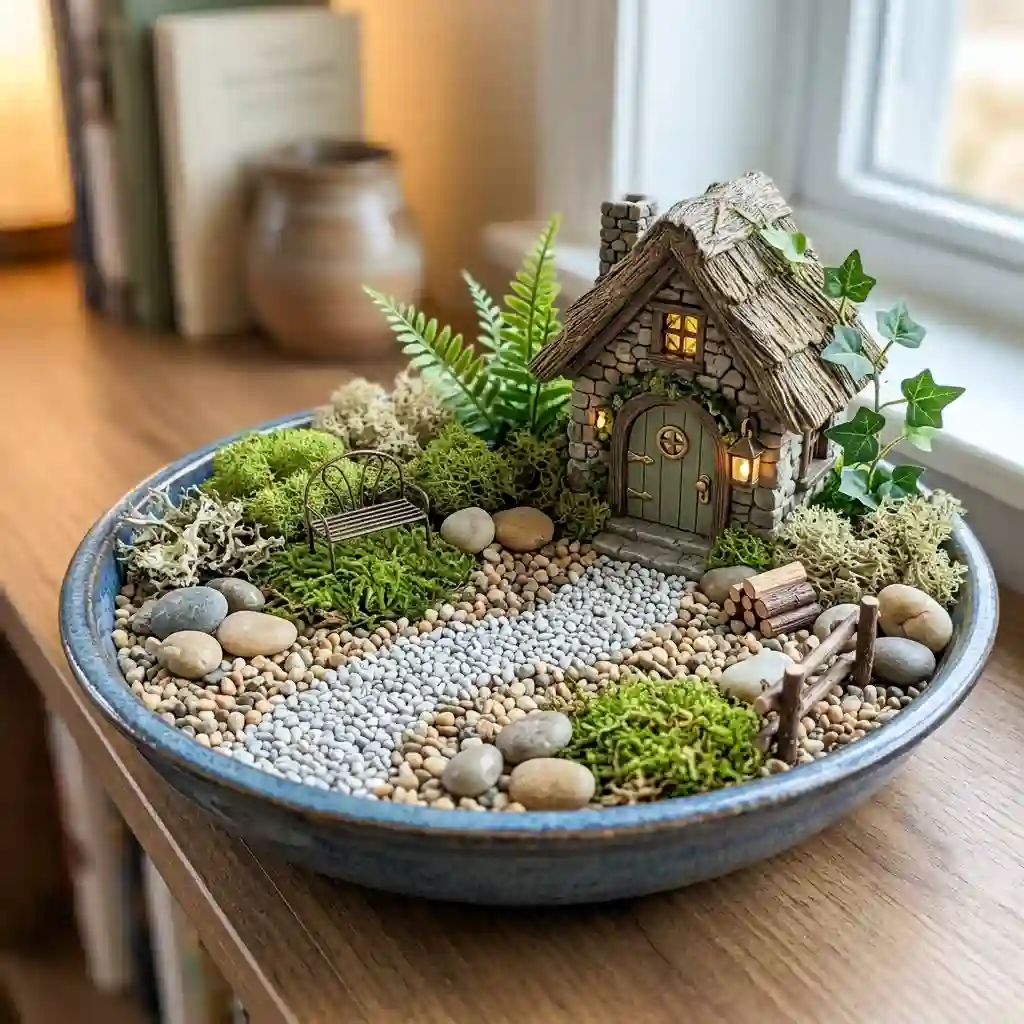
Fill a shallow dish with gravel, stones, preserved moss, or artificial greenery. Add one small building and a path.
This indoor miniature garden works well on a desk, shelf, or bedside table. It does not need sunlight, soil, or water.
Place outdoor versions beneath a roof or porch cover. Artificial plants and painted items may still fade after long sun or rain exposure.
Care is simple. Remove dust with a soft brush and replace loose gravel as needed.
Choose Plants and Fairy Garden Accessories That Last
Check the mature height and spread of each plant. A plant that looks tiny at the nursery may cover the whole scene after one growing season.
Match every plant to the site:
- Sunny and fairly dry: Compact succulents may work in containers with fast drainage.
- Sunny outdoor area: Creeping thyme can form a low carpet where the climate suits it.
- Shaded area: Small ferns and miniature sedges can add soft texture.
- Moist, protected area: Baby tears may work, but it can spread quickly in good conditions.
Plant results depend on your climate, light, soil, and watering habits. Ask a local nursery which compact plants perform well in your area.
Repeat two or three materials throughout the design. For example, use the same stones for the main path, patio, and garden border.
Choose weather-resistant fairy garden accessories for open outdoor spaces. Resin, sealed ceramic, metal, and stone often last longer than paper, thin fabric, or untreated wood.
Keep buildings and furniture removable. You will find it much easier to trim plants, refresh gravel, and clean the container.
Keep Your Fairy Garden Looking Good
Plants can hide a miniature scene faster than you may expect. Trim them before they cover the paths, doors, and furniture.
Water based on plant needs. Do not add water just because the moss or decorations look dry. Decorative moss does not need watering, while live plants may have very different needs.
Remove wet leaves and standing water. Bring fragile pieces inside before storms, frost, or extreme heat. Replace bark, twigs, and other natural materials when they become soft.
Follow this simple seasonal care list:
- Spring: Clean the accessories and replace broken pieces.
- Summer: Check soil moisture and watch for harsh afternoon sun.
- Fall: Remove fallen leaves and secure loose decorations.
- Winter: Store fragile items if freezing weather may damage them.
Check drainage holes several times a year. Roots, soil, and small stones can block them.
Start With One Small Scene
The best fairy garden ideas do not depend on a large space or a pile of decorations. You need a suitable location, one main feature, correctly sized details, and plants that match the growing conditions.
Choose one empty pot, balcony corner, tree base, or indoor shelf. Build the main path and place the focal point first. Step back and look at the open space before adding more.
Your first design does not need to be perfect. Natural materials will age, plants will grow, and you may change the layout. That is part of the fun.
Start with one of these DIY fairy garden ideas today. You can always add the smaller details later.