
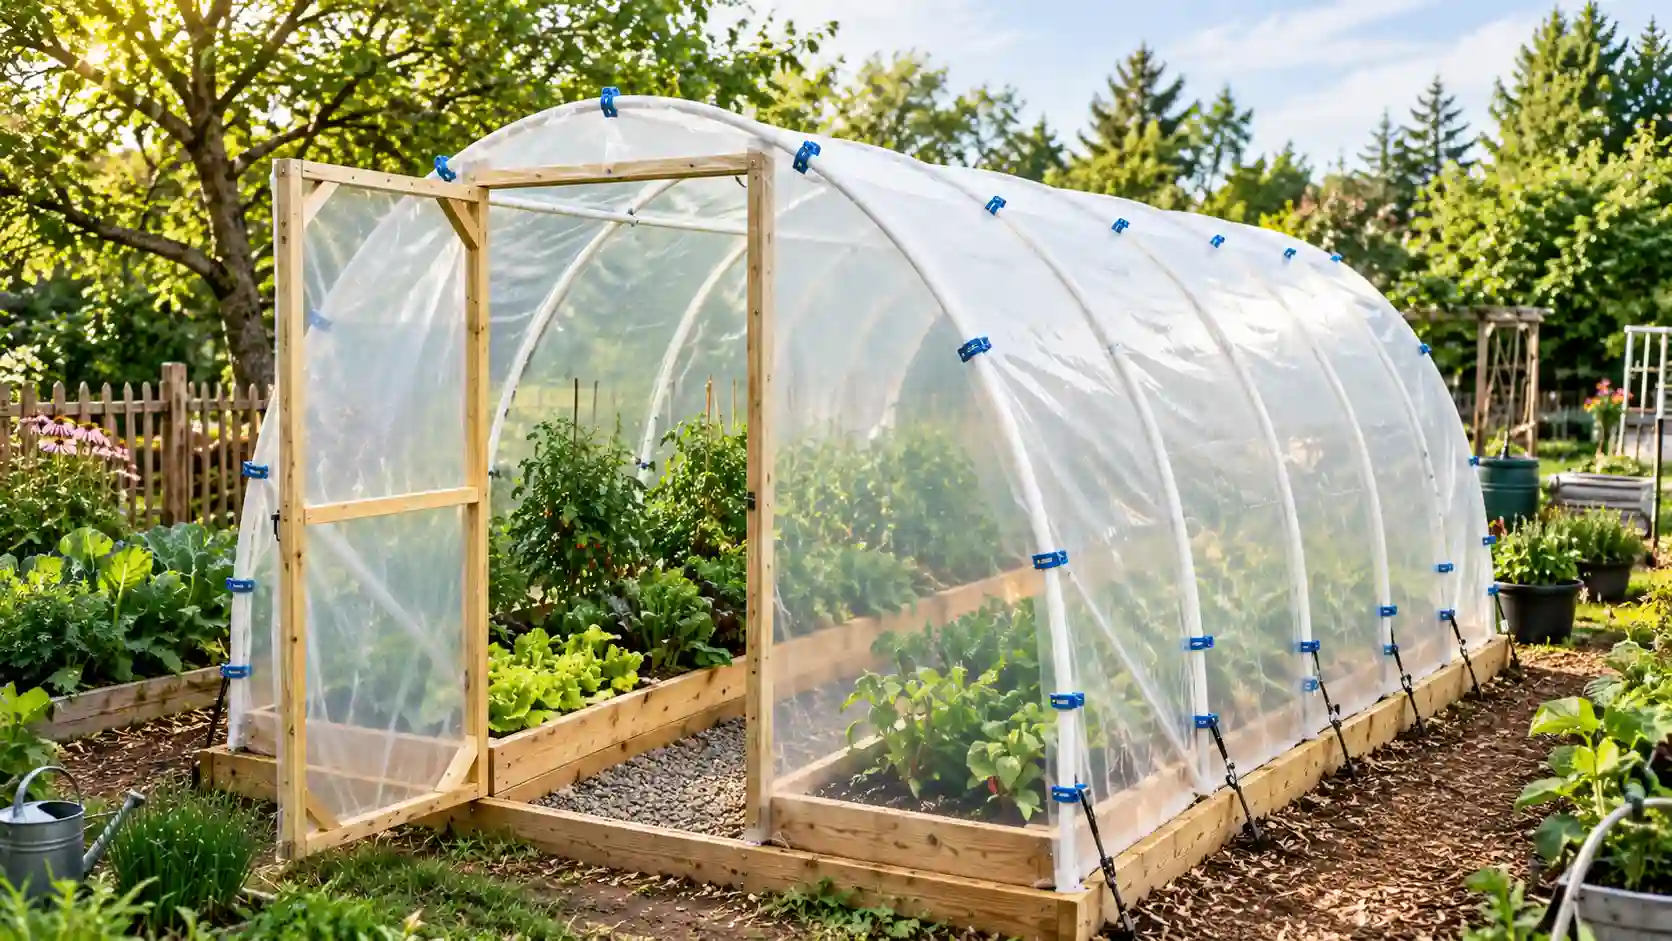
You do not need a large yard or an expensive kit to protect your plants. These DIY greenhouse ideas can help you start seeds earlier, guard crops from cold weather, and grow plants for longer each year.
Many greenhouse plans require costly materials or advanced building skills. That can make a simple garden project feel out of reach. A cheap DIY greenhouse offers another option. You can use storage bins, old windows, plastic bottles, PVC pipes, or other basic materials.
The right design depends on your space, weather, budget, and plants. You may need a small DIY greenhouse for a balcony. Or you may want a walk-in structure for raised beds.
This guide covers 18 designs, from tiny seed-starting boxes to permanent backyard greenhouses. You will also learn how to pick a safe location, choose a covering, add airflow, and secure the frame.
What to Check Before Choosing a Greenhouse
Start by deciding what you want your greenhouse to do. Do you need a warm place for seed trays? Do you want to protect vegetables from early frost? Your main goal will help you choose the right size and design.
Use this five-question checklist before buying materials:
- How much level space do you have?
- How many hours of direct sun reach that space?
- Will the greenhouse face strong wind, heavy rain, or snow?
- Do you need a permanent or portable structure?
- What is your total budget?
Place your greenhouse where it can receive plenty of winter sunlight. Avoid low spots where rainwater collects. You should also leave room around the structure for repairs and cleaning.
A shelf greenhouse may use just a few square feet. A walk-in greenhouse needs space for a path, plants, shelves, and an opening door.
Weather matters too. A light frame may work well in a sheltered yard but fail in an open, windy space. Greenhouses can also become dangerously hot when doors and vents remain closed.
Include the frame, covering, fasteners, anchors, foundation, and vents in your budget. Check local building rules before installing a permanent backyard greenhouse. Your HOA or landlord may also have restrictions.
Write down your limits before choosing a design. This small step can save you time and money.
Cheap DIY Greenhouse Ideas Using Simple Materials
Low-cost greenhouse projects often require more cleaning and preparation. Reclaimed materials may also need repairs. Check every reused item before adding it to your garden.
1. Make a Greenhouse from a Clear Storage Bin
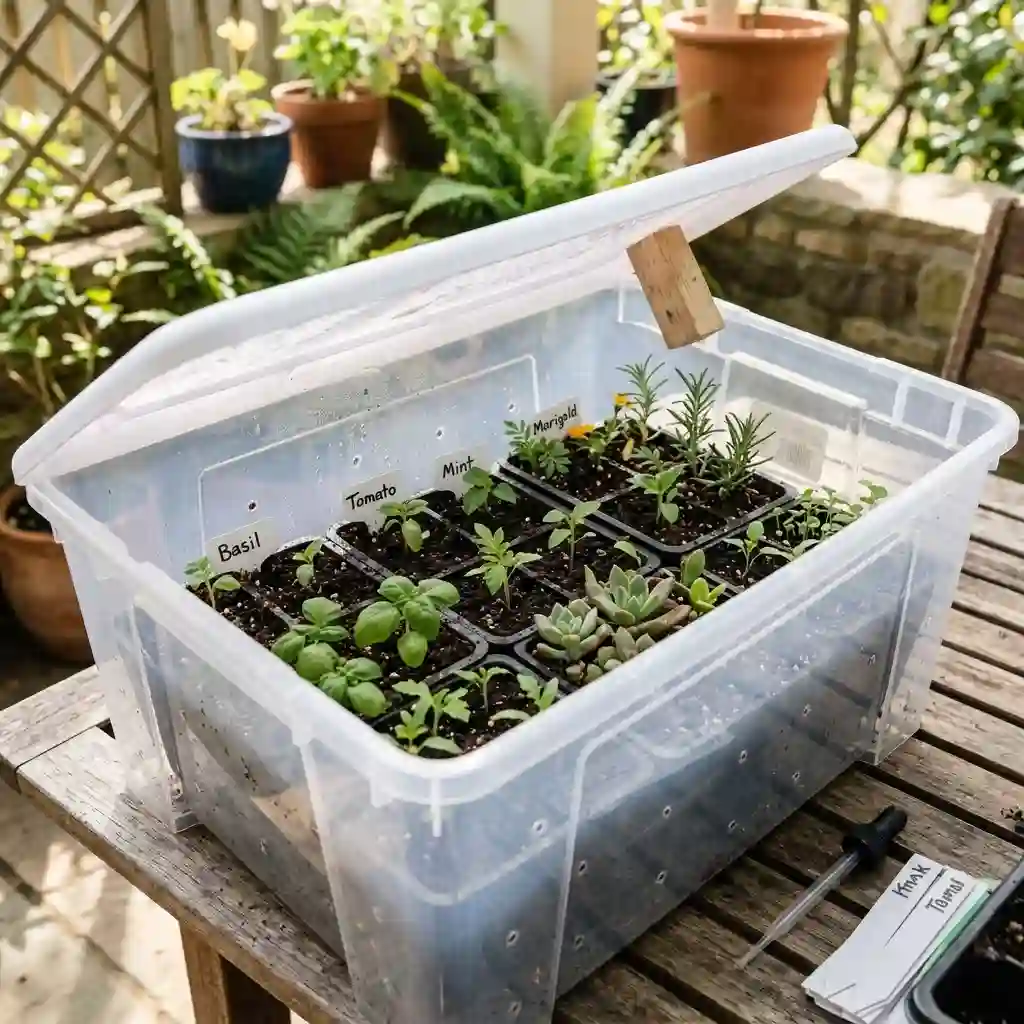
A clear storage bin can become a small propagation chamber. It traps warmth and moisture around seeds and young plants.
Choose a transparent bin with a fitted lid. Drill a few small holes for drainage and airflow. Place seed trays or small pots inside, then set the bin on a sunny patio or sheltered balcony.
Open or remove the lid on warm afternoons. A closed bin can heat up faster than you may expect.
Best for: Seedlings, herbs, and plant cuttings
Skill level: Beginner
Space required: About 2 to 4 square feet
Likely cost: Very low
Drawback: Limited height and poor airflow when closed
2. Build Walls with Clear Plastic Bottles
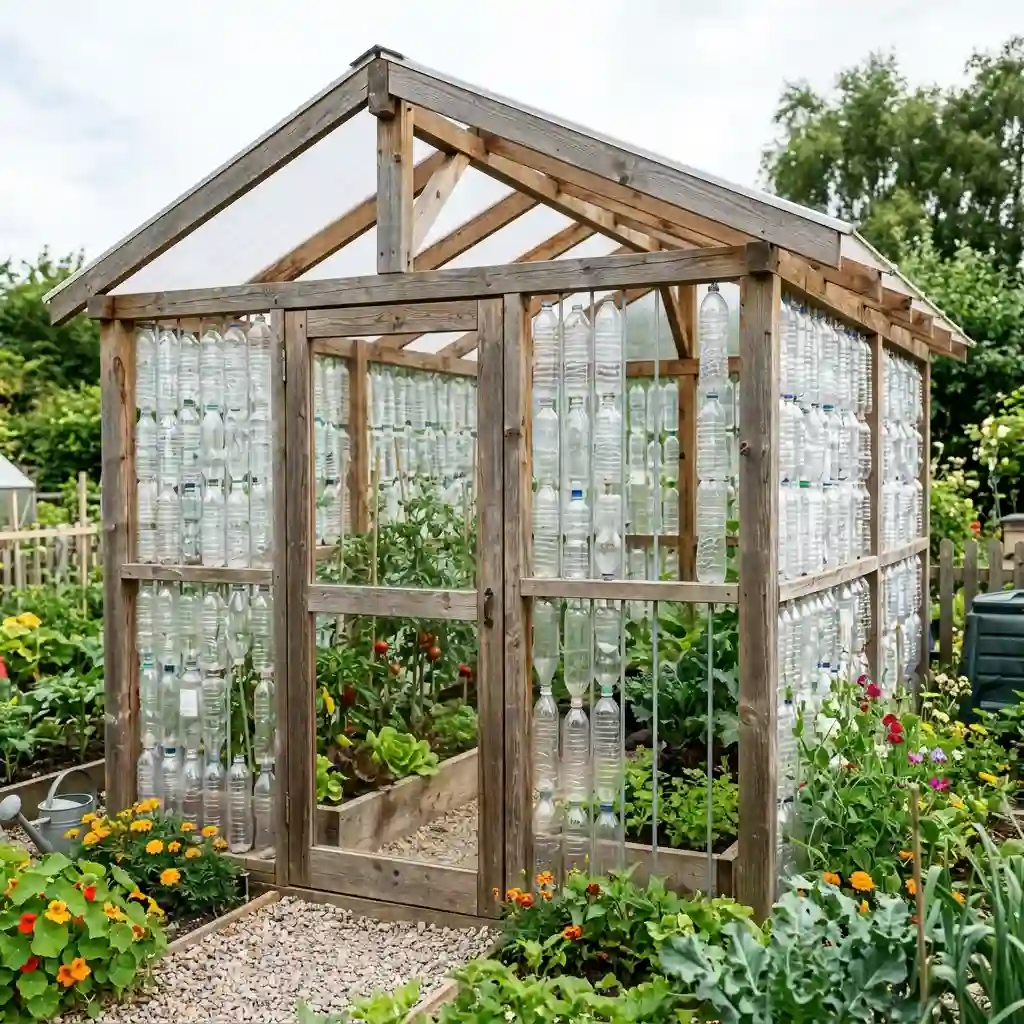
A plastic bottle greenhouse turns waste into useful wall panels. Clean bottles are threaded onto canes, wire, or narrow wooden supports.
Build a firm timber frame first. Remove bottle labels and cut the bottoms so each bottle can slide into the next one. Attach the finished bottle columns to the frame.
Collecting and cleaning enough bottles can take weeks. The finished walls may also have small gaps, so this design works better for mild protection than tight temperature control.
Best for: Gardeners with access to many clean bottles
Skill level: Intermediate
Space required: Small to large, based on the frame
Likely cost: Low
Drawback: Slow preparation and an uneven seal
3. Reuse Old Windows for a Greenhouse
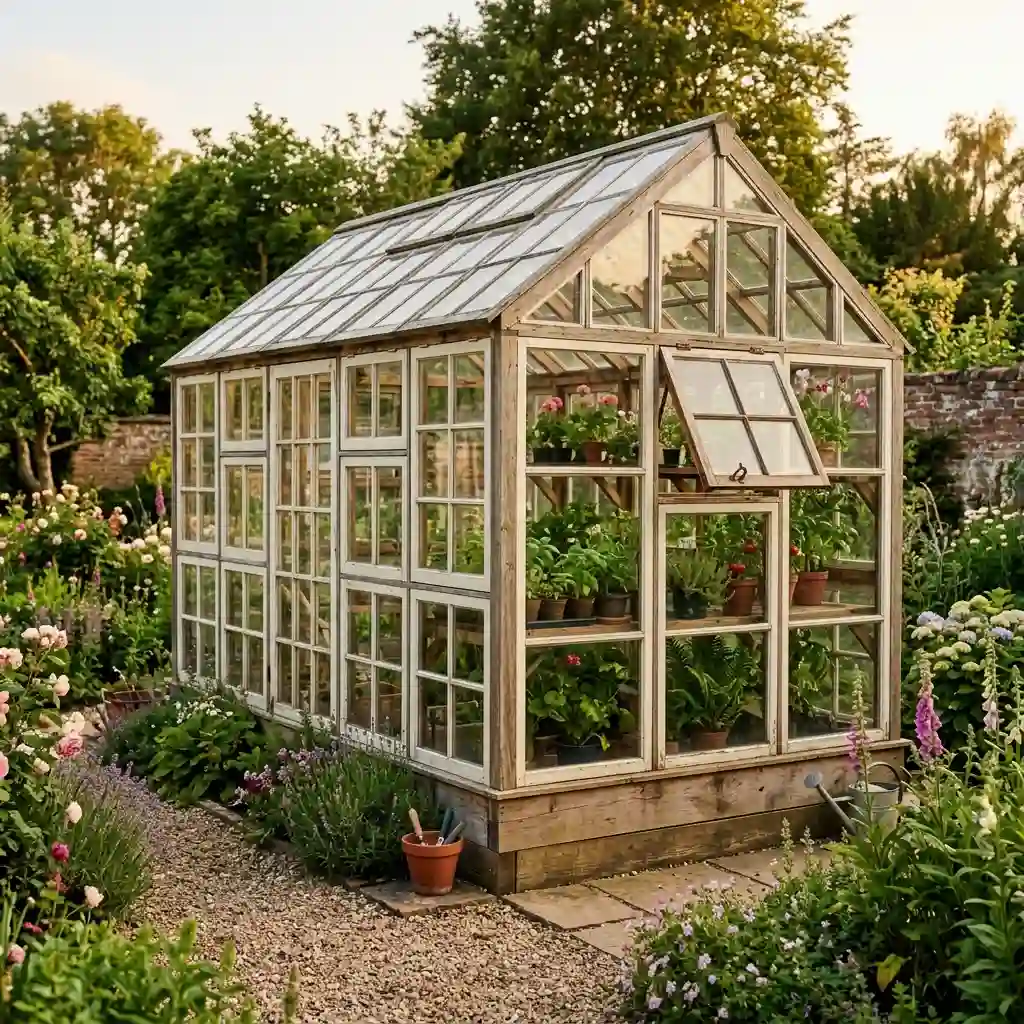
Salvaged windows can give a homemade greenhouse plenty of character. They can also create strong walls that last for years.
Check each frame for loose glass, rot, sharp edges, and damaged hardware. Build the base around the window sizes instead of trying to cut the glass. Use at least one opening window as a vent.
Older painted frames may contain lead. Get the paint tested before sanding, cutting, or scraping it.
Best for: A permanent greenhouse with a reused look
Skill level: Intermediate to advanced
Space required: Medium or large
Likely cost: Low to moderate
Drawback: Heavy panels and mixed window sizes
4. Create a PVC Hoop Greenhouse
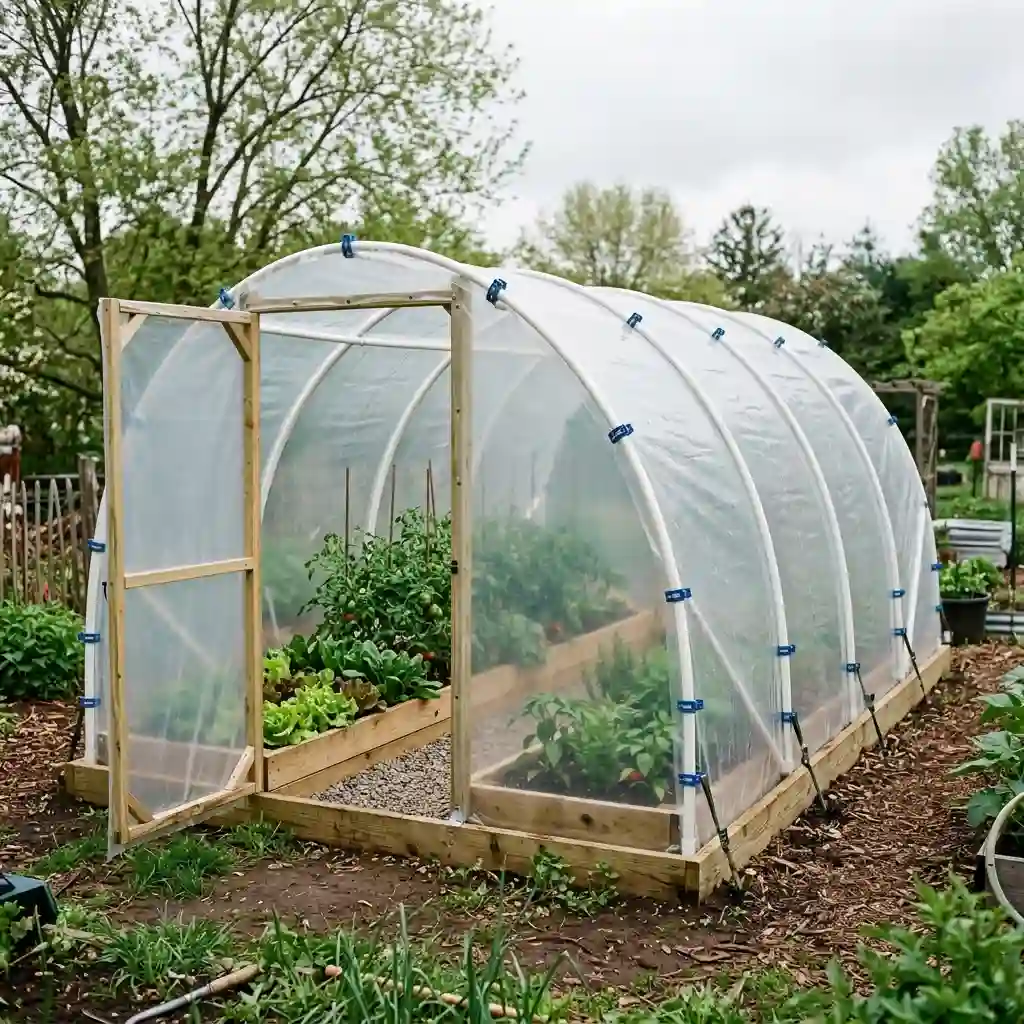
A PVC greenhouse is one of the simplest walk-in designs. Flexible pipes form hoops over a rectangular timber base.
Place each pipe end over a stake or inside a pipe bracket. Run another pipe along the top to connect the hoops. Cover the frame with greenhouse-grade plastic and hold it with proper clips.
Avoid making many holes in the plastic with staples. Each hole can grow into a tear. Use ground anchors if your yard receives strong wind.
Best for: Affordable seasonal crop protection
Skill level: Beginner to intermediate
Space required: Medium
Likely cost: Low
Drawback: Lightweight PVC needs strong anchoring
5. Bend a Cattle Panel into a Hoop House
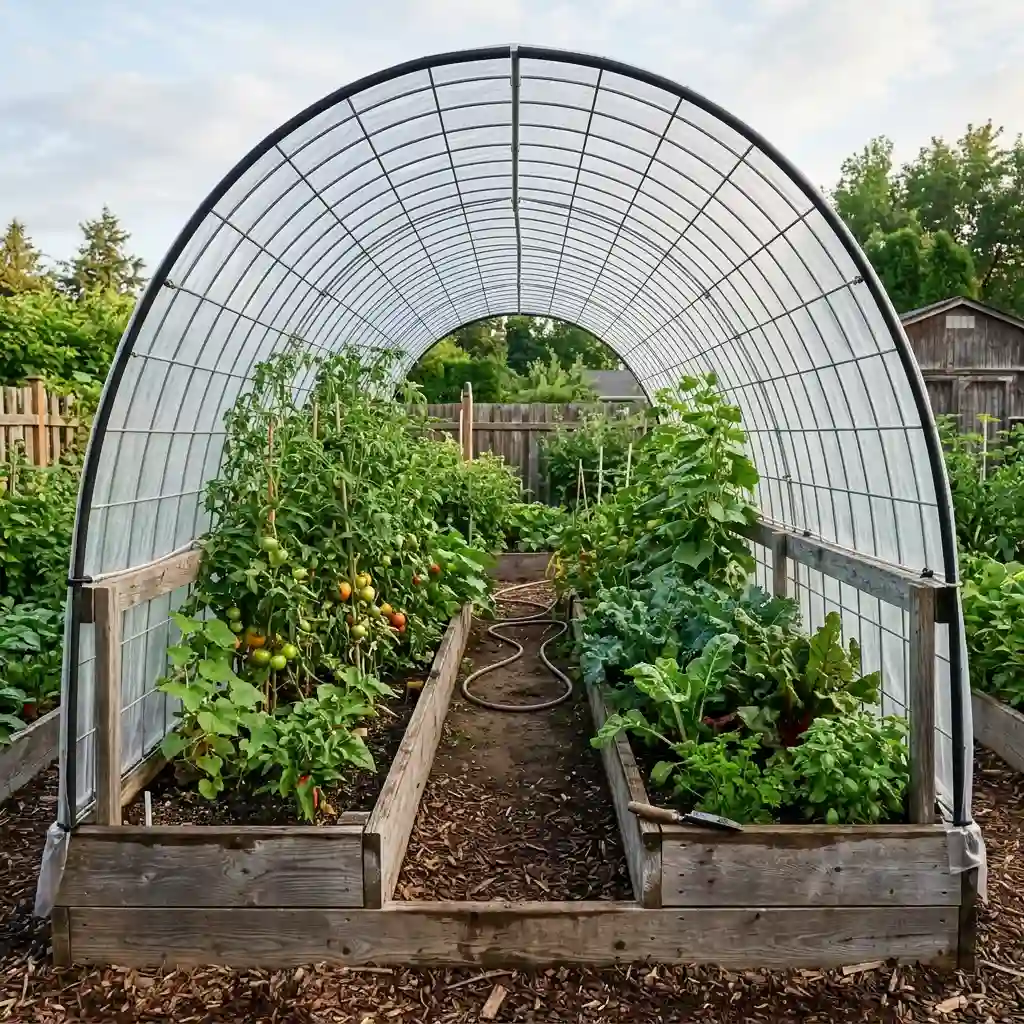
A cattle panel is more rigid than PVC pipe. Bend the panel into an arch and secure both sides to a timber base or solid posts.
Cover the arch with greenhouse plastic during cool months. Remove the cover in summer, and the wire grid can support beans, cucumbers, or other climbing plants.
Cover or smooth any sharp wire ends first. They can tear plastic and cause cuts.
Best for: Raised beds and seasonal vegetables
Skill level: Intermediate
Space required: Medium
Likely cost: Low to moderate
Drawback: Bending and moving the panel may require two people
6. Use Pallets for the Base
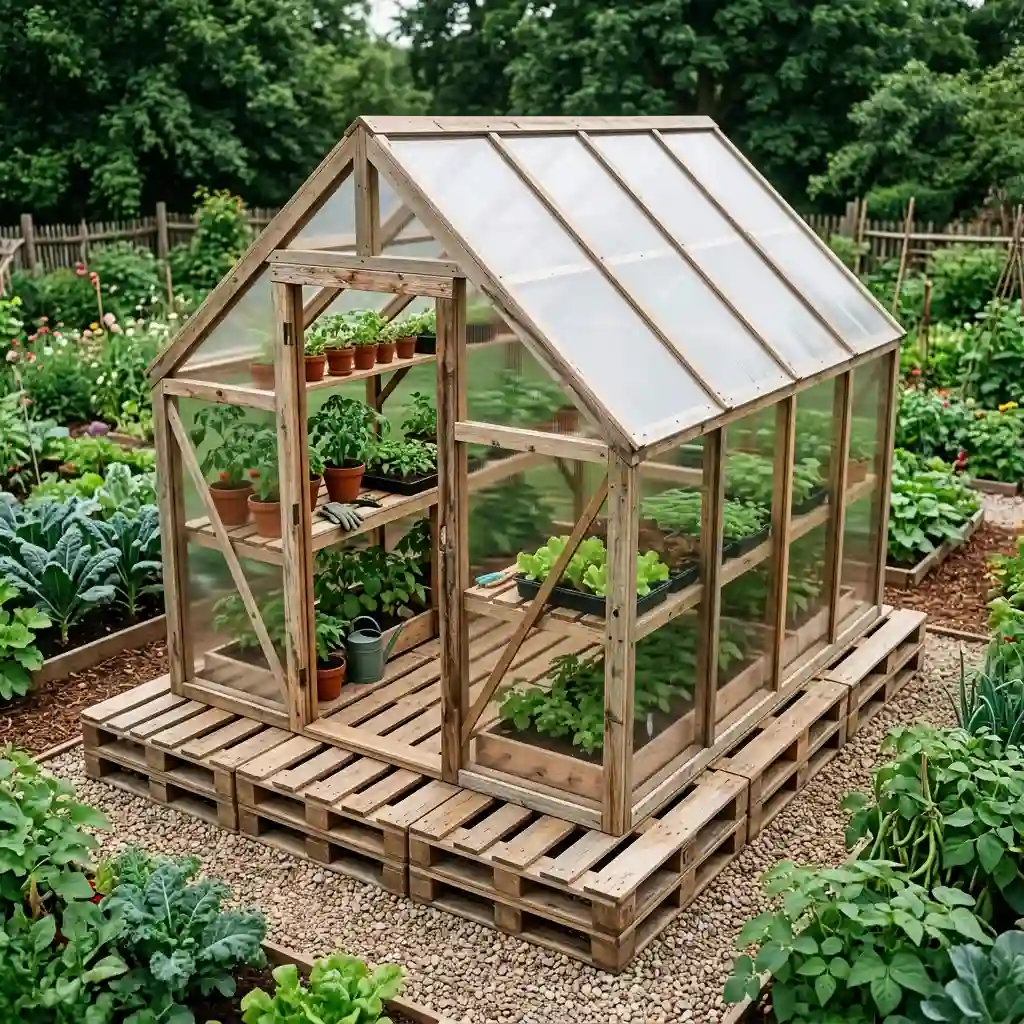
Clean pallets can form a raised floor or the lower section of a recycled greenhouse. Add a lighter timber or PVC frame above them.
Use only pallets that are dry, sound, and free from spills. Look for an HT mark, which often means the wood was heat-treated. Avoid damaged pallets or any pallet with an unknown history.
Place gravel or another draining layer below the pallet floor. Wet soil can cause the wood to rot.
Best for: A low-cost greenhouse with a raised base
Skill level: Intermediate
Space required: Medium
Likely cost: Low
Drawback: Pallets vary in size, safety, and condition
Small DIY Greenhouse Ideas for Tight Spaces
A small yard, patio, or balcony can still hold a useful greenhouse. Focus on vertical storage, folding frames, and designs that fit against a wall.
7. Turn an Old Window into a Cold Frame
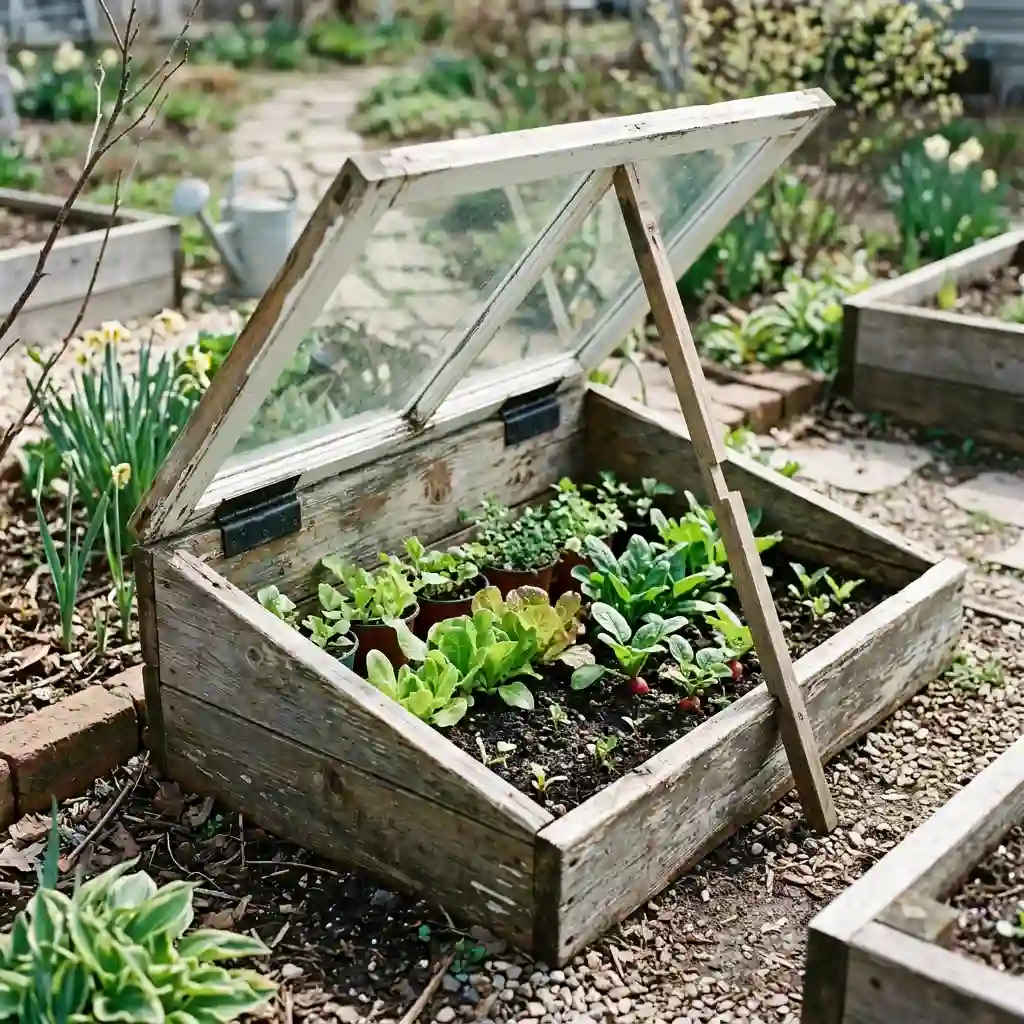
A cold frame is a low timber box with a clear lid. A common size is about 3 feet by 2 feet, though you can adjust it to match an old window.
Build the back wall higher than the front. This creates a sloped lid that sheds rain and catches more light. Face the lower side toward the strongest winter sun.
Add a prop stick or automatic opener so you can vent the box. Cold frames work well for hardening seedlings and protecting greens during cool weather.
Best for: Seedlings and low-growing crops
Skill level: Beginner to intermediate
Space required: About 6 square feet
Likely cost: Low
Drawback: You must bend or kneel to reach the plants
8. Cover a Greenhouse Shelf
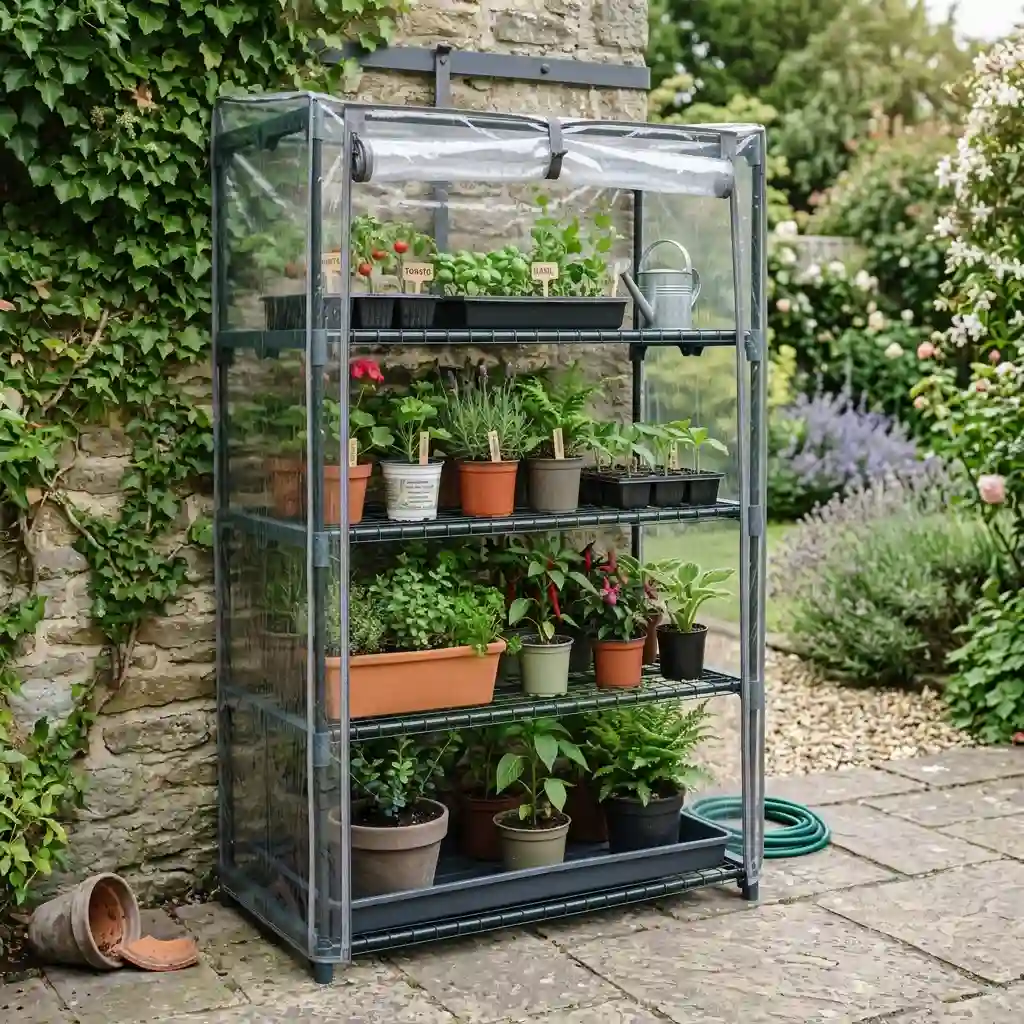
Place a clear zippered cover over a four-tier metal or plastic shelf. This creates a compact seed-starting area without taking over your patio.
Set waterproof trays under the pots. Secure the shelf to a wall or fence so wind cannot tip it over. Open the cover during hot afternoons to release heat.
Check each shelf’s weight limit before filling it with wet pots. Soil and water can become heavy.
Best for: Seeds, cuttings, and small potted plants
Skill level: Beginner
Space required: About 2 by 3 feet
Likely cost: Low
Drawback: Tall plants will quickly outgrow the shelves
9. Add a Lean-To Beside a Shed
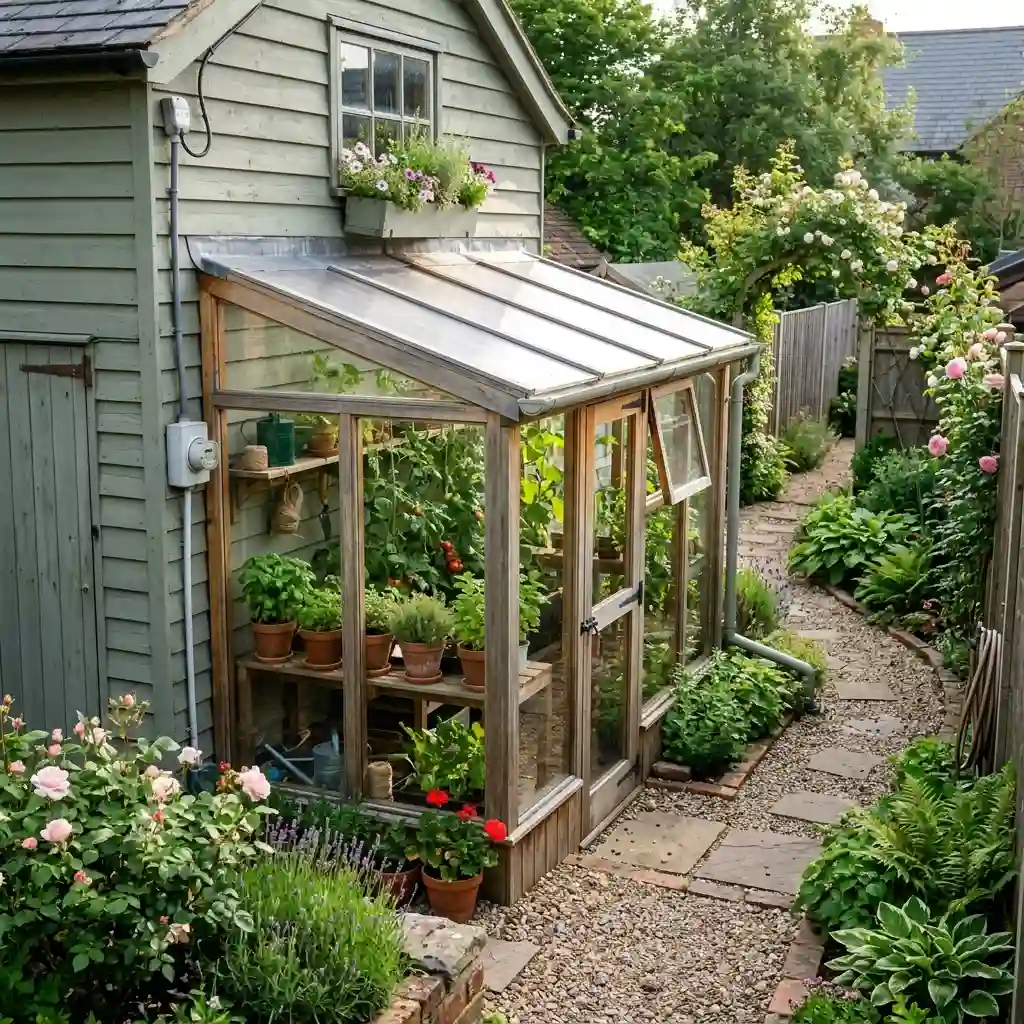
A lean-to greenhouse uses an existing wall as one side of the structure. A narrow design can fit beside a shed, garage, or house.
The wall may provide support and hold some warmth after sunset. Build a sloped roof that sends rain away from the building. Add flashing where the roof meets the wall.
Do not cover windows, dryer vents, air-conditioning units, meters, or utility access points. Check for pipes and cables before drilling.
Best for: Narrow side yards
Skill level: Intermediate to advanced
Space required: Flexible, but often narrow
Likely cost: Moderate
Drawback: Poor flashing can cause leaks or wall damage
10. Install a Window-Mounted Greenhouse Box
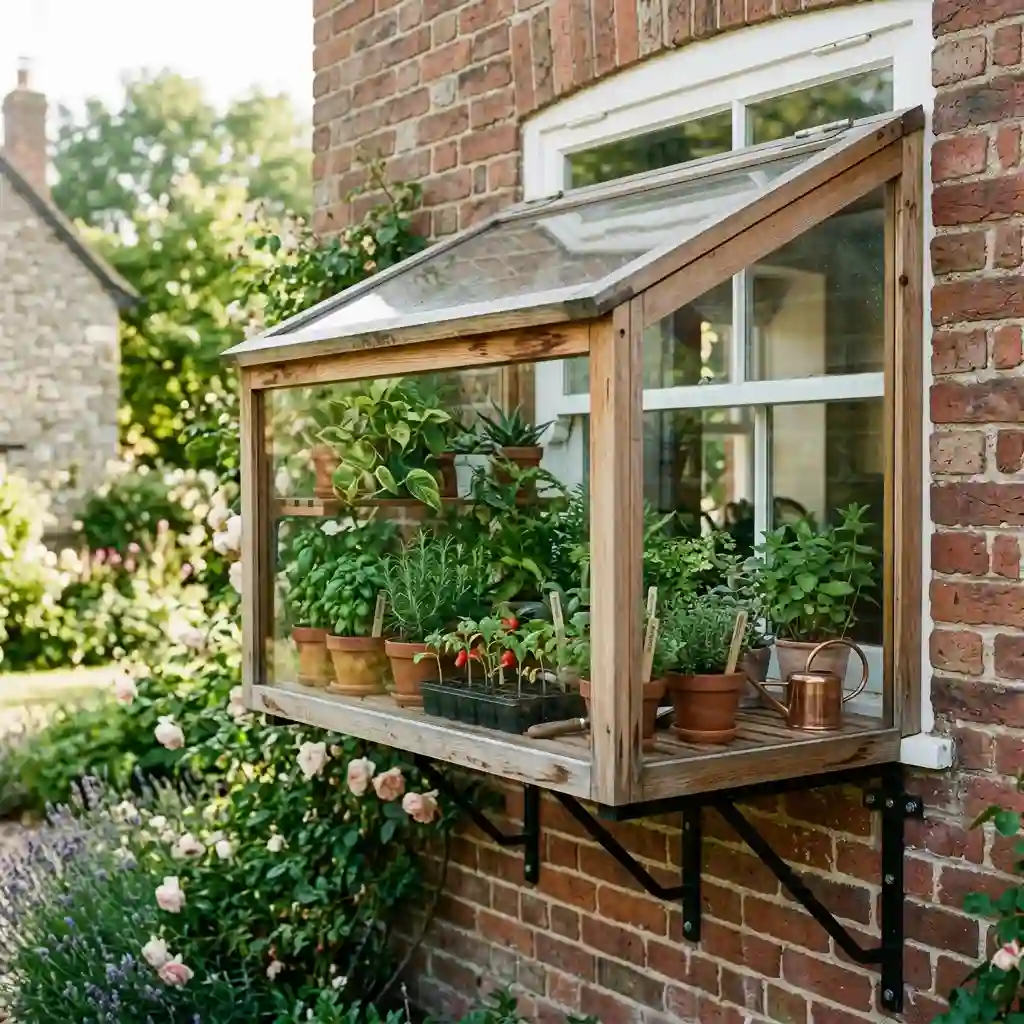
A greenhouse box can extend from a sunny exterior window. It looks like a deep window box with clear sides and a sloped lid.
Use it for herbs, seed trays, or small houseplants. Strong brackets must support the full weight of the frame, wet soil, plants, and water.
Plan how you will open, clean, and water the box. A design that is hard to reach will soon become a problem.
Best for: Herbs outside a kitchen window
Skill level: Advanced
Space required: No ground space
Likely cost: Moderate
Drawback: Requires strong wall supports and safe access
11. Convert a Cabinet into a Balcony Greenhouse
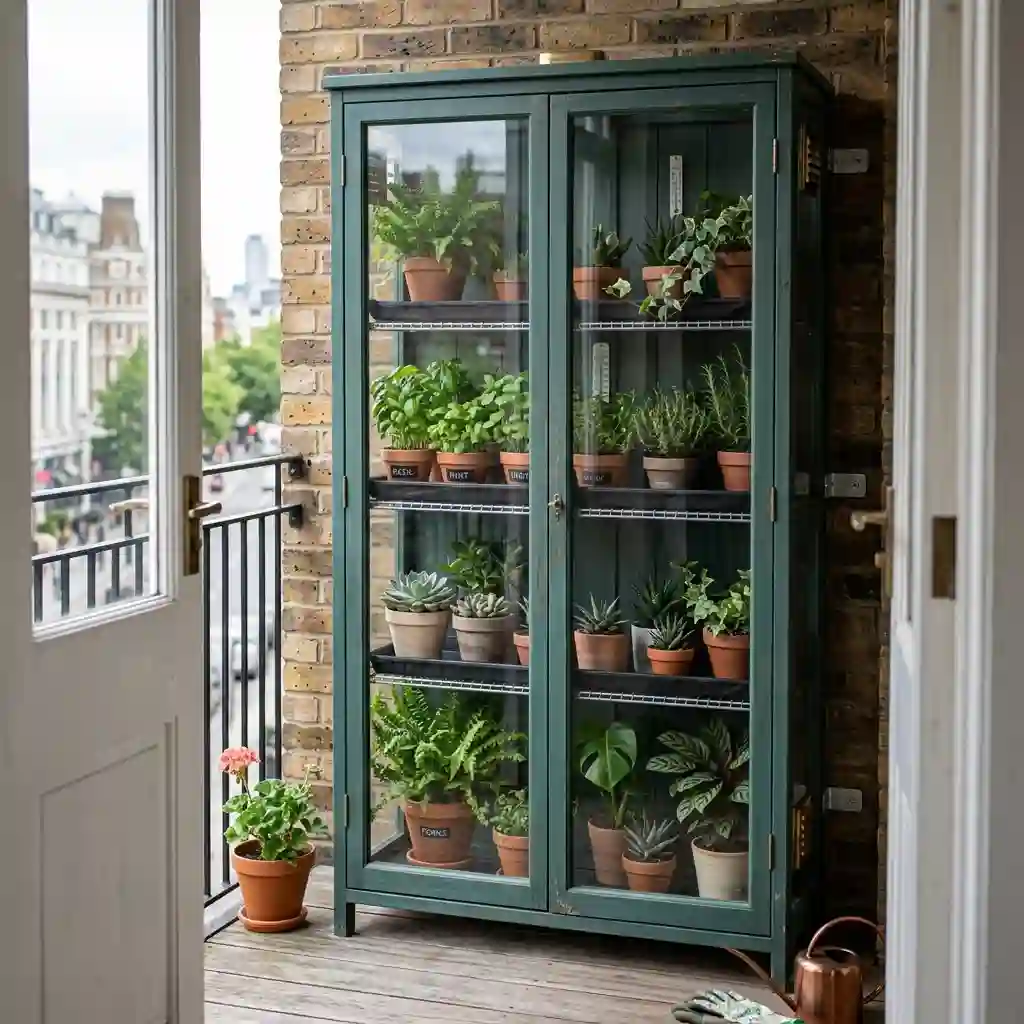
A glass-fronted cabinet can become an attractive balcony greenhouse. Add removable shelf liners, small vents, and trays to catch water.
Secure the cabinet to a solid wall so it cannot tip. Use shatter-resistant panels if you need to replace the glass.
Check your balcony’s weight limits and property rules first. Wind exposure can also be much stronger above ground level.
Best for: Renters and balcony gardeners
Skill level: Beginner to intermediate
Space required: About 2 to 4 square feet
Likely cost: Low to moderate
Drawback: Heavy cabinets may not suit every balcony
12. Build a Folding A-Frame Greenhouse
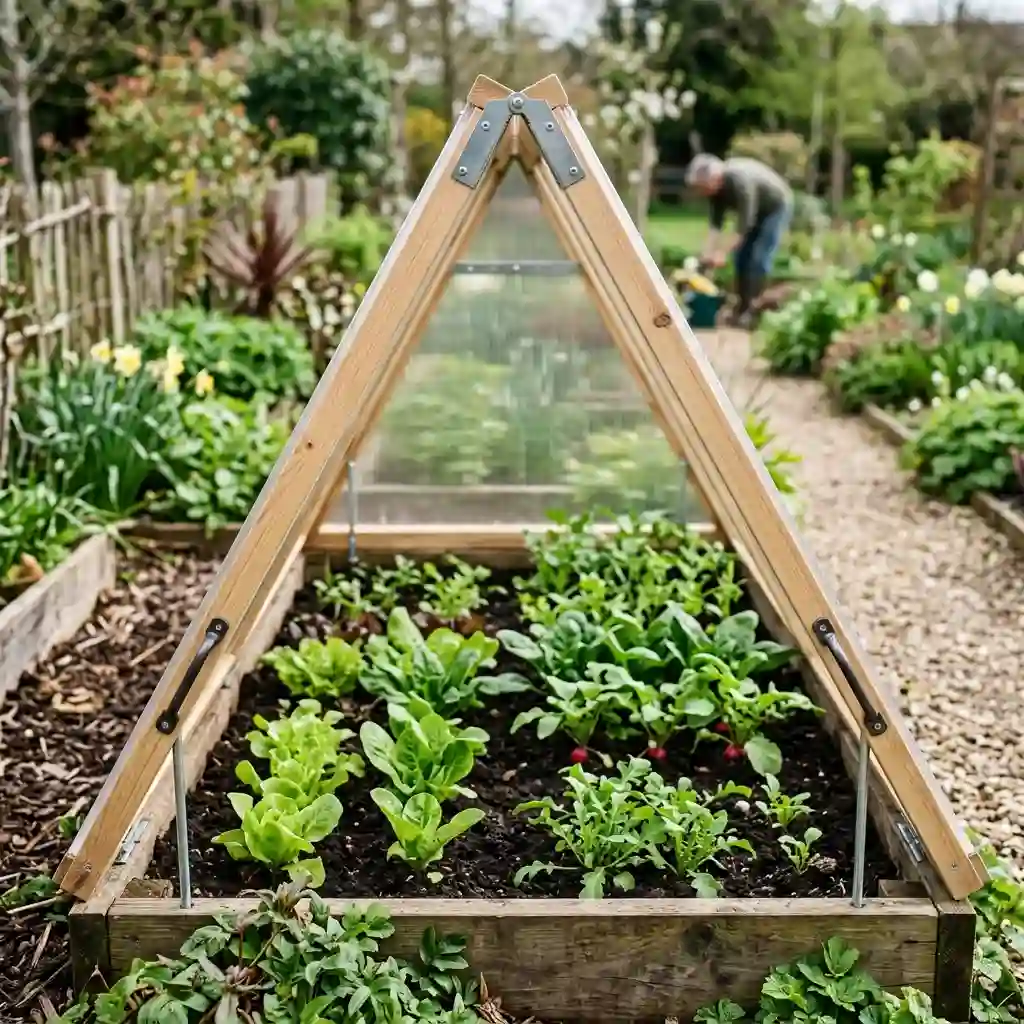
Join two framed panels at the top with strong hinges. Cover the panels with clear plastic or polycarbonate.
Place the A-frame over a raised bed or group of containers. Fold it flat or move it into storage when the weather becomes warm.
Add handles if you plan to move it often. Removable ground pins can keep it secure during windy weather.
Best for: Seasonal use over raised beds
Skill level: Intermediate
Space required: Based on the bed size
Likely cost: Low to moderate
Drawback: Hinges and lightweight panels need regular checks
Walk-In Greenhouses for Larger Gardens
A walk-in greenhouse gives you space for taller plants, benches, tools, and a working path. It costs more, but it can support a wider range of garden tasks.
13. Build a Timber-Framed Greenhouse
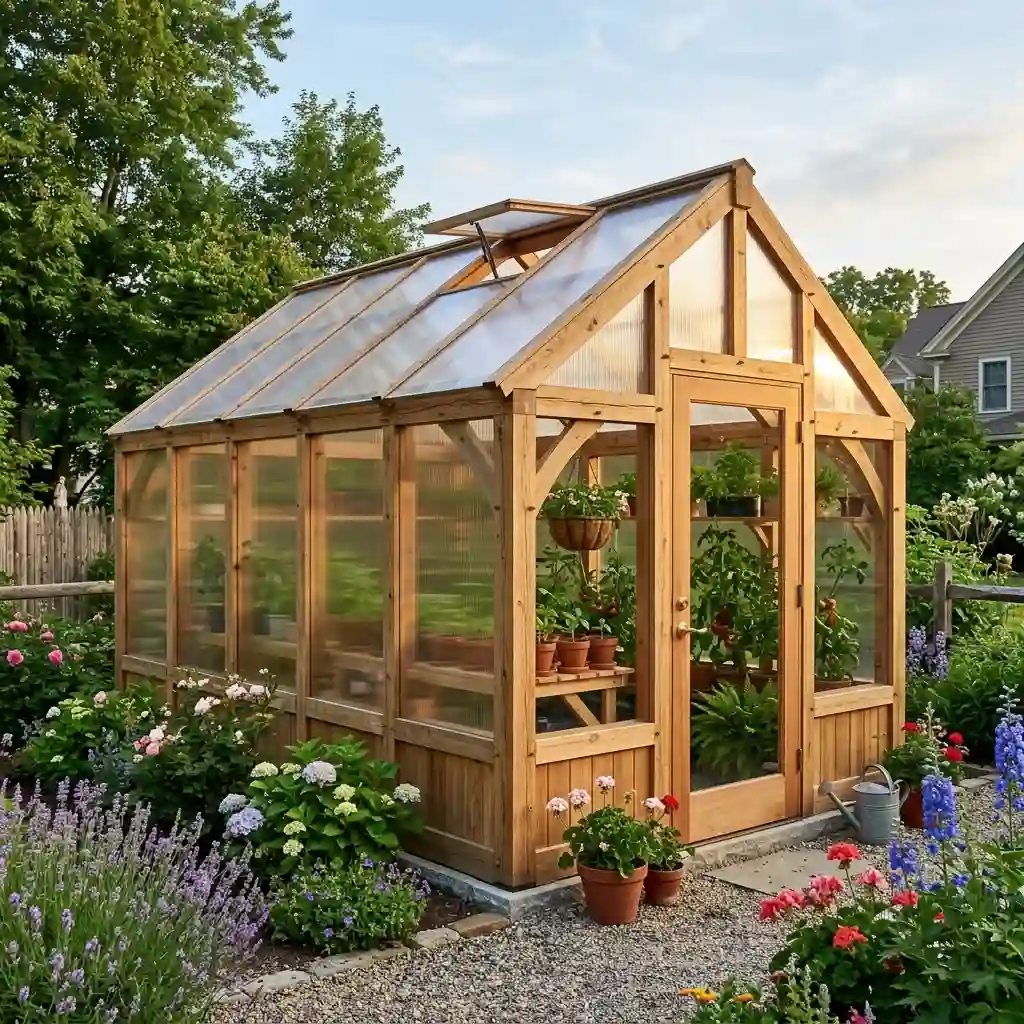
Timber creates a strong frame that is easy to adjust. Use treated wood or a naturally rot-resistant type approved for outdoor use.
Build a level, square base before adding the walls. Small errors at the base can make the door and roof hard to fit.
You can cover the frame with plastic film, polycarbonate, or glass. Include a full-size door and roof vents from the start.
Best for: A long-term backyard greenhouse
Skill level: Intermediate to advanced
Space required: Medium to large
Likely cost: Moderate to high
Drawback: Wood needs protection from moisture and rot
14. Use Twin-Wall Polycarbonate Panels
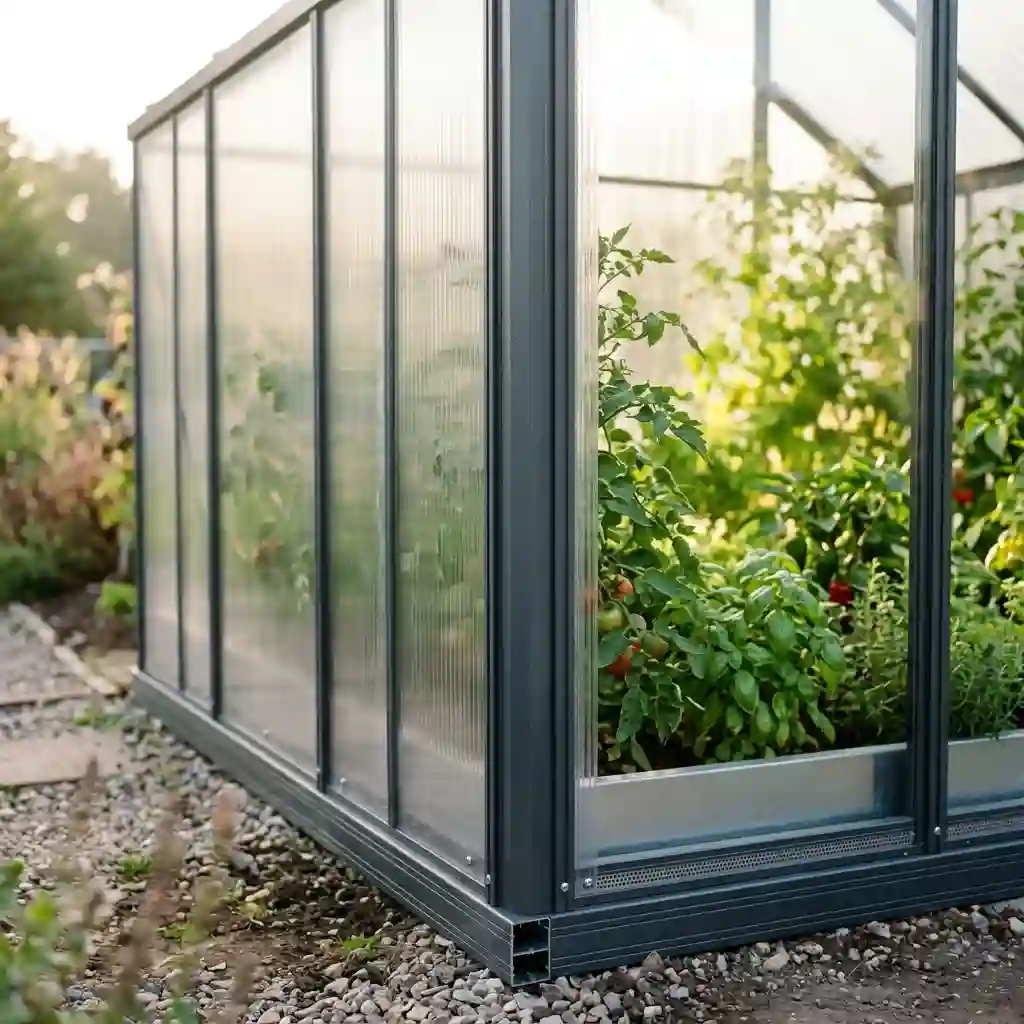
Twin-wall polycarbonate is lighter than glass and harder to break. Its internal channels also help slow heat loss.
Install each panel in the direction listed by its maker. The channels often need to run from top to bottom so moisture can drain. Allow space for the panels to expand in warm weather.
Seal exposed channels with the correct tape or trim. This helps keep out dirt, water, and insects.
Best for: A durable permanent structure
Skill level: Intermediate to advanced
Space required: Medium to large
Likely cost: High
Drawback: Incorrect sealing can trap dirt and moisture
15. Make a Geodesic Dome Greenhouse
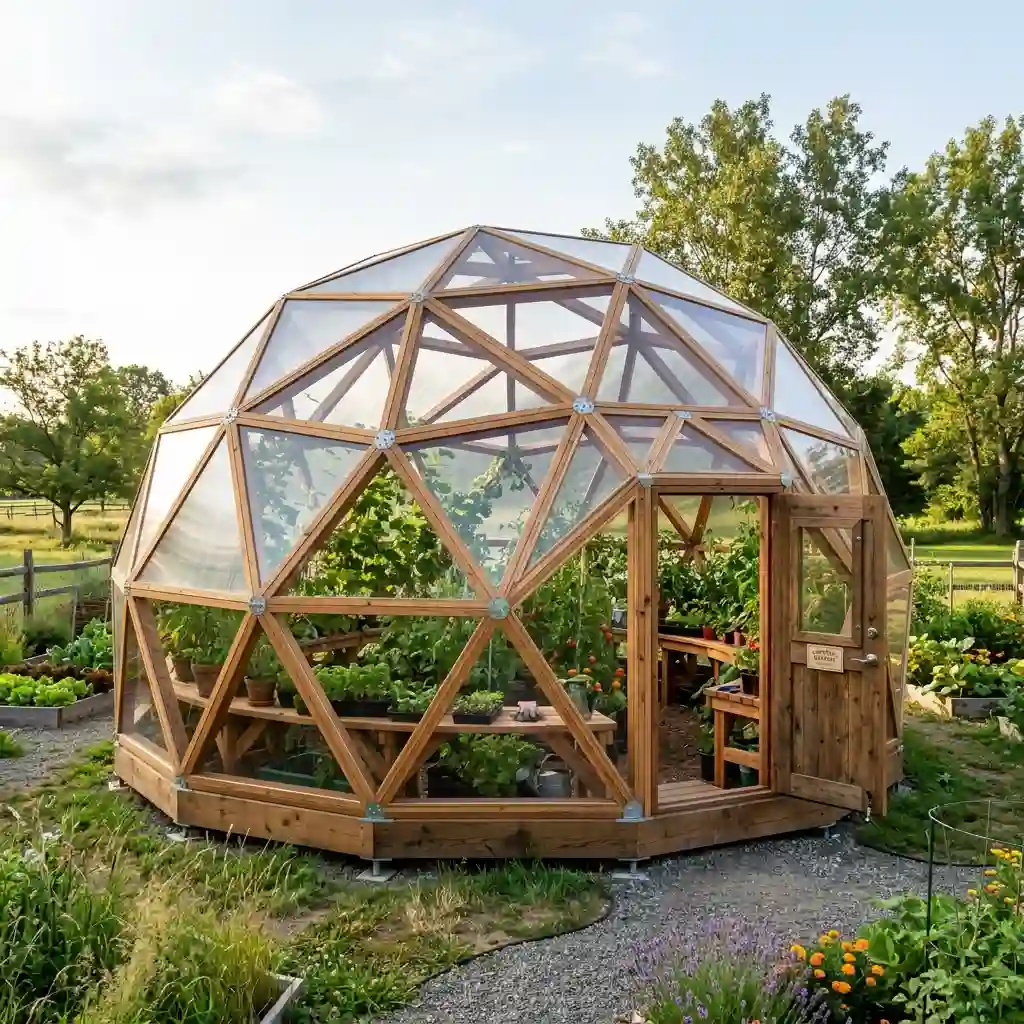
A geodesic dome uses connected triangles to create a strong, rounded frame. You can build the sections from wood or metal.
The dome shape handles wind well when properly anchored. It also offers good headroom near the center.
Accurate cuts and joints are critical. Curved walls can make standard shelves hard to fit, so plan custom benches before building.
Best for: Exposed gardens and bold backyard designs
Skill level: Advanced
Space required: Large, round footprint
Likely cost: Moderate to high
Drawback: Complex joints and awkward wall space
16. Combine a Shed and Greenhouse
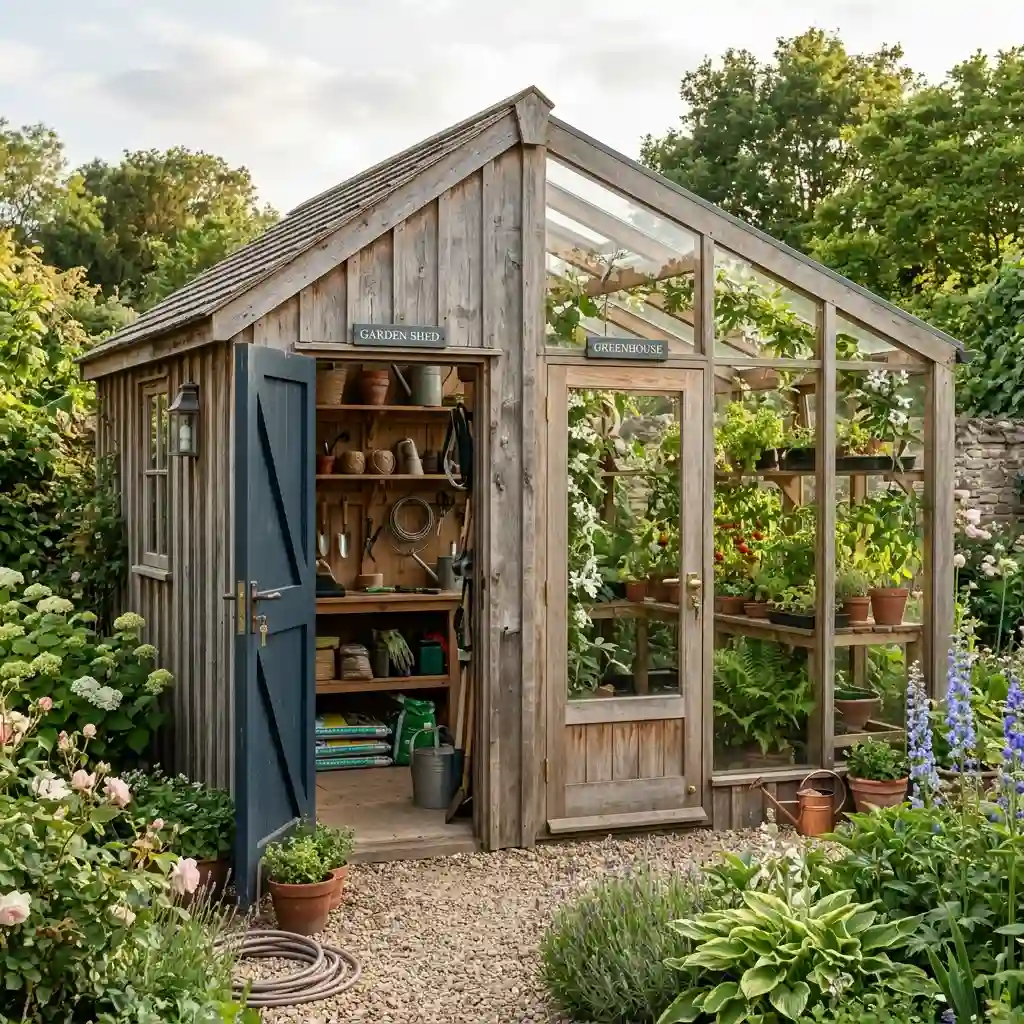
Split one building into a storage area and a growing area. Use a solid internal wall for shelves, hooks, and garden tools.
Give each zone its own door when possible. Keep wet soil and watering equipment away from lights, chargers, and other electrical items.
The solid shed area can block some sun. Check the sun’s path before deciding which side will hold the greenhouse.
Best for: Gardeners who need growing and storage space
Skill level: Advanced
Space required: Large
Likely cost: High
Drawback: More planning, materials, and building time
17. Cover Existing Raised Beds
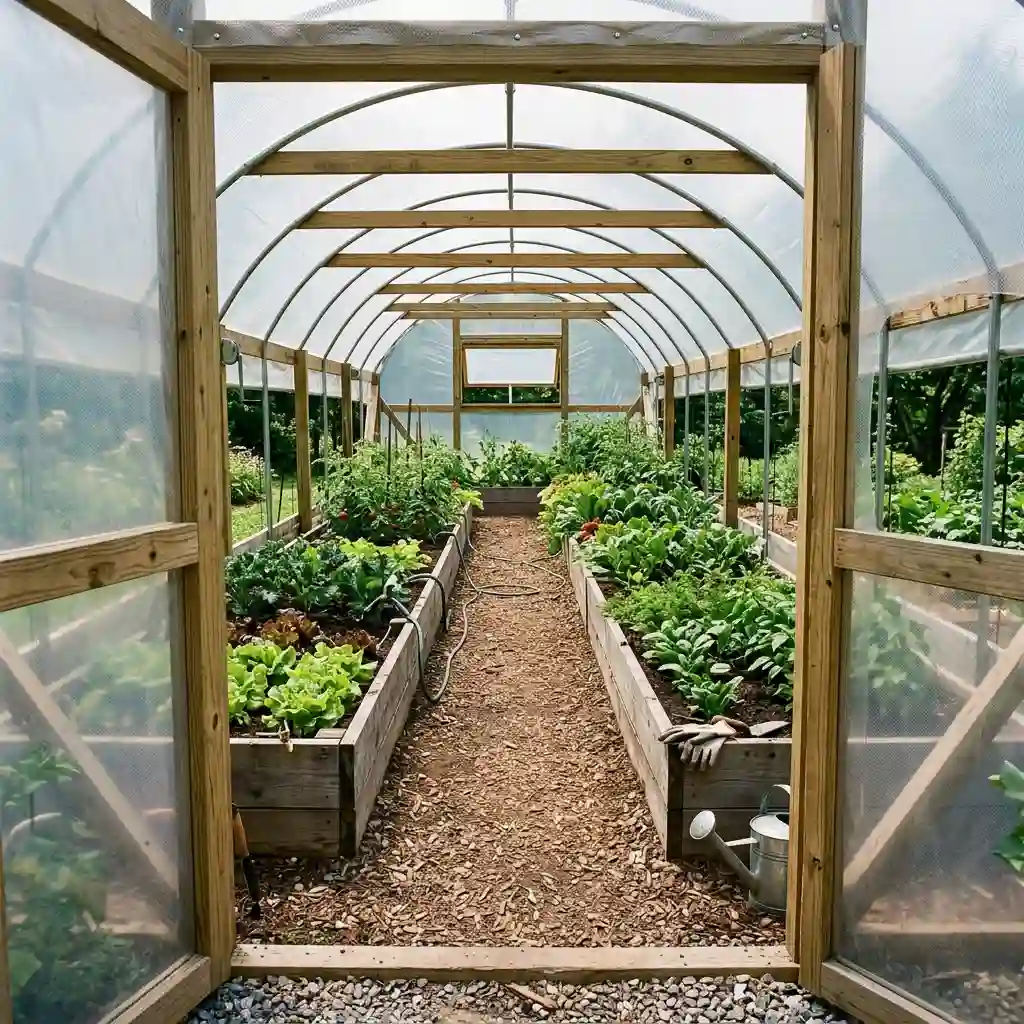
Build a greenhouse frame around your existing raised beds. This lets you protect crops without moving soil or rebuilding the garden.
Leave a path wide enough for watering, harvesting, and carrying tools. Add roll-up sides or large vents for summer airflow.
Think about crop rotation before placing permanent supports. You should still be able to reach and refresh all the soil.
Best for: Vegetable gardens with established beds
Skill level: Intermediate
Space required: Medium to large
Likely cost: Moderate
Drawback: Poorly placed supports can block garden access
18. Put a Portable Greenhouse on Skids
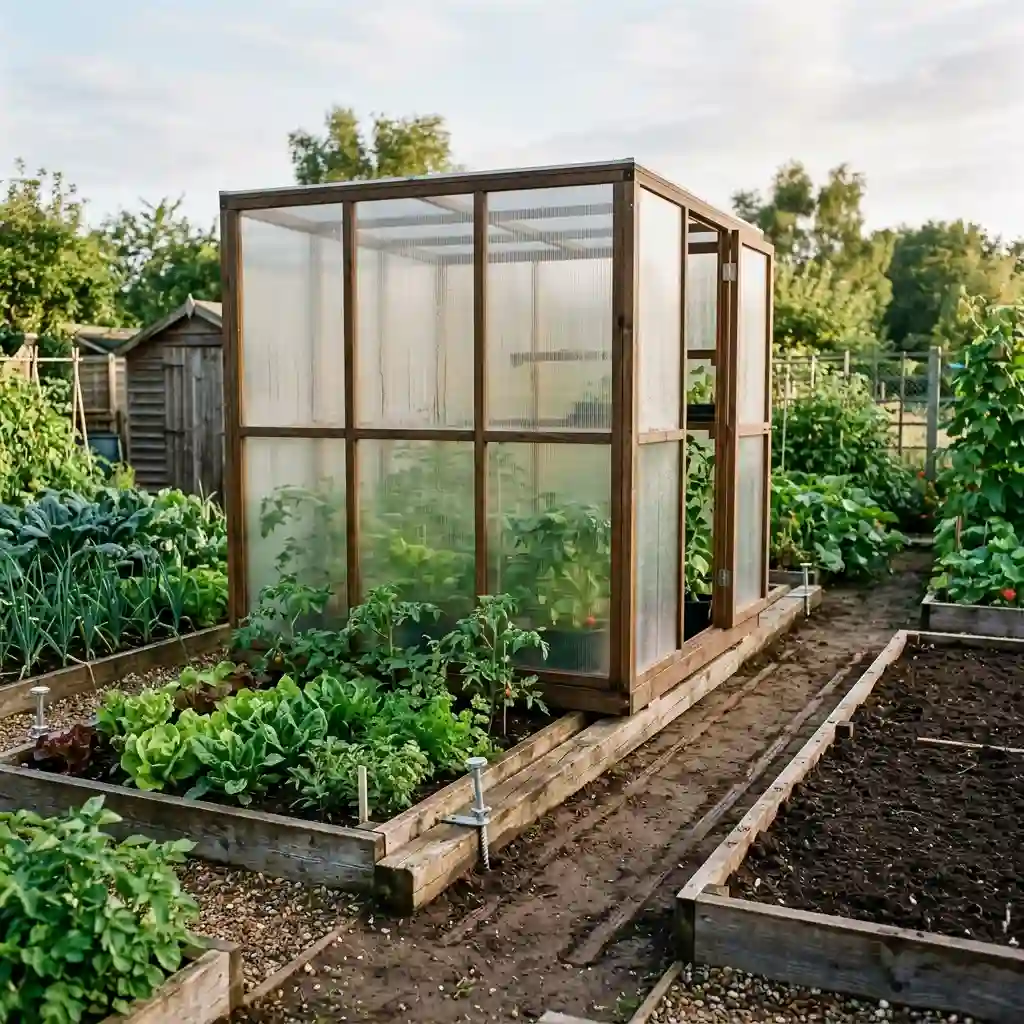
Build a lightweight wood or metal greenhouse on two strong runners. You can then pull or slide it between seasonal beds.
Use removable anchors after each move. A portable greenhouse is still light enough for wind to lift or shift.
Keep the frame square and avoid heavy glass. Plastic film or lightweight panels make moving easier.
Best for: Crop rotation and seasonal bed protection
Skill level: Intermediate to advanced
Space required: Large enough for several positions
Likely cost: Moderate
Drawback: Moving it requires clear, level ground
Compare the Best Greenhouse Coverings
Clear walls alone do not create a reliable greenhouse. Your covering affects cost, weight, heat control, safety, and maintenance.
| Covering | Cost | Weight | Durability | Installation |
| Greenhouse film | Low | Very light | Best for temporary or seasonal use | Easy |
| Polycarbonate | Moderate to high | Light | Strong and suitable for long-term use | Moderate |
| Glass | High | Heavy | Long-lasting but breakable | Difficult |
| Reclaimed windows | Low to moderate | Heavy | Depends on age and condition | Difficult |
Greenhouse-grade film usually lasts longer outdoors than thin household plastic. It is made to face sun, rain, and changing temperatures. Keep greenhouse repair tape nearby so you can seal small tears before they spread.
Glass provides a clear view, but it requires a strong frame. It can also create sharp pieces when broken. Polycarbonate is a safer choice where children, pets, or falling branches are a concern.
Reclaimed windows can reduce material costs. Still, repairs, paint testing, replacement glass, and stronger framing may raise the final price.
How to Make Your Greenhouse Safer
A greenhouse must handle heat, wind, water, tools, and daily foot traffic. Check these areas before moving plants inside.
Anchor the Frame
Choose anchors based on your soil and local wind. Ground stakes may work for a small seasonal hoop house. A permanent structure may need concrete footings or another solid foundation.
Do not assume the greenhouse’s weight will keep it in place. Wind can get under doors, vents, and loose plastic.
Add High and Low Vents
Warm air rises, so high vents let heat escape. Lower openings bring cooler air inside.
Add a thermometer at plant height. Check it at different times of day during the first week. Open doors and vents before the air becomes too hot for your plants.
Remove Sharp Edges
Smooth cut metal, exposed wire, rough wood, and sharp plastic corners. Cover screw ends that stick into paths or growing areas.
Check fasteners and plastic after every major storm. Small loose parts can quickly cause larger damage.
Create a Safe Path
Use gravel, pavers, or another firm surface that drains well. Wet soil, algae, and loose plastic can create slipping hazards.
Keep hoses away from the main path. If you use electricity, choose equipment made for damp outdoor spaces and follow local safety rules.
Complete a Final Inspection
Before using the greenhouse, confirm that:
- The frame is square and stable.
- Every anchor is secure.
- The door opens without sticking.
- Vents can open and close safely.
- The covering has no loose edges.
- Water drains away from the base.
- Shelves can hold wet pots.
- Sharp fasteners are covered.
How to Pick the Best DIY Greenhouse
Match the design to the main job you need it to perform. A large greenhouse may look useful, but it also costs more and takes longer to maintain.
| Your main need | Good options |
| Very small budget | Storage bin, covered shelf, or basic cold frame |
| Small space | Cabinet, A-frame, window box, or lean-to |
| Beginner project | Covered shelf, storage bin, or PVC hoop |
| Walk-in growing space | PVC hoop or cattle-panel house |
| Permanent structure | Timber or polycarbonate greenhouse |
| Seasonal protection | Folding frame or portable greenhouse |
| Seed starting | Storage bin, cold frame, or shelf |
| Raised-bed protection | Cattle panel, A-frame, or bed-covering frame |
Choose a design for the worst weather your yard usually receives. Do not base the whole plan on calm spring days.
Start with the smallest structure that meets your needs. You can learn how heat, moisture, and airflow affect your plants before paying for a larger greenhouse.
Start with a Greenhouse You Can Manage
These DIY greenhouse ideas range from a covered storage bin to a permanent timber building. Each one can protect plants, but the best choice depends on your available space, budget, weather, and building skills.
A small project is often the best place to start. Try a cold frame or covered shelf if you mainly want to raise seedlings. Choose a hoop house if you need affordable walk-in space. For long-term use, consider a timber frame with polycarbonate panels.
Measure your site before buying anything. Then choose one design and make a complete list of materials, tools, anchors, and vents. Good planning will make your greenhouse safer, easier to use, and less costly to repair.