
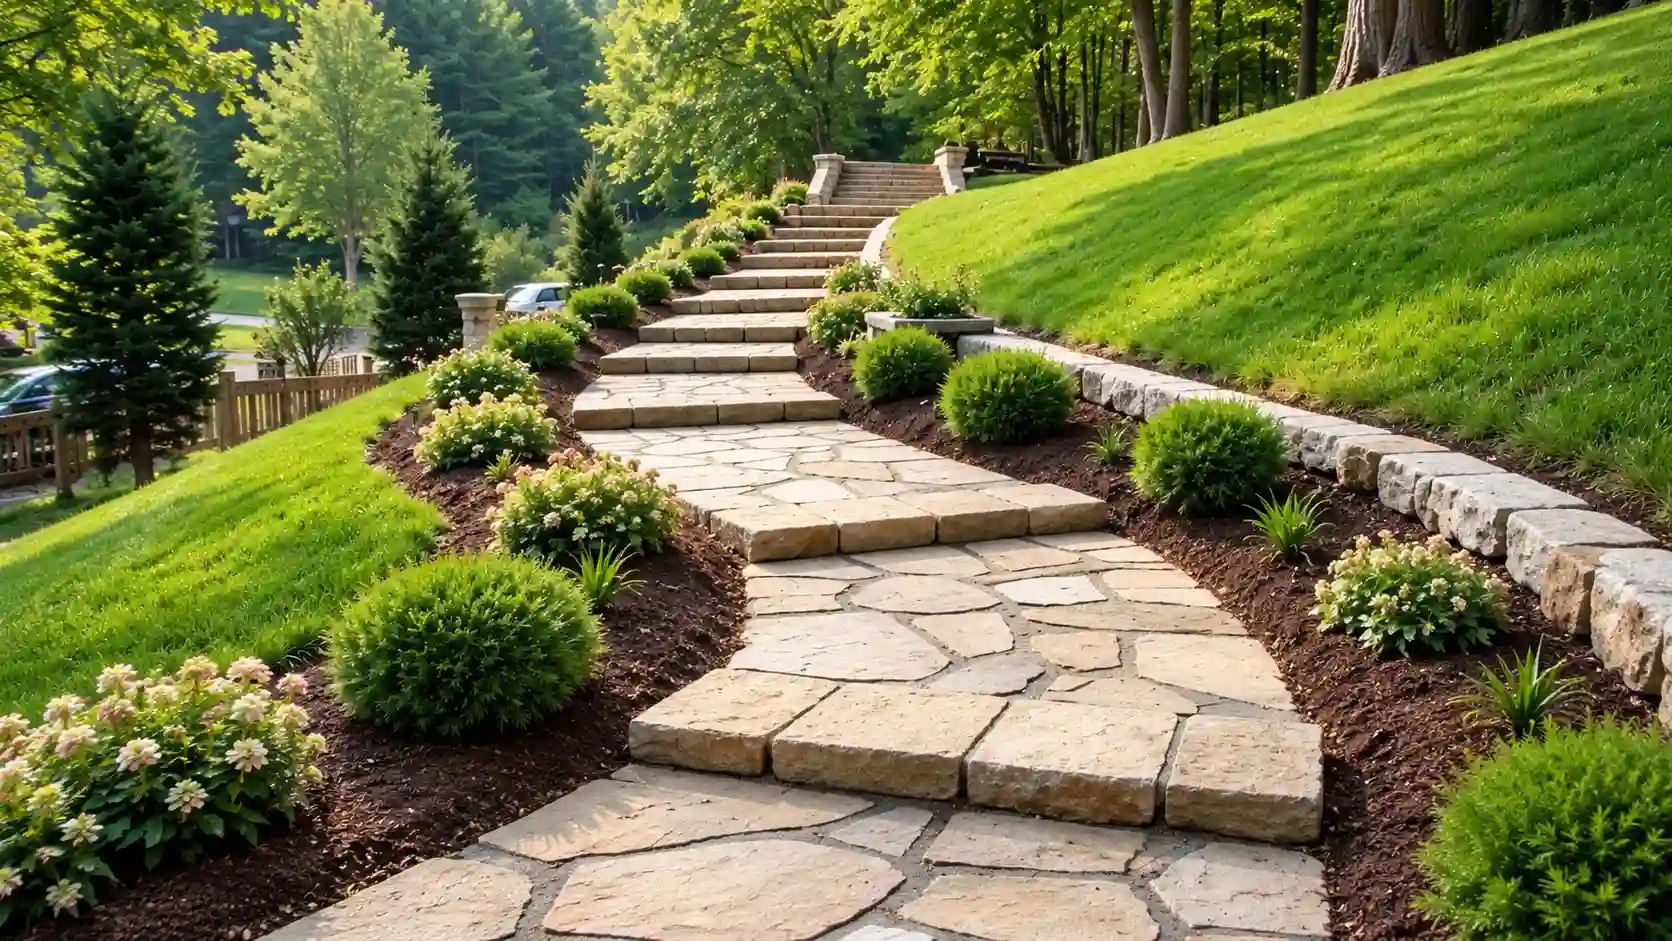
A steep yard may look beautiful, but moving across it can be difficult. Rain can turn bare soil into mud. Loose gravel may slide downhill. An informal trail can slowly become a washed-out channel.
The right steps or pathway can make your hillside safer and easier to use. It can also protect plants and soil by keeping foot traffic on one clear route.
These hillside steps and pathway ideas cover natural stone, concrete, brick, gravel, timber, pavers, and planted paths. You will also learn how switchbacks, level landings, handrails, and lights can improve a steep route.
Before choosing from these sloped yard pathway ideas, look at your land carefully. The slope, soil, drainage, climate, and people using the path should guide your decision. A design that works on a gentle garden bank may fail on a steep, unstable hill.
Plan Safe Hillside Landscaping Steps First
Choose the route before you choose the material. A beautiful stone or brick path can still fail if water runs beneath it or the soil moves.
Start by measuring the total rise of the hill. The rise is the vertical distance between the bottom and top. Next, measure how much horizontal space you have.
You can estimate the slope by dividing the rise by the horizontal run. For example, a yard that rises 5 feet over a 20-foot run has a 25% slope.
A short, steep hill may need direct steps. A wide hill may have enough room for a curved or switchback path. A switchback crosses the hill in stages instead of climbing straight up.
Watch the area during heavy rain. Look for flowing water, deep puddles, washed-out soil, and wet spots. Your pathway should not become a channel that sends water toward your house.
You should also mark:
- Underground utility lines
- Large tree roots
- Irrigation pipes
- Drainage outlets
- Property boundaries
- Septic system parts
Think about who will use the path. Wide, even steps may work well for daily access. A rough stepping-stone trail may be fine for an occasional walk through a garden. It may be a poor choice for children, older adults, or anyone with limited mobility.
Federal outdoor guidance uses a 5% running slope as an important reference for some walking surfaces and trails. However, these federal rules may not apply to a private home. Check your local residential codes for stair, landing, guard, and handrail rules.
Before You Build
- Measure the rise and available run.
- Test the soil for softness or movement.
- Watch where rainwater flows.
- Decide how often the route will be used.
- Set a budget for materials and labor.
- Check local permit and building rules.
Natural Hillside Steps and Pathway Ideas
Natural materials work well in cottage, woodland, rustic, and informal gardens. The goal is to make the route feel connected to the land without leaving the walking surface unstable.
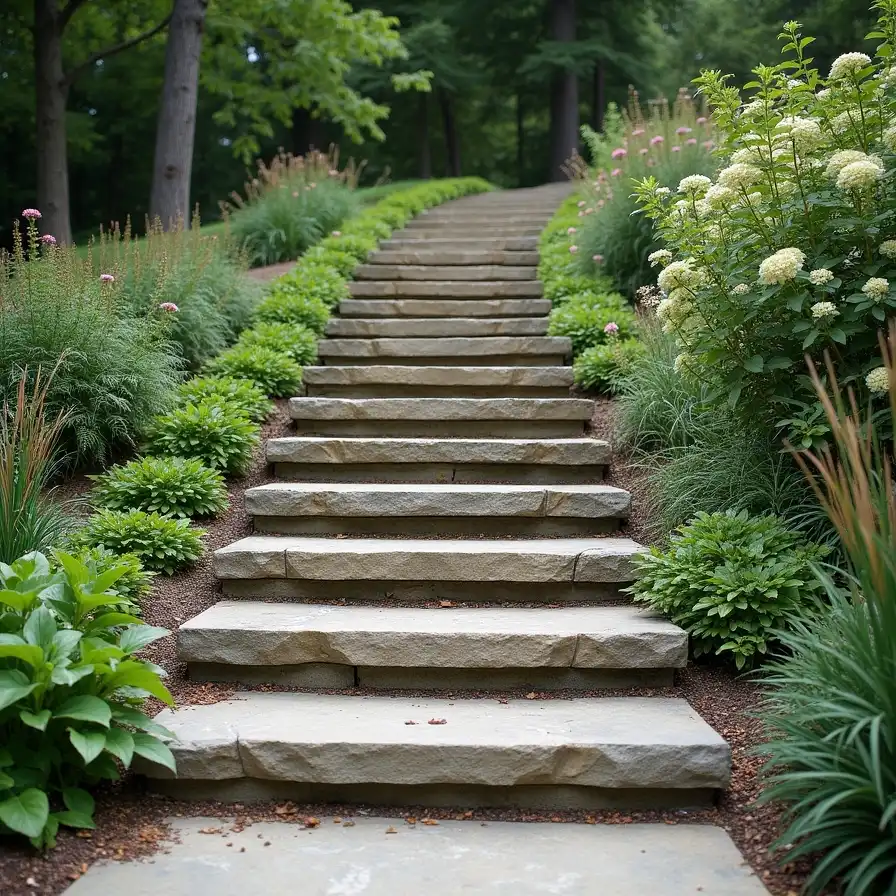
1. Build Wide Natural Stone Slab Steps
Best for: Short slopes, cottage gardens, and high-use routes
Broad stone slabs create strong treads with a natural appearance. Their weight helps them feel solid when they are set on a firm base.
Choose stone with a rough or textured surface. Smooth stone may become slippery after rain or when covered with frost. Wide slabs also reduce the number of joints where weeds or loose soil can collect.
Set each slab on compacted crushed stone rather than placing it directly on soft soil. Keep the step heights consistent, even when the stones have different shapes.
Plant low ground covers beside the steps to soften the hard edges. Keep spreading plants away from the main walking surface so they do not hide changes in level.
Watch for: Heavy slabs often require lifting equipment or professional installation.
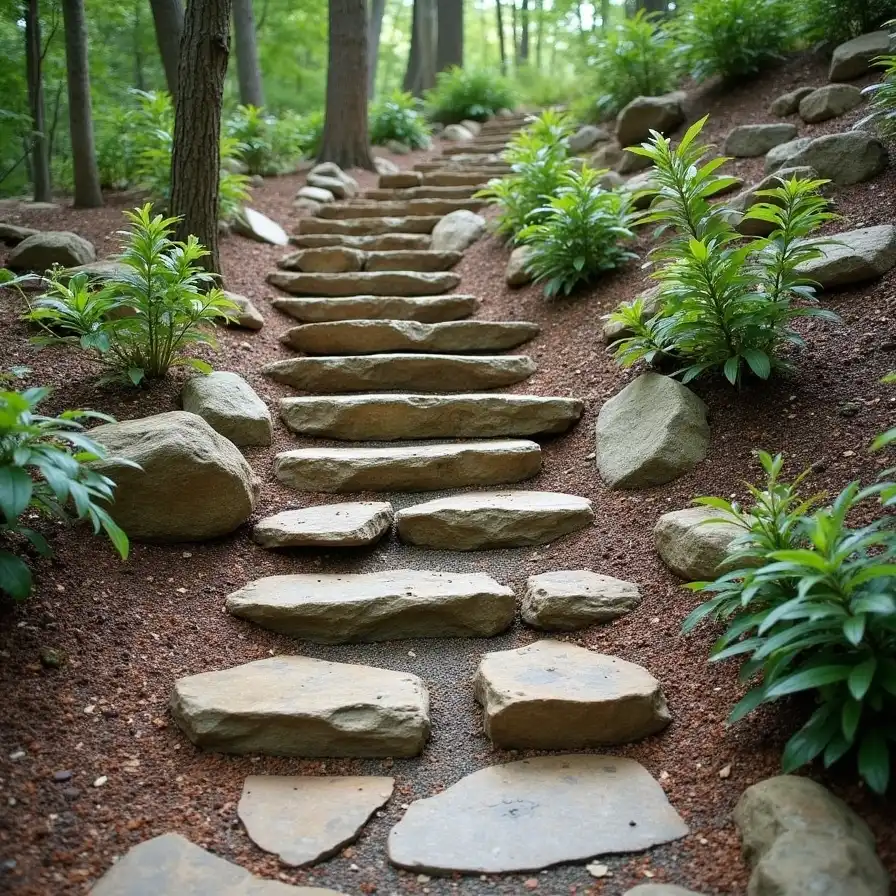
2. Create Irregular Fieldstone Garden Steps
Best for: Informal gardens and wooded hillsides
Fieldstone steps look less formal than cut stone. Their varied shapes can help the stairway blend into an existing rock garden or natural slope.
The visible shapes can be irregular, but the walking surfaces still need to feel firm and even. Do not build a staircase from loose piles of rock. Each stone should sit securely on a prepared base.
Fill wide spaces beside the steps with compacted gravel or low plants. This keeps soil from washing into the joints.
You can also repeat a few stone colors from nearby walls, boulders, or garden borders. This small detail helps the new steps feel like part of the yard.
Watch for: Deep joints and uneven treads can become trip hazards.
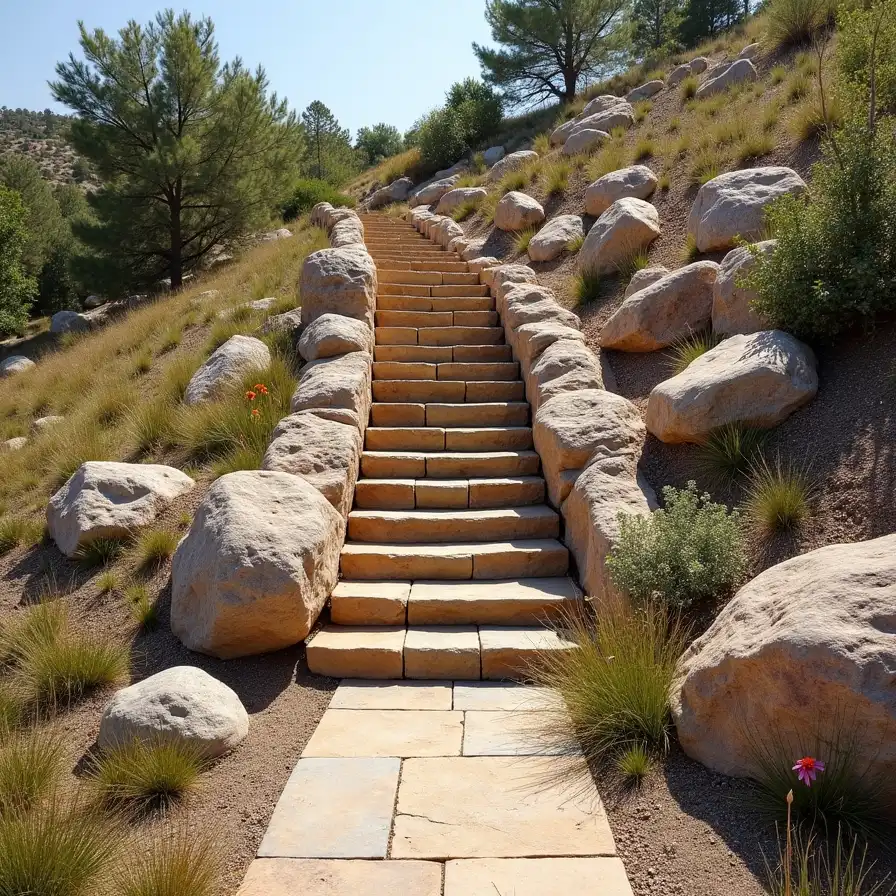
3. Frame the Stairway With Large Boulders
Best for: Rocky slopes and dry-climate landscapes
Large boulders can define both sides of a hillside staircase. They give the route a strong shape while connecting it to the surrounding land.
Place the boulders beside the steps rather than in the main walking area. Use different sizes, but bury part of each rock so it looks settled and remains stable.
Fill the spaces between the boulders with plants that suit your soil, sunlight, and climate. Dense roots can help cover exposed ground. However, plants cannot fix a serious slope failure.
Keep large rocks away from drains and natural water channels. A poorly placed boulder can redirect runoff and cause erosion somewhere else.
Watch for: Large rocks can move during installation. Hire experienced help when lifting or slope stability is a concern.
4. Add a Woodland Stepping-Stone Trail
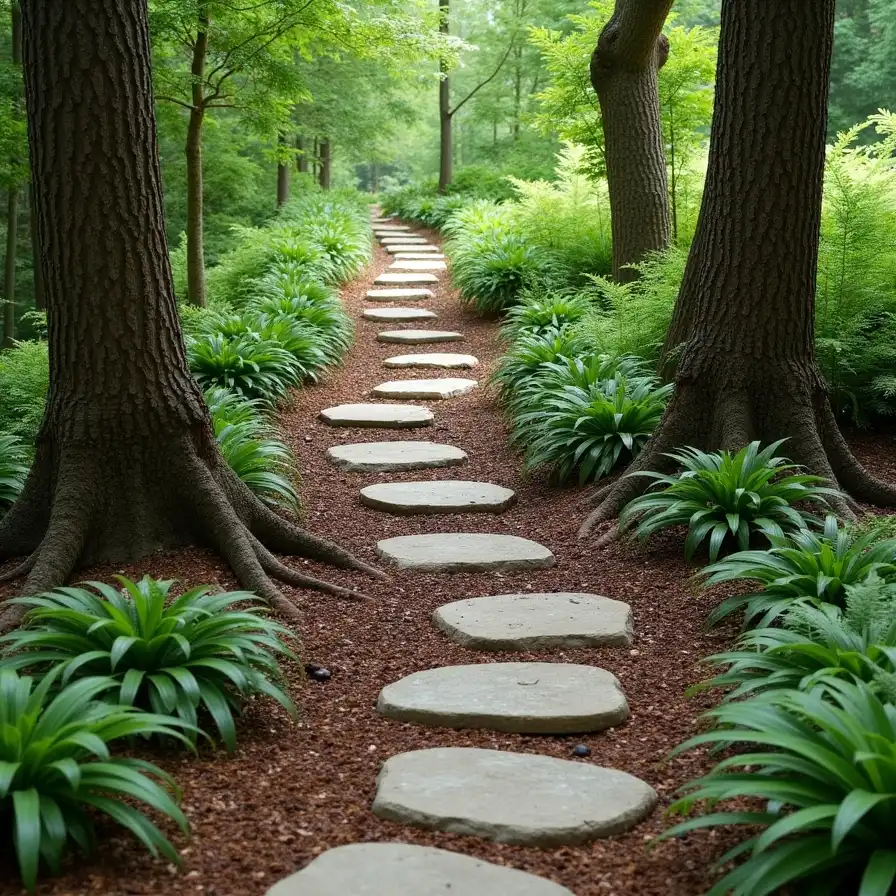
Best for: Gentle wooded slopes with light foot traffic
A stepping-stone trail can curve around trees and existing plants. It requires less hard material than a full staircase and keeps the setting informal.
Use large stones that give each foot enough space. Set them into the ground so they do not rock or slide. Add coarse wood chips or compacted fine gravel between them.
Plan the route around major tree roots. Cutting large roots can damage the tree and weaken the soil around the path.
Widely spaced stones may look charming, but they are harder to use. Keep the gaps comfortable and predictable.
Watch for: Leaves, moss, and wet shade can make stones slippery. Clear the surface often.
5. Design a Flagstone Switchback Path
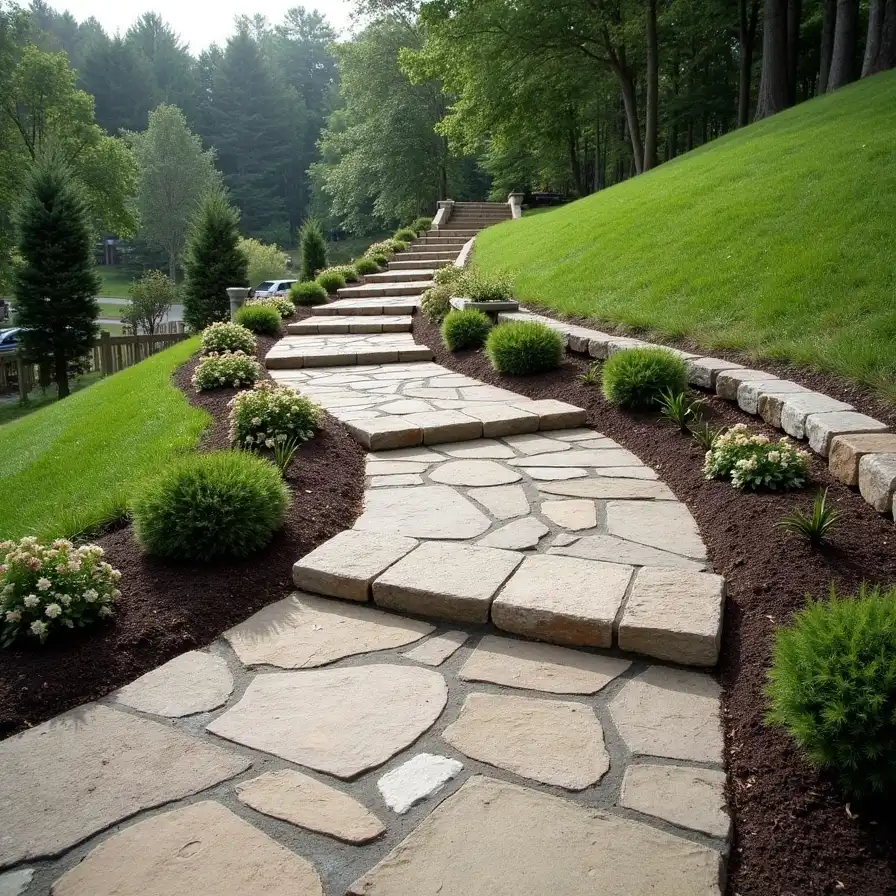
Best for: Wide hillsides where a direct staircase feels too steep
A flagstone switchback travels across the face of the hill. It then changes direction at a level turning area.
This route makes the climb feel more gradual. It also gives you room for planting beds between each part of the path.
Use broad flagstones with narrow, stable joints. Add secure edging where the downhill side could shift. Each turn should provide enough space to stop and change direction safely.
Plant both sides of the route. This can discourage people from taking shortcuts straight down the slope.
A flagstone hillside path needs careful drainage. Water should cross or leave the route without washing soil or joint material downhill.
Watch for: Do not let water collect at the switchback turns.
Durable Sloped Yard Pathway Ideas
A frequently used route needs a firm surface. Concrete, brick, pavers, and retaining-wall steps can provide long-term access when they have a sound base.
6. Install Textured Poured Concrete Steps
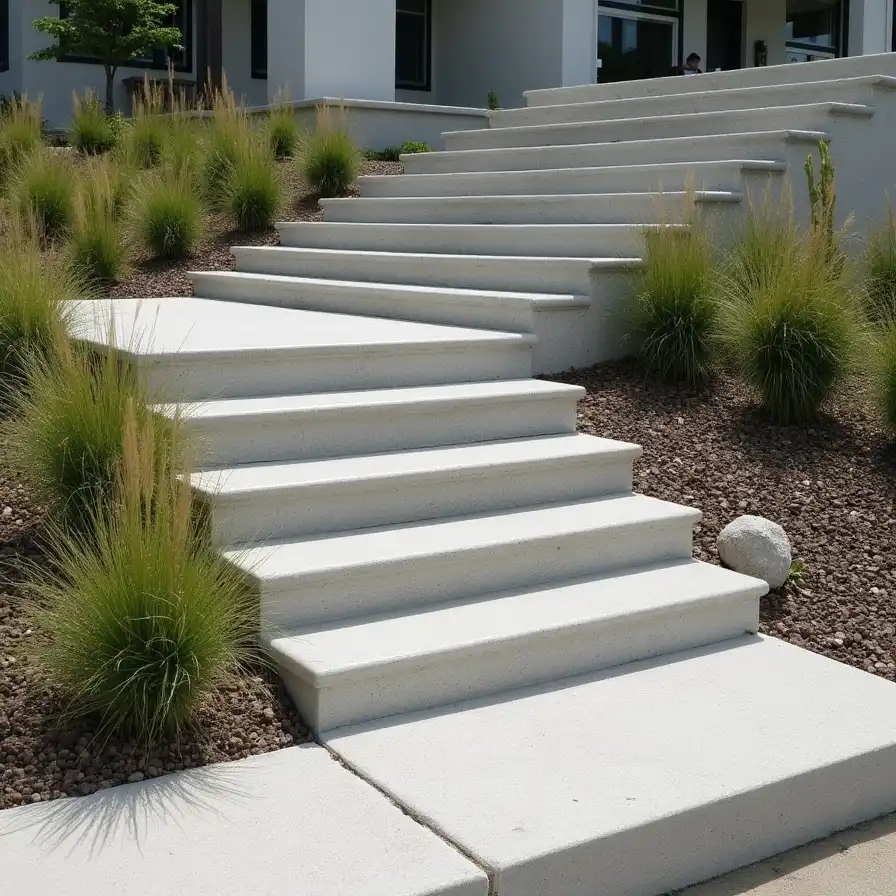
Best for: Modern homes and busy routes
Poured concrete creates a clean and permanent stairway. It works well beside modern homes, garages, and lower patios.
Use a broom finish or another textured surface to improve grip. A polished finish may look sleek, but it can become slippery when wet.
Straight forms create a simple staircase. Custom forms can create wider landings or gentle curves. You can also add color or an exposed aggregate finish to soften the plain gray surface.
Concrete does not adjust well when the soil beneath it moves. Drainage, compaction, and proper reinforcement need to be handled before the pour.
Watch for: Poorly placed concrete may crack or separate after soil movement and freezing weather.
7. Use Precast Concrete Block Steps
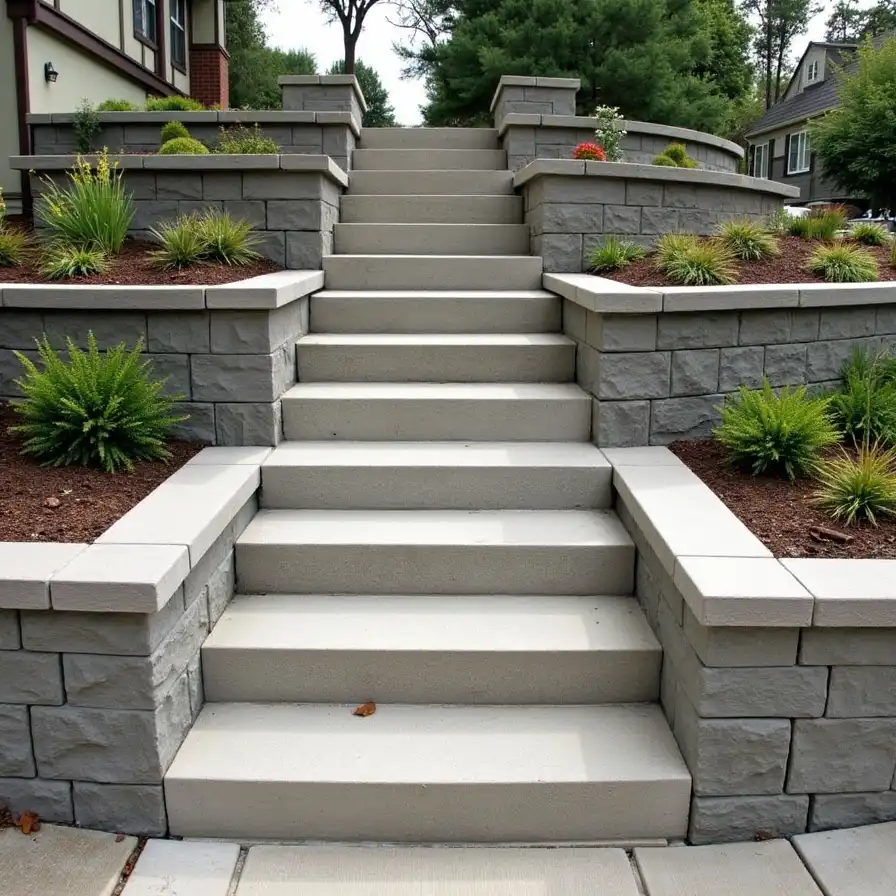
Best for: Practical landscapes and modular designs
Precast concrete units give you a solid surface without pouring every step in place. Their repeated size creates a neat and orderly staircase.
These blocks come in different colors, textures, and shapes. Some look like cut stone, while others have a smooth modern finish.
A damaged unit may be easier to replace than one part of a poured staircase. However, every block still needs a compacted and level base.
Use the same block style in nearby retaining walls or borders. Repeating one material can make the yard look connected.
Watch for: Heavy blocks may settle unevenly if the base is thin or poorly compacted.
8. Build a Traditional Brick Stairway
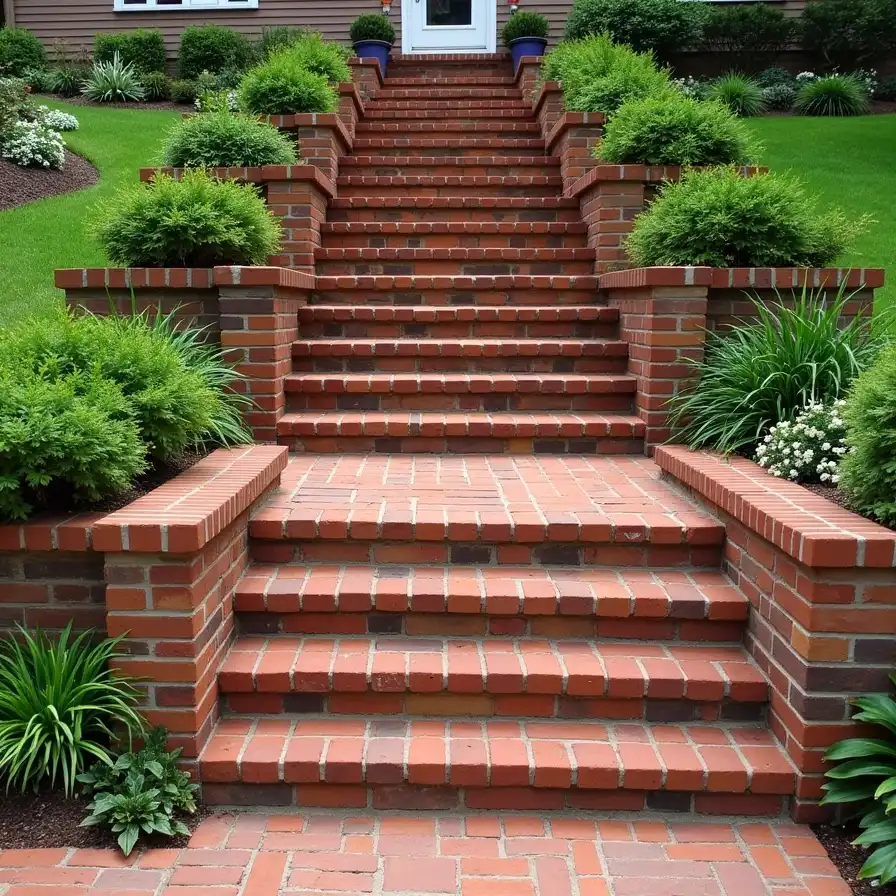
Best for: Traditional homes, courtyards, and cottage gardens
Brick steps can connect a hillside with an existing brick house, walkway, or patio. The warm color also works well with green planting.
Use paving bricks rated for outdoor ground contact. Regular building bricks may absorb water or break down faster in harsh weather.
You can place contrasting bricks along the front of each tread. This makes each step easier to see and adds a simple border.
Keep the joints even and repair loose mortar or joint sand quickly. Moss may grow in damp shade, so the surface will need cleaning.
Watch for: Brick can move during freeze-thaw cycles if the base and drainage are weak.
9. Lay an Interlocking Paver Path
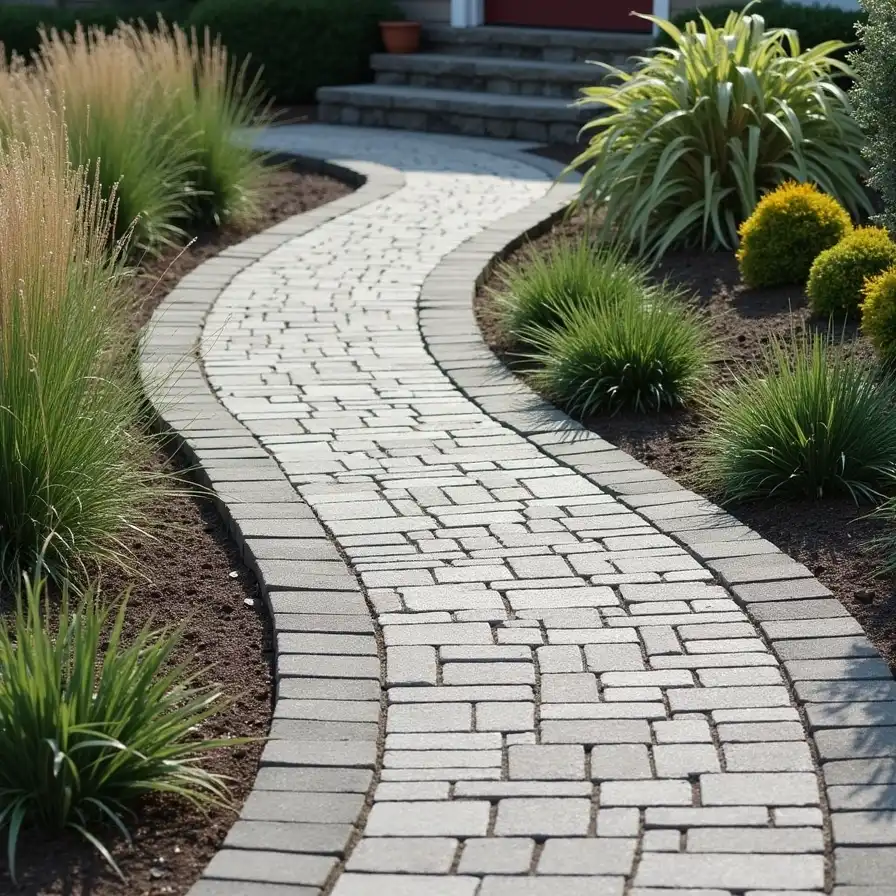
Best for: Curved paths and coordinated outdoor spaces
Pavers offer more patterns and colors than plain concrete. You can use them to connect the hillside path with a driveway, patio, or pool area.
Choose textured pavers for better grip. Small polished units may feel less secure on a steep route.
Add strong edge restraints. These stop the pavers from moving sideways as people walk across the slope. The base should also extend beyond the visible edges.
A simple running pattern can make a narrow path feel longer. A contrasting border can mark the edge and changes in direction.
Watch for: Loose joint sand and failed edging can allow the surface to spread.
10. Combine Steps With a Retaining Wall
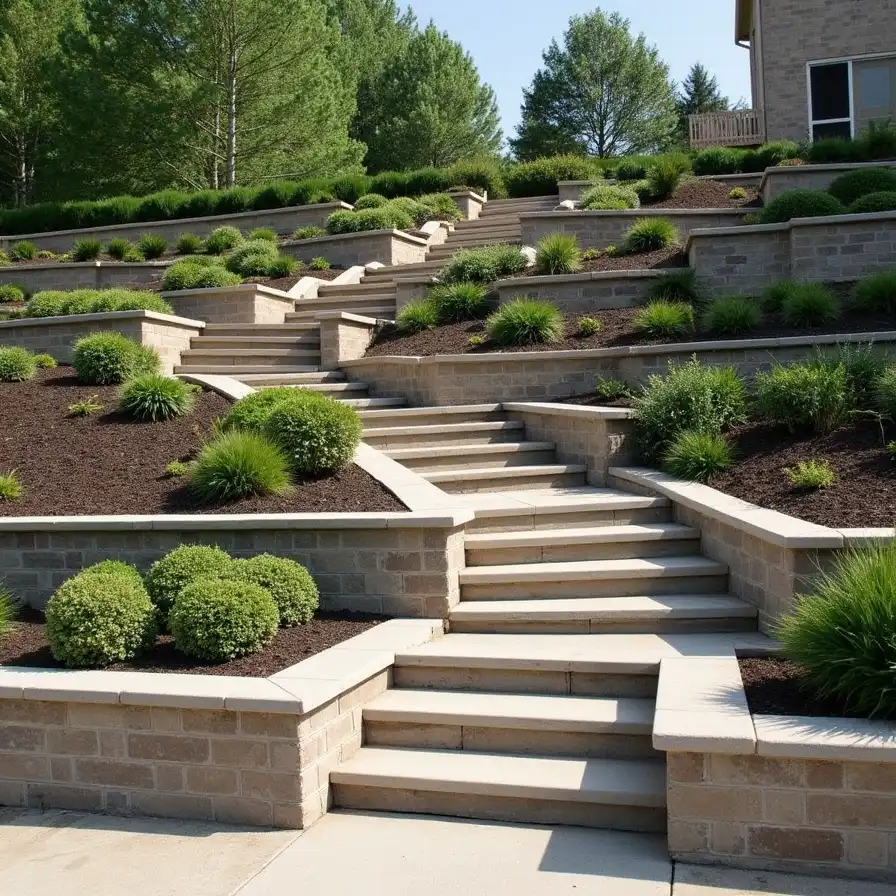
Best for: Terraced slopes and yards with major height changes
Retaining wall steps can turn a difficult slope into several smaller garden levels. The stairway may pass through the wall or sit beside it.
Use matching stone, concrete block, or brick for both features. This keeps the design from feeling crowded.
Add planting beds between stair runs. These beds can hold shrubs, flowers, or ground covers that soften the wall.
Retaining walls must manage the pressure of soil and water behind them. Taller walls and unstable slopes may need engineered footings, reinforcement, and drainage.
Watch for: Cracks, bulging walls, and leaning sections are warning signs. Ask a qualified professional to inspect them.
Affordable and Low-Impact Hillside Path Ideas
You do not always need expensive masonry to improve a hill. Gravel, timber, mulch, and reused materials can work well in the right setting. The trade-off is often more regular maintenance.
11. Create a Crushed-Stone Switchback Path
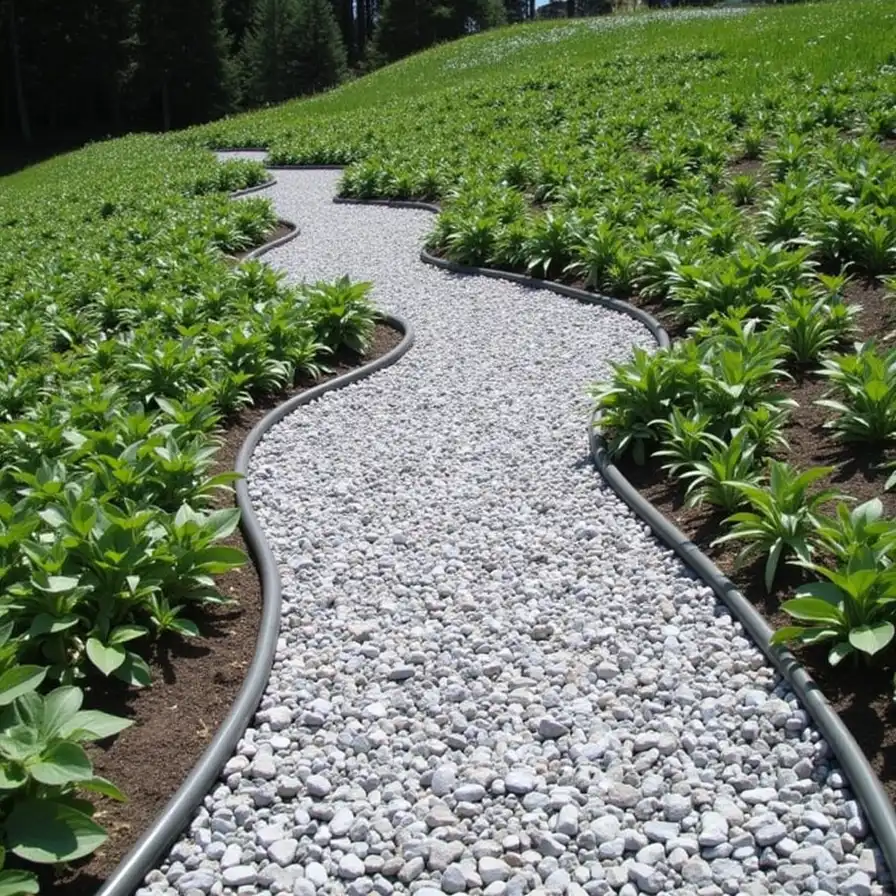
Best for: Wide slopes and informal gardens
Angular crushed stone locks together better than smooth, rounded gravel. Once compacted, it creates a firmer walking surface.
Run the path across the slope in a zigzag pattern. Add flatter turning areas where the route changes direction.
Steel, stone, or strong plastic edging can hold the crushed stone in place. The downhill edge needs special care because loose material naturally moves in that direction.
Check the path after heavy rain. Rake displaced stone back into place and repair small channels before they grow.
Watch for: Rounded pea gravel can roll beneath your feet. It is often a poor choice for steep sections.
12. Add Gravel Steps With Timber Risers
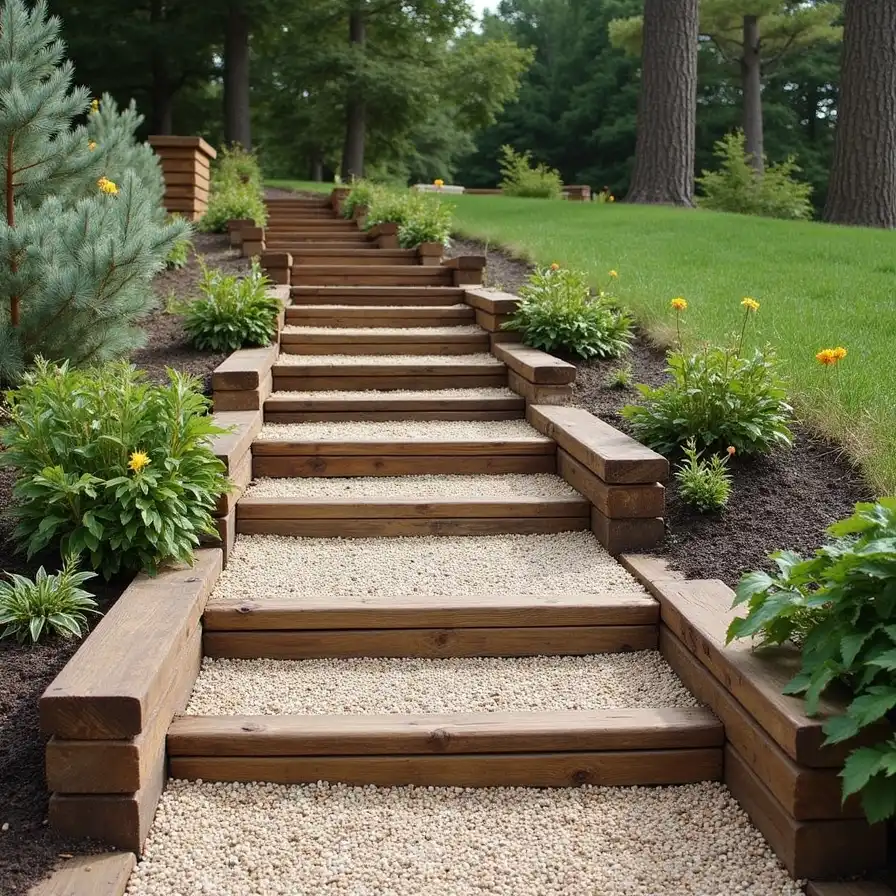
Best for: Moderate slopes and rustic DIY projects
Timber risers can hold compacted gravel in a series of shallow steps. This design costs less than many full-stone stairways.
Anchor each timber securely. Use wood or another product rated for outdoor ground contact. Fill each tread with compacted angular gravel.
Make the treads deep enough for a comfortable step. Avoid high risers that force users to climb sharply.
Inspect the wood every year. Look for rot, loose anchors, insect damage, and movement along the edges.
Watch for: Timber is not permanent. Plan for repair or replacement as it ages.
13. Make a Mulch Path for a Gentle Wooded Slope
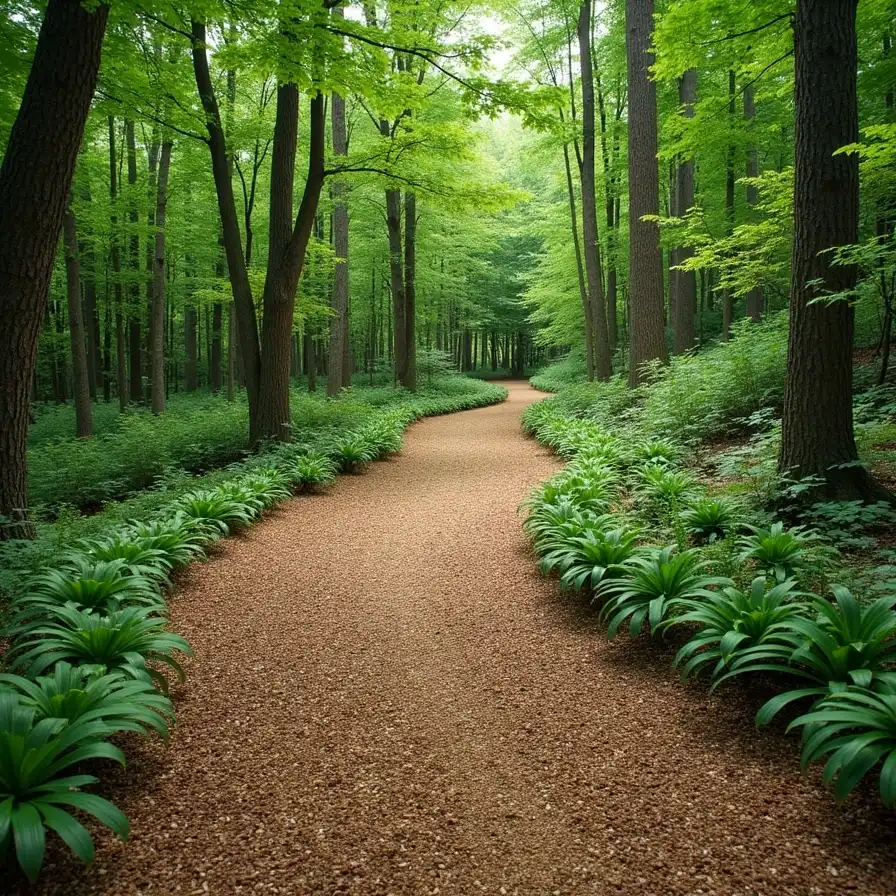
Best for: Lightly used shade gardens
Coarse wood chips create a soft and low-cost trail through a wooded area. They also fit well around trees and natural planting.
Use this idea only on a gentle slope. Mulch can wash downhill when placed on a steep route.
Shallow timber or stone checks can help hold the material at intervals. These small barriers should not create awkward trip points.
Add fresh chips when the old layer breaks down or becomes thin. Move any material that collects against tree trunks.
Watch for: This surface can become soft after heavy rain and may need frequent topping up.
14. Reuse Brick or Stone in a Mixed Path
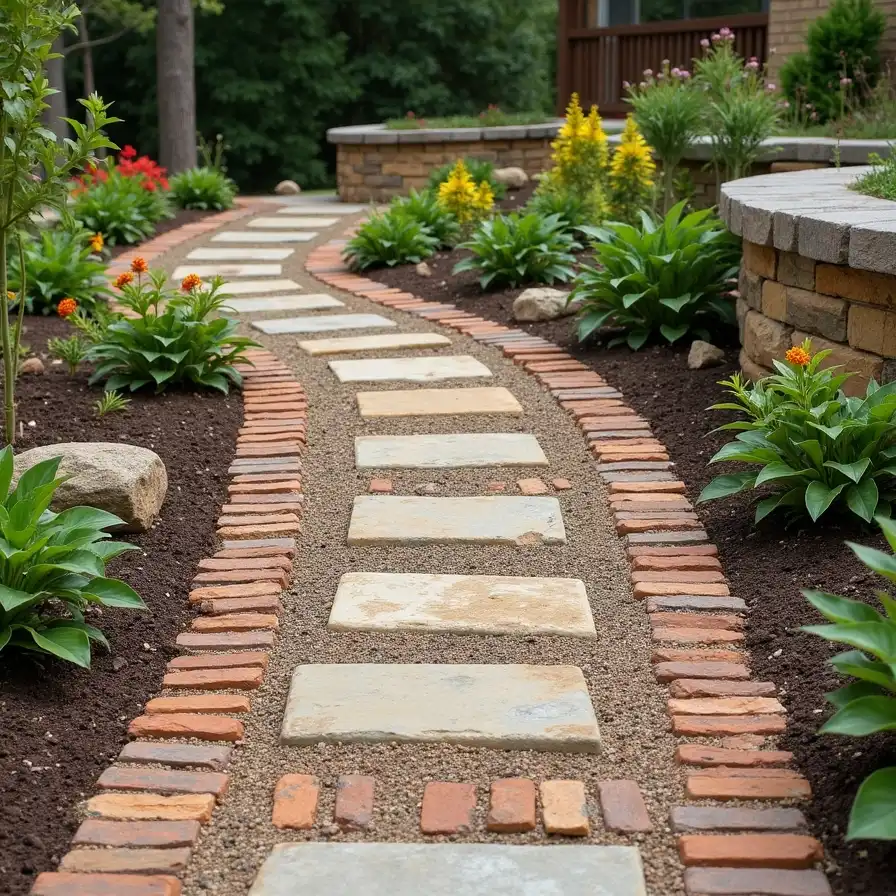
Best for: Small budgets and casual garden styles
Reclaimed brick and stone can add character without requiring all-new material. Use them as step edges, borders, or solid sections within a gravel path.
Sort the pieces by thickness before installation. Similar thicknesses make it easier to build an even walking surface.
Repeat the same colors along the route. This keeps the design looking planned instead of random.
Check old bricks for cracks and water damage. Some indoor or wall bricks are not strong enough for ground paving.
Watch for: Do not use badly worn pieces where people place most of their weight.
15. Use Large Pavers With Planted Joints
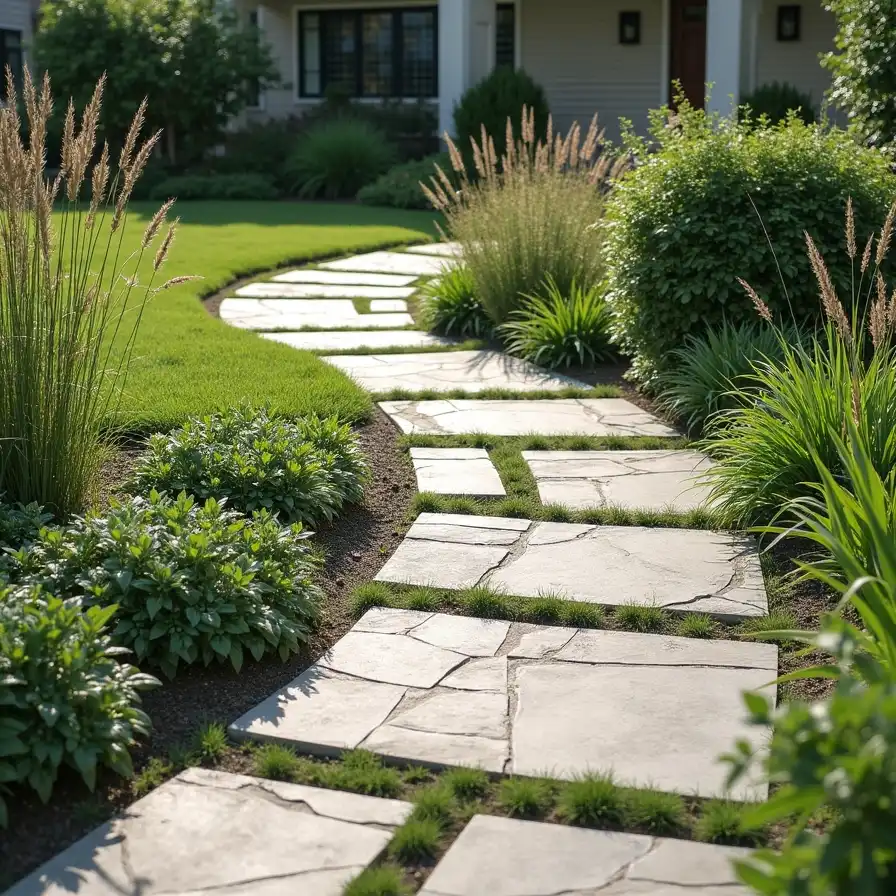
Best for: Gentle slopes and decorative garden paths
Large pavers can create a clear walking line while leaving room for plants between them. The result feels softer than a fully paved route.
Choose low plants that suit the light, moisture, and climate. Select types that can handle light foot traffic if they will grow close to the tread surface.
Keep the main foot-contact area open. Plants should not hide the edges of the pavers or create slippery growth across them.
Use a stable base beneath every unit. Planted joints do not make up for rocking or poorly set pavers.
Watch for: This design needs trimming, weeding, and occasional resetting.
Make Garden Steps on a Steep Slope Safer
The shape of a route matters as much as its surface. Switchbacks, landings, rails, and lighting can make a steep hillside feel less tiring and easier to use.
16. Use a Zigzag Switchback Route

Best for: Wide, steep hillsides
A switchback reduces the need to climb directly up the hill. It creates several angled path sections with turns between them.
Use clear, level areas at each turn. These spaces give users a place to pause and change direction.
Plant the open areas between path sections. Dense planting can reduce erosion and discourage people from creating shortcuts.
Plan how water will cross the route. A path that blocks natural drainage can create puddles on one side and erosion on the other.
Watch for: A switchback needs more horizontal space than a direct stairway.
17. Break Long Stairs Into Short Runs With Landings
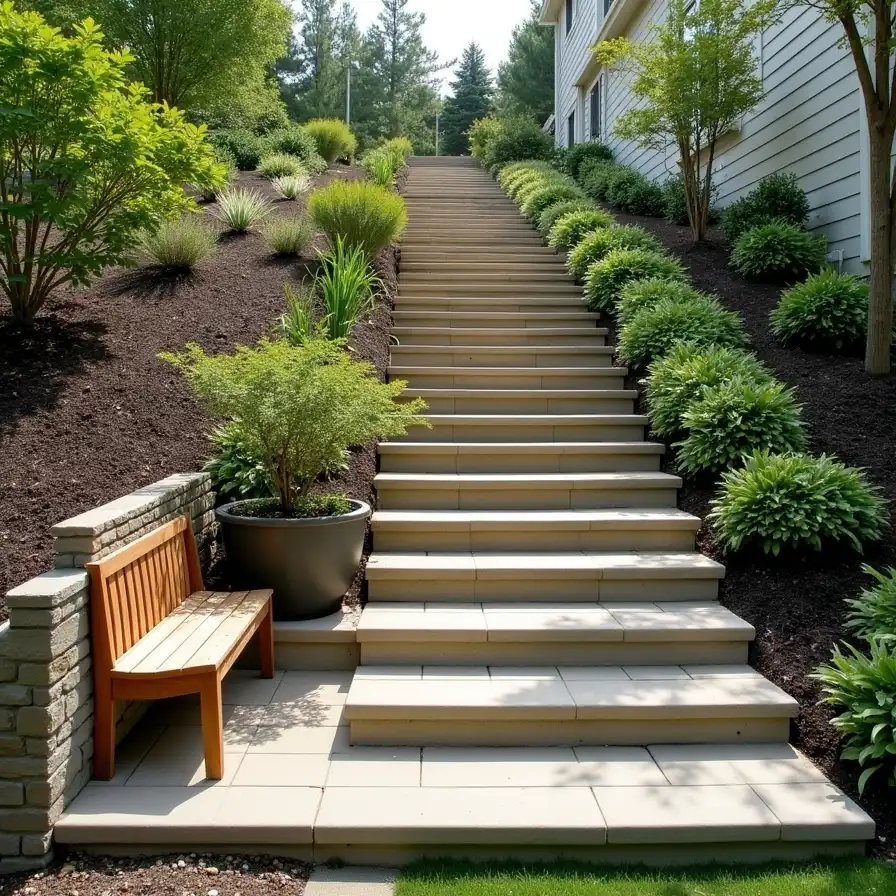
Best for: Tall hills and tiring climbs
A long, unbroken staircase can feel hard to climb. Divide it into shorter runs with level landings between them.
A landing may serve as a simple rest point. A larger one could become a small viewing area with a bench or planted container.
You can also change the stair direction at a landing. This helps the route fit a narrow or irregular yard.
Build each landing so water leaves the surface without creating a visible drop or slippery channel.
Watch for: A landing should feel level, but it still needs safe drainage.
18. Combine a Gradual Path With Short Step Runs
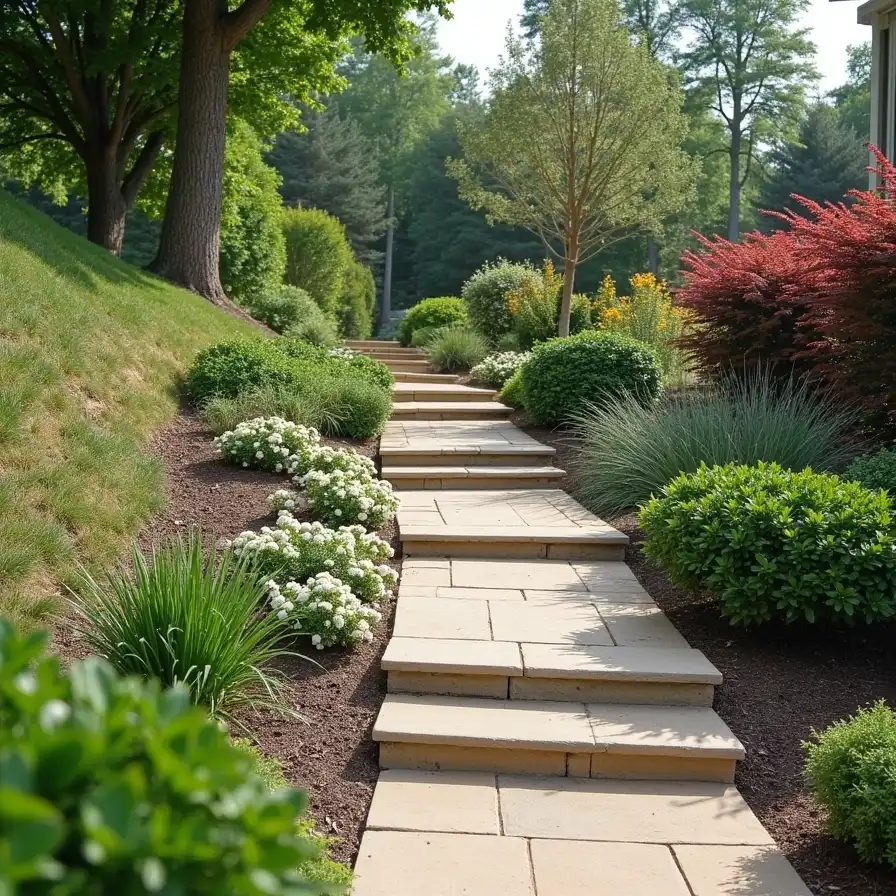
Best for: Gardeners moving tools, carts, or bins
One direct staircase may not meet every need. A second, more gradual path can make it easier to move garden supplies.
Let the gradual route cross the gentler parts of the hill. Add short step runs where the land becomes too steep for a stable path.
This layout also gives users a choice. They can take the shorter steps or use the longer route.
Do not describe a path as wheelchair-accessible unless it meets all relevant rules. Accessible design involves slope, width, landings, surface stability, edges, and other site details.
Watch for: Check local requirements if accessibility is a key project goal.
19. Add a Handrail-Framed Hillside Stairway
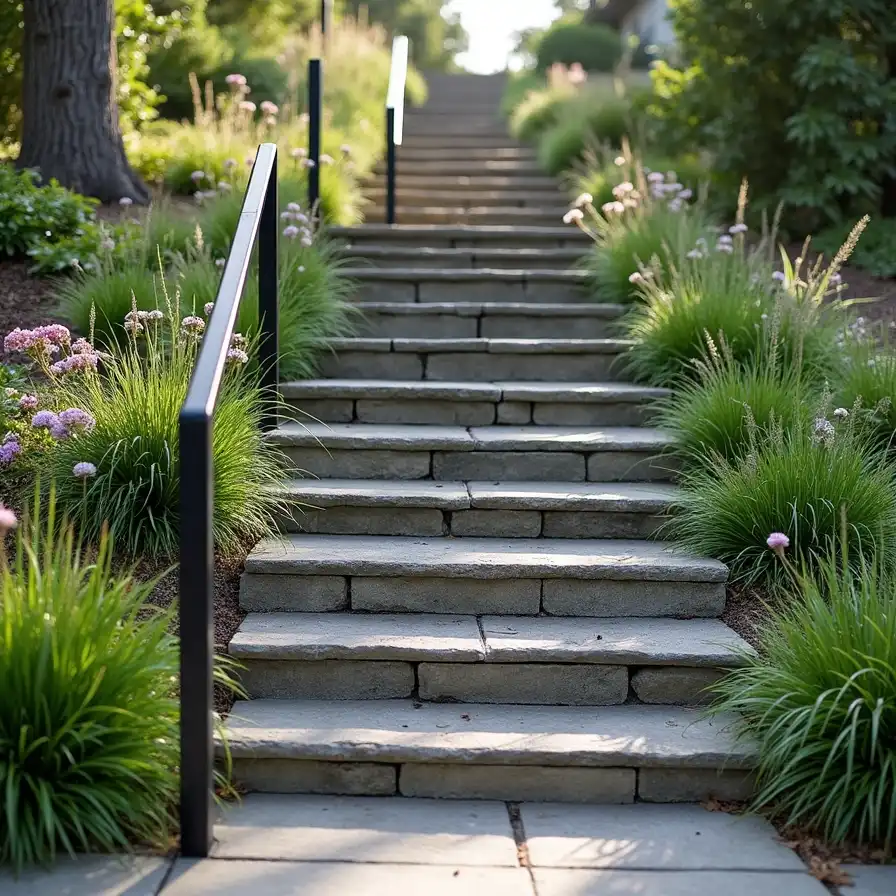
Best for: Steep steps and routes used in wet weather
A handrail gives users support when climbing or walking downhill. It can be useful near long stair runs, exposed edges, and slippery areas.
Choose a material that fits the home. Black metal suits many modern yards. Timber works well in rustic settings. A simple painted rail can match porch or deck details.
Keep thorny or stiff plants away from the gripping area. Trim any growth that blocks the rail.
Handrail height, spacing, grip size, and guard requirements can vary. Check local rules before building.
Watch for: A decorative rail still needs firm posts and secure connections.
20. Install an Illuminated Step-and-Path System
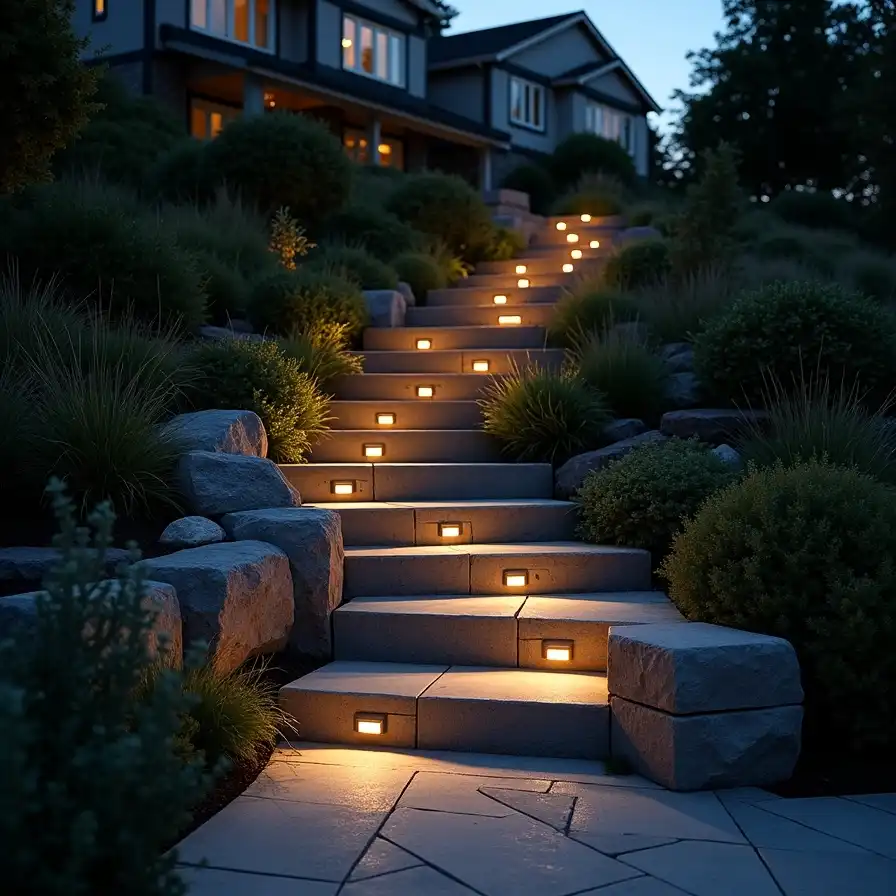
Best for: Routes used after sunset
Good lighting helps people see tread edges, landings, and changes in direction. It can also make a hillside route feel connected to the rest of the yard.
Place step lights low enough to light the walking surface. Use shielded fixtures that point light downward. This reduces glare in the user’s eyes.
Add path lights at landings, turns, and entry points. Space them based on the light they provide rather than placing them in a perfect row.
Plan for plant growth. A small shrub may block a low fixture after a few seasons.
Watch for: Solar lights may provide weak or uneven light in deep shade. Use a reliable system where safety depends on it.
Choose the Best Design for Your Slope
No single material works for every yard. The best path for a sloped yard depends on how steep the land is, how often you use it, and how much care you can provide.
Natural stone is strong and attractive, but it is heavy and often expensive to install. Concrete provides a firm surface, though cracks may develop if the base moves. Pavers are easier to replace, but they need good edge support.
Crushed stone costs less than most masonry. It also requires raking and refilling. Mulch is affordable, but it works best on a gentle, lightly used route. Timber risers create a warm, rustic look, though they will age and may eventually need replacement.
| Material | Best setting | Cost | Care needed | Main concern |
| Natural stone | Rustic or formal gardens | High | Low to medium | Weight and installation |
| Concrete | Modern, busy routes | Medium to high | Low | Cracking and drainage |
| Pavers | Curved or patterned paths | Medium | Medium | Edge movement |
| Crushed stone | Informal switchbacks | Low to medium | Medium | Loose material |
| Mulch | Gentle, low-use slopes | Low | High | Washout |
| Timber risers | Rustic DIY steps | Medium | Medium to high | Rot and anchoring |
Ask yourself three questions:
- Who needs to use this path?
- What happens here during heavy rain?
- How much yearly maintenance can I handle?
Your answers should help you remove weak choices and shortlist two suitable designs.
Install and Maintain a Hillside Path Correctly
A hillside path can look solid on the surface while failing underneath. Its base and drainage need as much attention as the visible material.
Mark the full route with stakes and mason’s line. Walk it in both directions before digging. Make sure turns feel natural and entry points connect with the places you use.
Call your local utility-location service before excavation. Confirm nearby pipes, cables, irrigation lines, and drains.
Build a compacted base that suits the surface material and local soil. Stone, pavers, concrete units, and gravel may need different base depths. Climate also matters because freezing soil can lift poorly supported materials.
Do not send runoff toward your house or a neighboring property. Water should leave the path through a planned drainage system or spread into a suitable planted area.
Cover disturbed soil as soon as possible. Mulch, suitable plants, or an erosion-control blanket can protect bare areas while roots become established.
Check the Path After Heavy Rain
- Look for washed-out gravel.
- Check for water collecting on landings.
- Find new channels in nearby soil.
- Test stones and pavers for movement.
- Clear leaves from drains and outlets.
- Repair exposed path edges.
Check the Path Once a Year
- Reset rocking stones.
- Refill low gravel areas.
- Inspect timber for rot.
- Repair damaged joints.
- Tighten loose rail parts.
- Trim plants away from lights and treads.
Terraces can help by turning one long slope into several shorter and more level sections. However, major grading and retaining structures can affect slope stability. Bring in a landscape architect, engineer, or skilled contractor when the work goes beyond a simple garden path.
Signs Your Slope Needs Professional Help
Contact a qualified professional if you notice:
- Deep or growing cracks in the soil
- Leaning or bulging retaining walls
- Soil moving around large rocks
- Water coming out of the hillside
- Repeated washouts after storms
- Steps that continue to sink or shift
- A steep drop beside the proposed route
Build a Route That Fits Your Yard
The best hillside steps and pathway ideas do more than improve how a yard looks. They create a clear route, reduce risky shortcuts, and help protect the surrounding soil.
Start with the slope and drainage. Then compare stone, concrete, brick, pavers, gravel, timber, and planted surfaces. Add switchbacks, landings, rails, or lighting where they make the route easier to use.
Measure your hill and watch what happens during the next rain. Shortlist two or three ideas that suit your space, budget, and maintenance plans. If the hillside is steep, wet, eroding, or unstable, have a qualified professional assess it before construction begins.