
Your backyard should be a place where you can relax. It should not feel like another area that needs endless mowing, watering, and weeding.
Grass can wear away near gates and patios. Mulch may fade, blow away, or wash downhill. Bare soil can turn into mud after one hard rain.
These 19 rock landscaping ideas for backyard spaces can help you fix those problems. You can use stone to build cleaner paths, improve garden beds, control runoff, and create places to sit.
Some projects are small enough for a weekend. Others may need heavy tools or professional help.
The key is to choose an idea that solves a real problem in your yard. Do not spread gravel everywhere just because it looks good in a photo. Think about drainage, heat, plants, foot traffic, and upkeep first.
What Is the Best Rock for Backyard Landscaping?
The best rock depends on how you plan to use it. Pea gravel works well for casual paths and seating areas. Crushed stone creates a firmer base. River rock suits borders and drainage features. Large boulders can support slopes or create a strong focal point.
How to Plan Your Rock Landscaping Before You Buy Anything
Rock is heavy. Moving it twice can turn a simple project into a long and tiring job.
Start by asking what you need to fix. You may have a muddy path, an empty corner, a steep slope, or a garden bed that keeps losing mulch.
Next, study the site. Check how much sun it gets. Watch where water flows after rain. Look for tree roots, low spots, and paths that people already use.
Use a garden hose or string to mark the shape of the project. Then view it from your patio, kitchen window, and back door. A shape that looks good up close may feel too wide or too narrow from the house.
Choose the rock based on the job:
- Use pea gravel for soft, casual paths.
- Use crushed stone for a compact surface.
- Use river rock for borders and drainage.
- Use boulders for height and slope support.
- Use decorative gravel around plants that can handle extra heat.
Bring home a small sample before ordering a full load. Rock color can look very different in bright sun, shade, and rain.
How Much Gravel Will You Need?
Measure the length and width of the area. Then decide how deep the rock layer should be.
For example, a 10-by-12-foot area covered with three inches of gravel needs a little more than one cubic yard. Add a small amount for settling and uneven ground.
A local supplier or gravel calculator can help you check the final amount.
Quick Rock Selection Guide
| Rock Type | Best Use | Main Benefit | Main Drawback |
| Pea gravel | Paths and seating areas | Comfortable and affordable | Moves under feet and chairs |
| River rock | Borders and drainage | Smooth and attractive | Can be hard to walk on |
| Crushed stone | Patios and firm paths | Packs into a strong surface | Feels less natural |
| Decomposed granite | Dining and sitting areas | Creates a neat, firm finish | Can track indoors |
| Lava rock | Dry garden beds | Light and easy to spread | Its bold color may not suit every yard |
| Marble chips | Small decorative beds | Bright, clean look | Shows dirt and can reflect heat |
| Boulders | Slopes and focal points | Adds height and structure | Heavy and costly to move |
5 Rock Landscaping Ideas for Backyard Paths and Borders
Grass often disappears first along the routes people use each day. A stone path or border can fix worn areas and give your yard a clearer shape.
1. Build a Pea Gravel Garden Path
Best for: Muddy routes between a gate, patio, shed, or garden
Main material: Pea gravel
Difficulty: Easy to moderate
Watch out for: Gravel spreading into the lawn
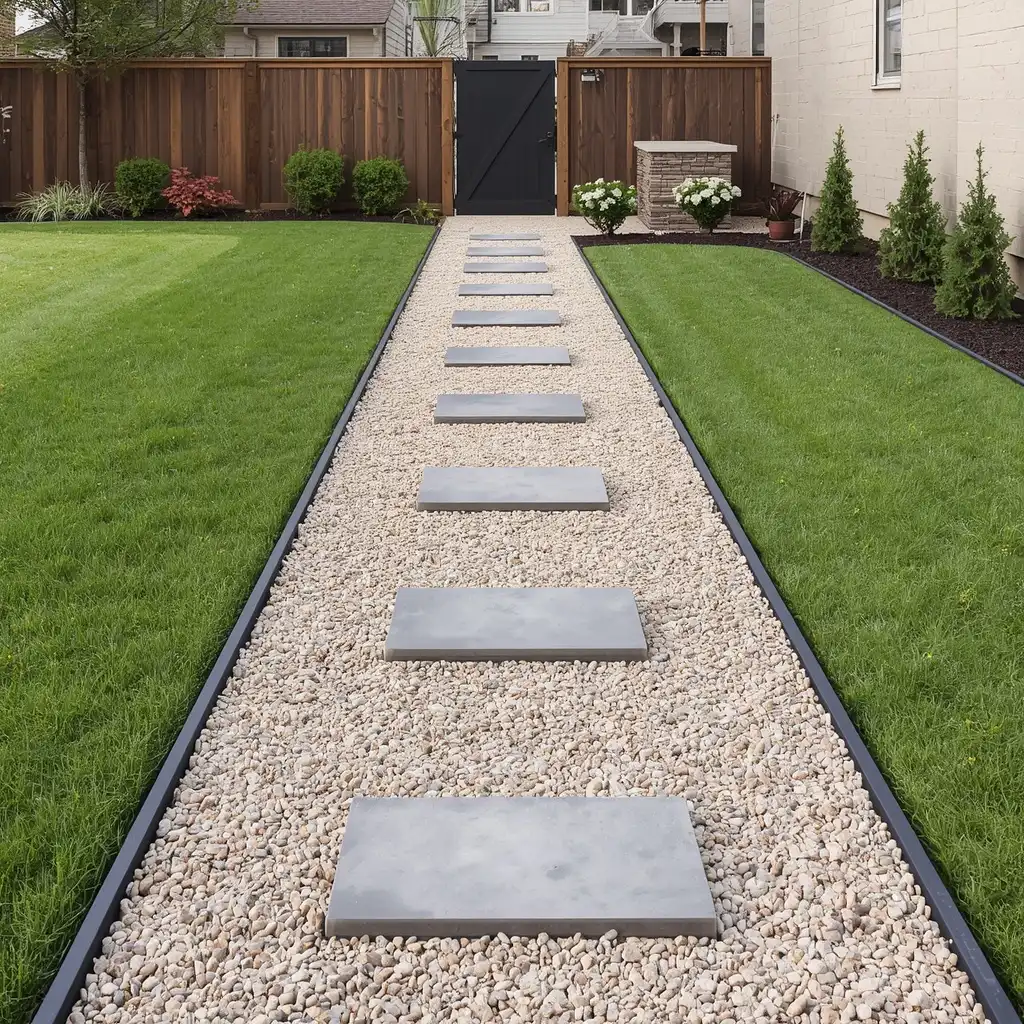
A pea gravel path can turn a muddy route into a clean walkway. It works well in relaxed gardens because the small stones have a soft, natural look.
Make the path about three feet wide so one person can walk with ease. Remove grass and loose soil. Add a compacted base if the path gets regular use.
Install metal, brick, stone, or plastic edging on both sides. Good edging keeps the gravel in place and makes mowing easier.
Pea gravel can shift under your feet. Add flat stepping stones if you want a firmer walking surface.
2. Set Large Stepping Stones in Gravel
Best for: Main backyard walkways
Main material: Flagstone, concrete pavers, and gravel
Difficulty: Moderate
Watch out for: Uneven stones that create a trip risk
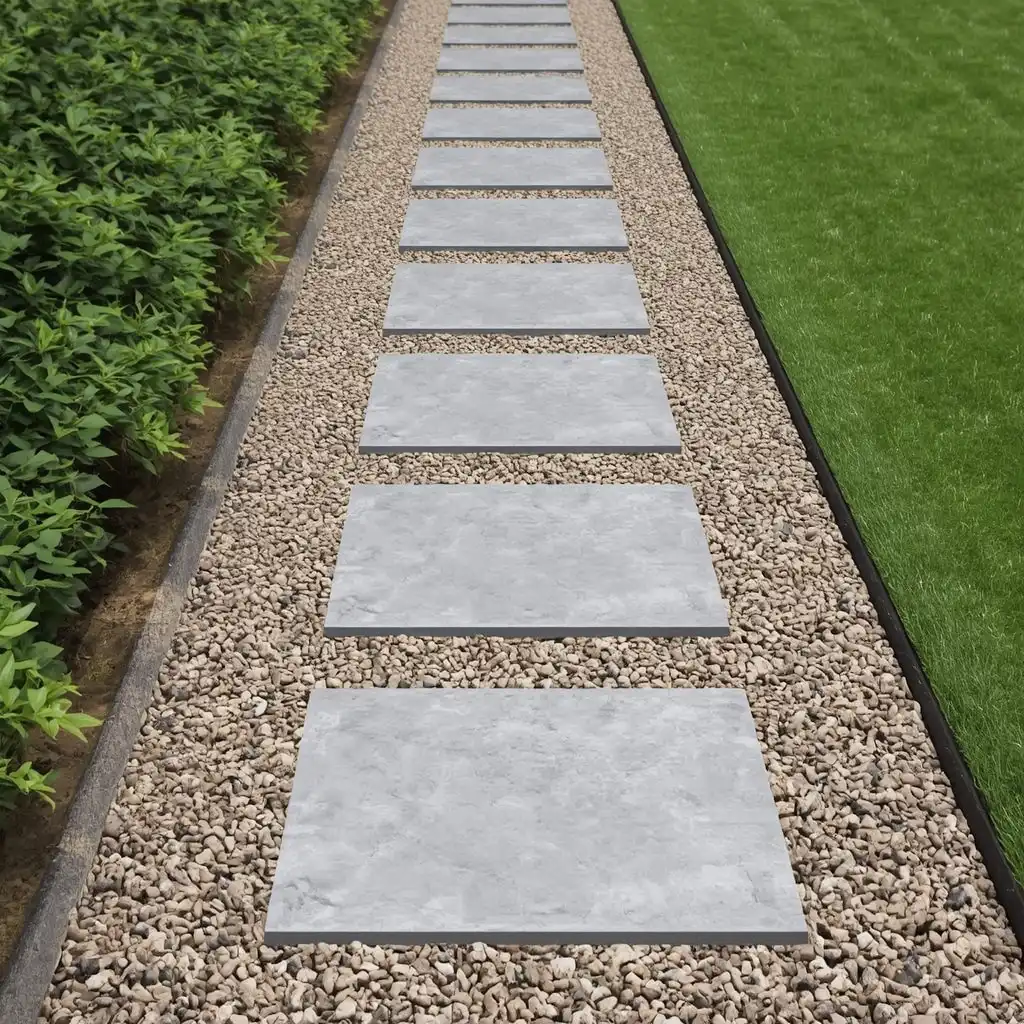
Stepping stones provide a solid place to walk while gravel fills the gaps. This mix often feels more stable than loose gravel alone.
Place each stone where your foot falls during a normal step. Do not space the stones based on looks alone. Walk across the layout several times before setting them.
Use flat flagstone for a natural yard. Choose square concrete pavers for a clean, modern style.
Set each stone on a firm base. The top should sit level with the gravel or slightly above it.
3. Add a River Rock Border Around Your Patio
Best for: Plain concrete or paver patios
Main material: River rock
Difficulty: Easy
Watch out for: Rocks blocking water flow
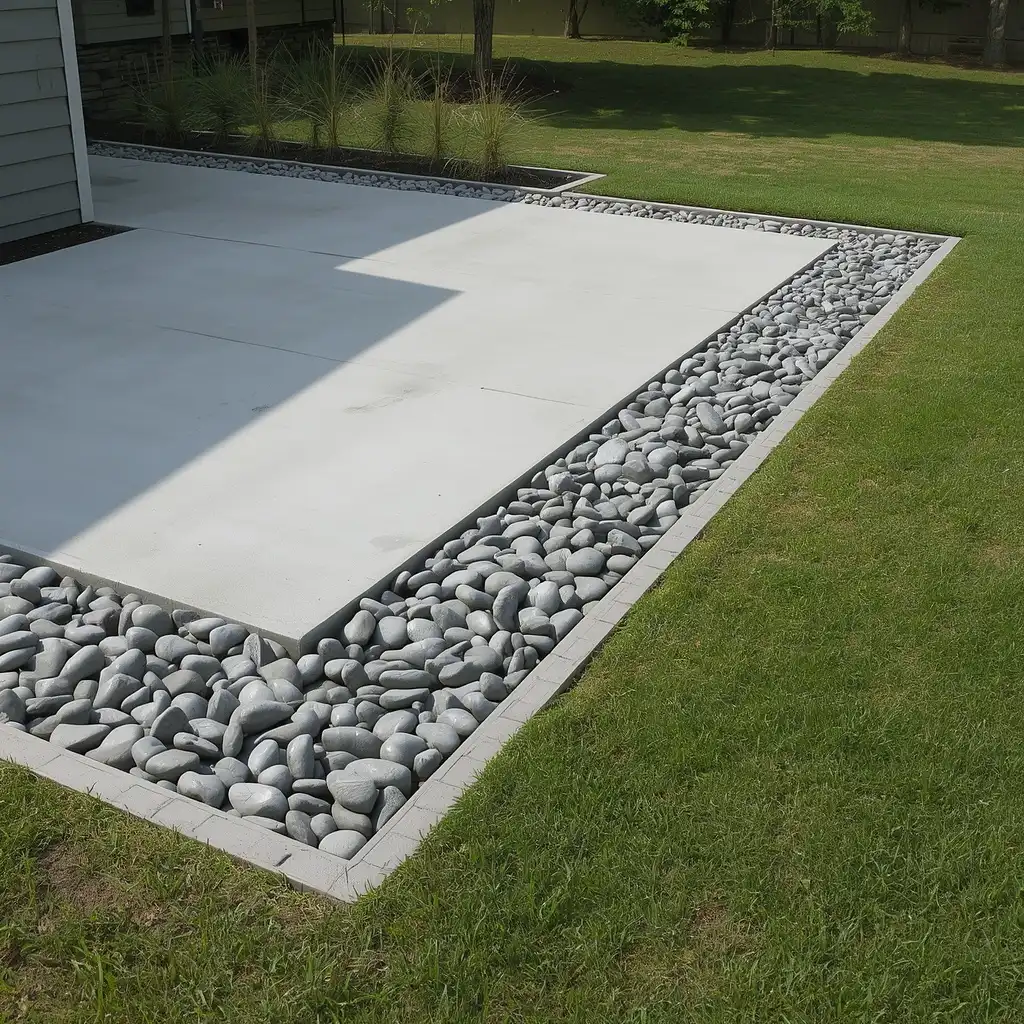
A river rock border can soften the hard edge of a patio. It can also stop mulch and soil from spilling onto the paved surface.
Create a strip that is about 12 to 18 inches wide. A very thin line may look like an afterthought. A wider strip feels like part of the design.
Use smooth gray rock for a calm look. Use mixed brown and tan stones near brick, wood, or warm-colored paving.
Make sure the border does not trap water against the patio or house. Grade the ground so runoff moves to a safe area.
4. Create Mixed-Stone Garden Edging
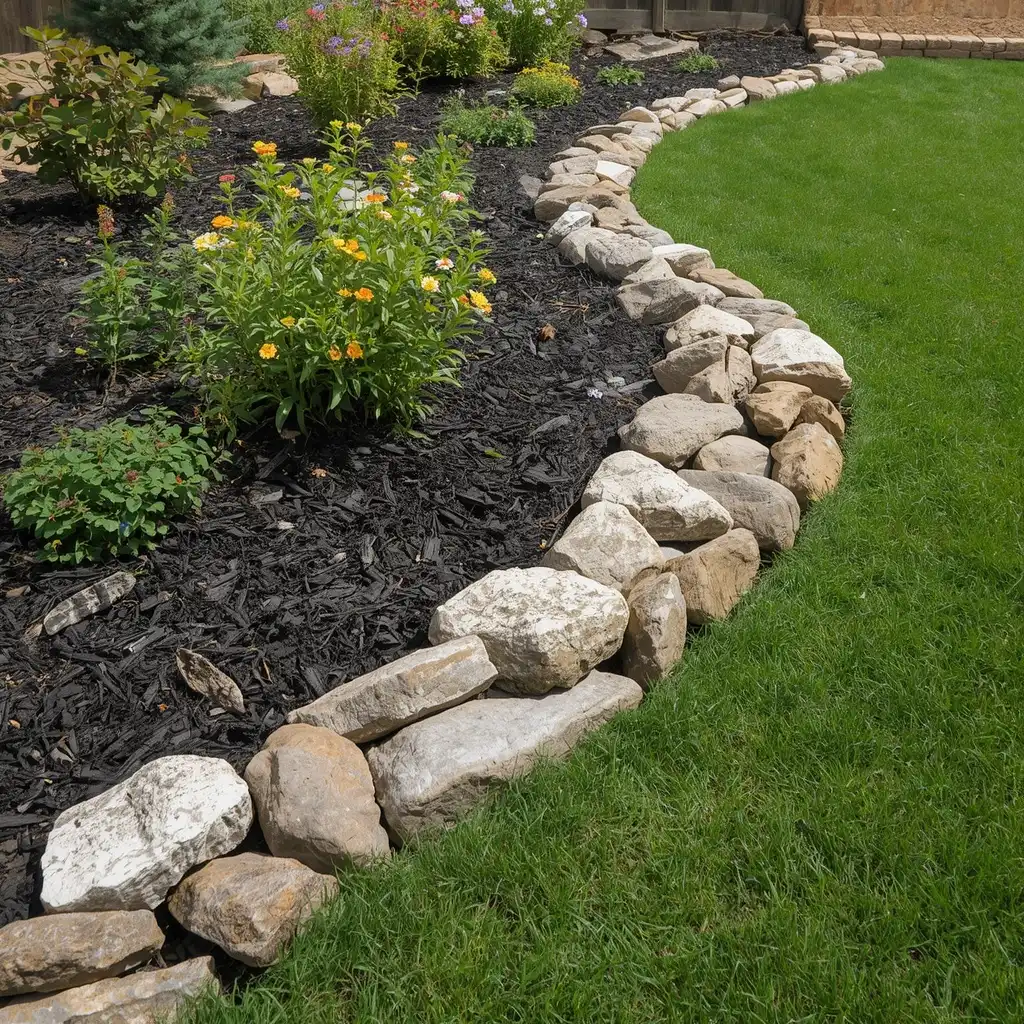
Best for: Curved flower beds and cottage-style yards
Main material: Fieldstone or medium landscape rocks
Difficulty: Easy
Watch out for: Mixing too many colors and sizes
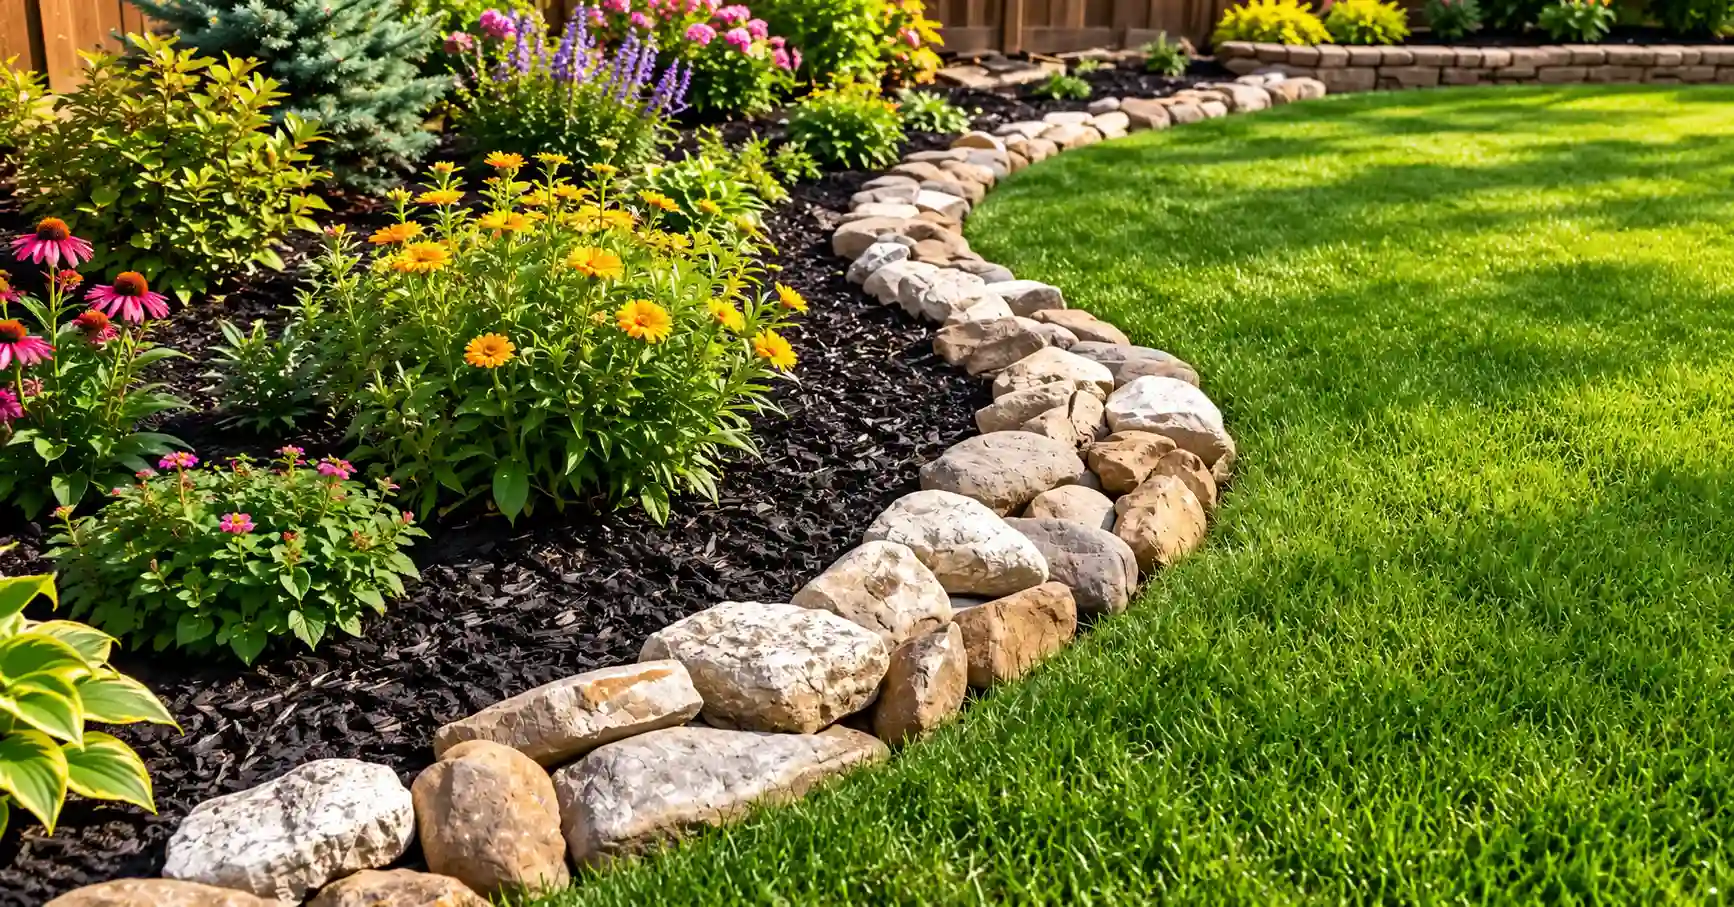
Stone edging gives flower beds a firm, lasting border. It also helps stop soil and mulch from spreading into the lawn.
Choose stones with a similar color. They do not need to match in size, but they should feel like they came from the same place.
Place each stone partly into the soil. This makes the border look settled instead of dropped on top of the ground.
Follow the natural curve of the bed. Avoid sharp turns unless they match the shape of your patio or house.
5. Make a Small Pebble Mosaic Path
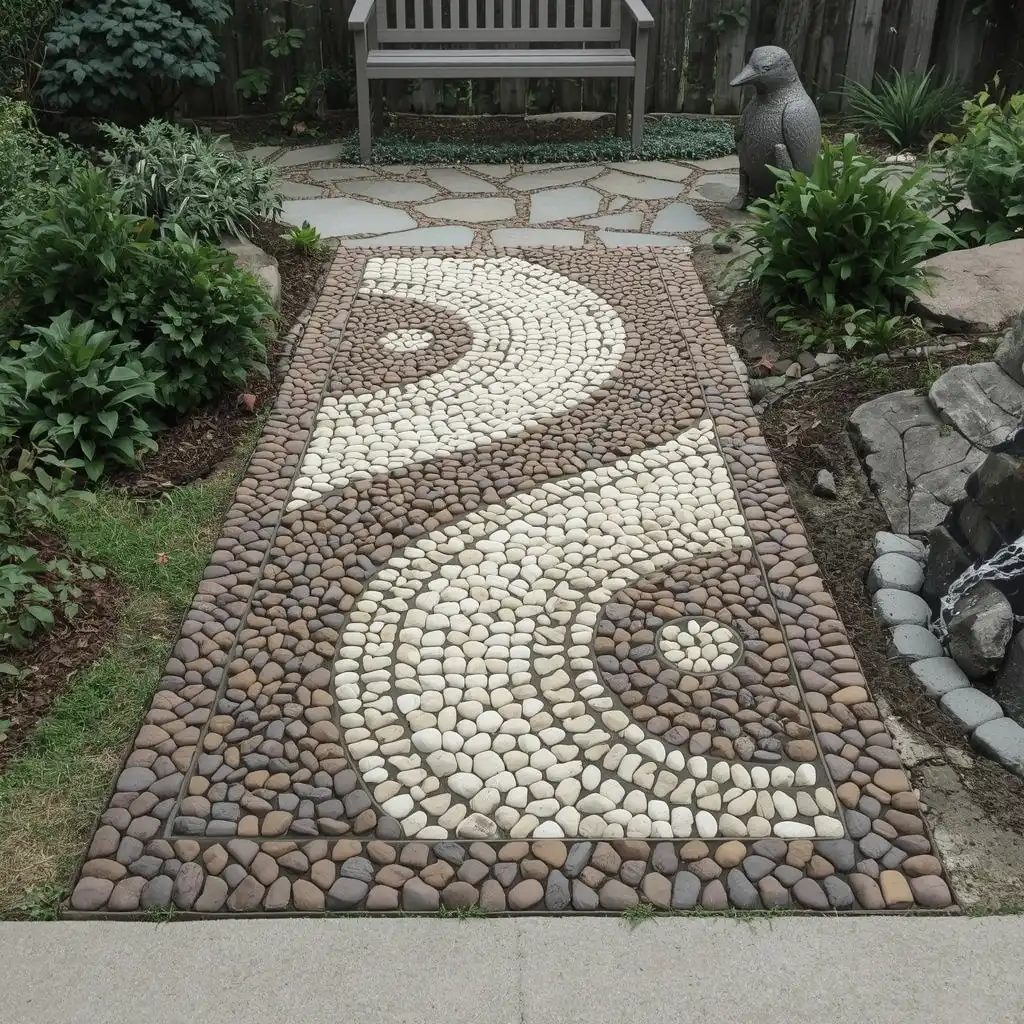
Best for: Garden corners and short accent paths
Main material: Smooth pebbles
Difficulty: Moderate to hard
Watch out for: Loose pebbles and slippery surfaces
A pebble mosaic can turn a small walkway into a piece of garden art. It works best in a short area, such as the space near a bench or water feature.
Choose two or three stone colors. Simple circles, waves, and leaf shapes are easier to build than detailed pictures.
Set the pebbles in mortar or another firm base. Loose pebbles may shift and make the pattern hard to see.
Keep the surface as flat as possible. Deep gaps can collect dirt and water.
5 Backyard Rock Landscaping Ideas That Improve Garden Beds
Mulch can fade, wash away, or need regular replacement. Rock lasts longer, but it is not the right choice for every plant or climate.
6. Replace Mulch With Decorative Gravel
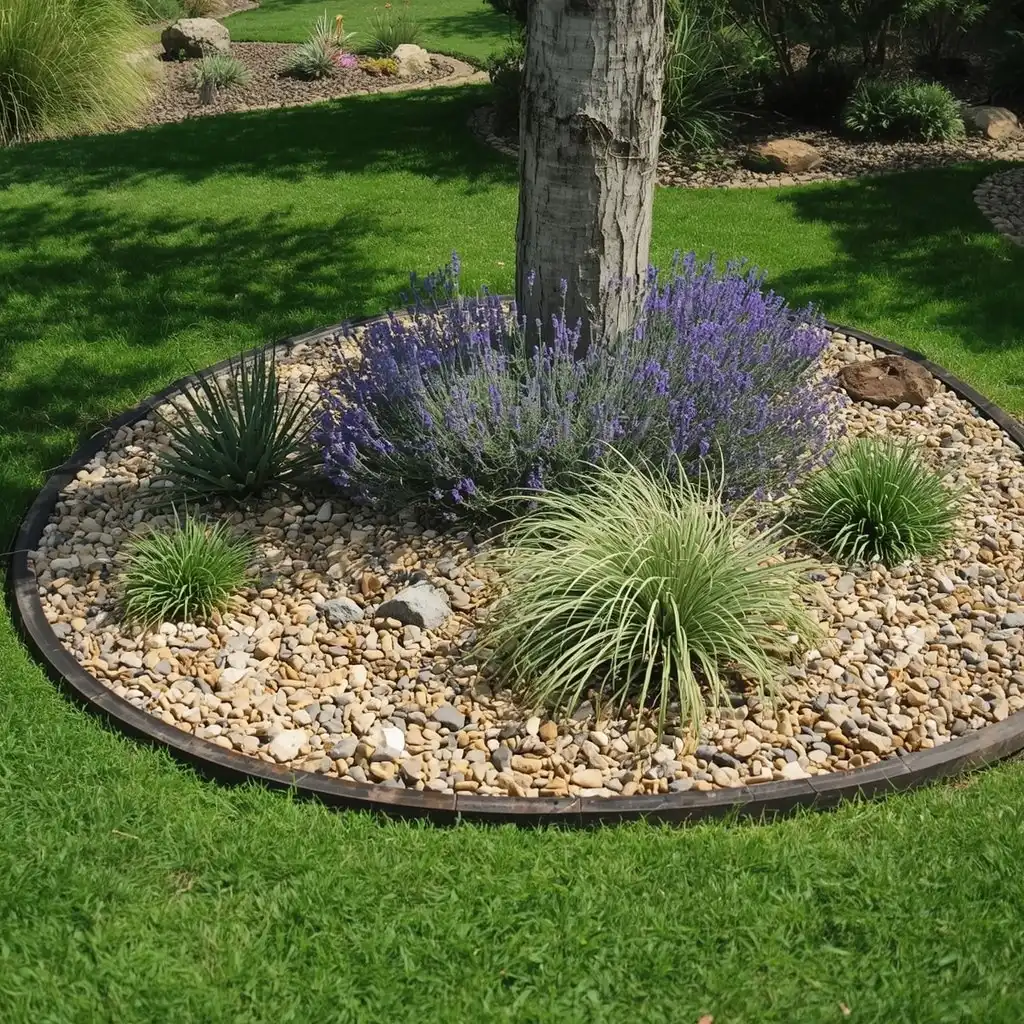
Best for: Dry garden beds and sun-loving plants
Main material: Small decorative gravel
Difficulty: Easy
Watch out for: Heat around shallow roots
Decorative gravel gives garden beds a clean finish. It works well around lavender, salvia, yucca, sedum, and ornamental grass.
Choose small gravel that does not overpower the plants. Tan, gray, and soft brown stone often work with many home styles.
Keep the gravel away from plant crowns and tree trunks. A small open space lets air reach the base of the plant.
Rock can hold heat during hot weather. It may stress plants with shallow roots. In very hot yards, use gravel in smaller areas or choose plants that handle dry soil.
7. Use One Large Boulder as a Focal Point
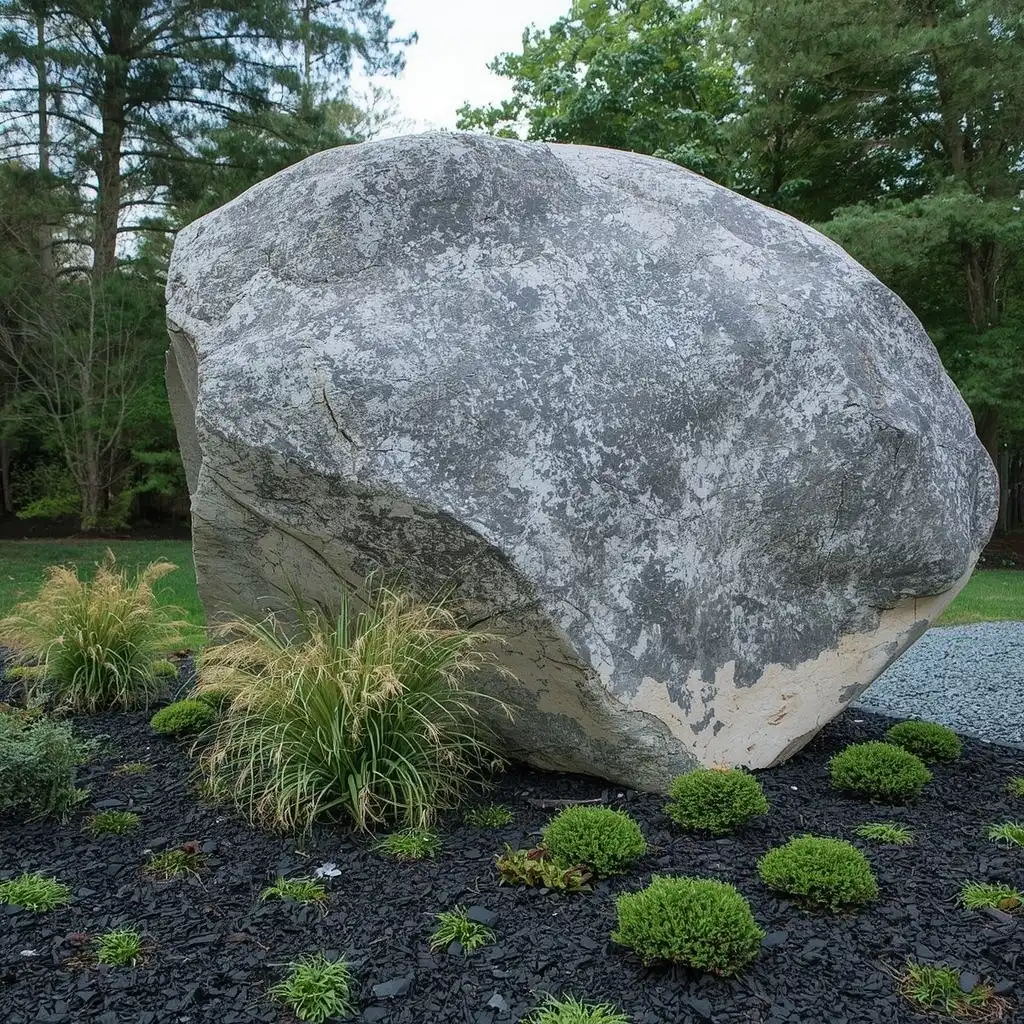
Best for: Flat or empty garden beds
Main material: One large boulder
Difficulty: Moderate to professional
Watch out for: A rock that looks placed instead of natural
One large boulder can give a flat garden bed more height. It often looks better than several small rocks spread without a clear plan.
Choose a stone with a shape and color that fit your yard. Place the wider side at the bottom.
Bury part of the boulder in the soil. Rocks in nature rarely sit fully above the ground.
Plant low grasses, creeping thyme, or small shrubs near the base. Leave some open space so the stone remains easy to see.
8. Build a Drought-Tolerant Rock Garden
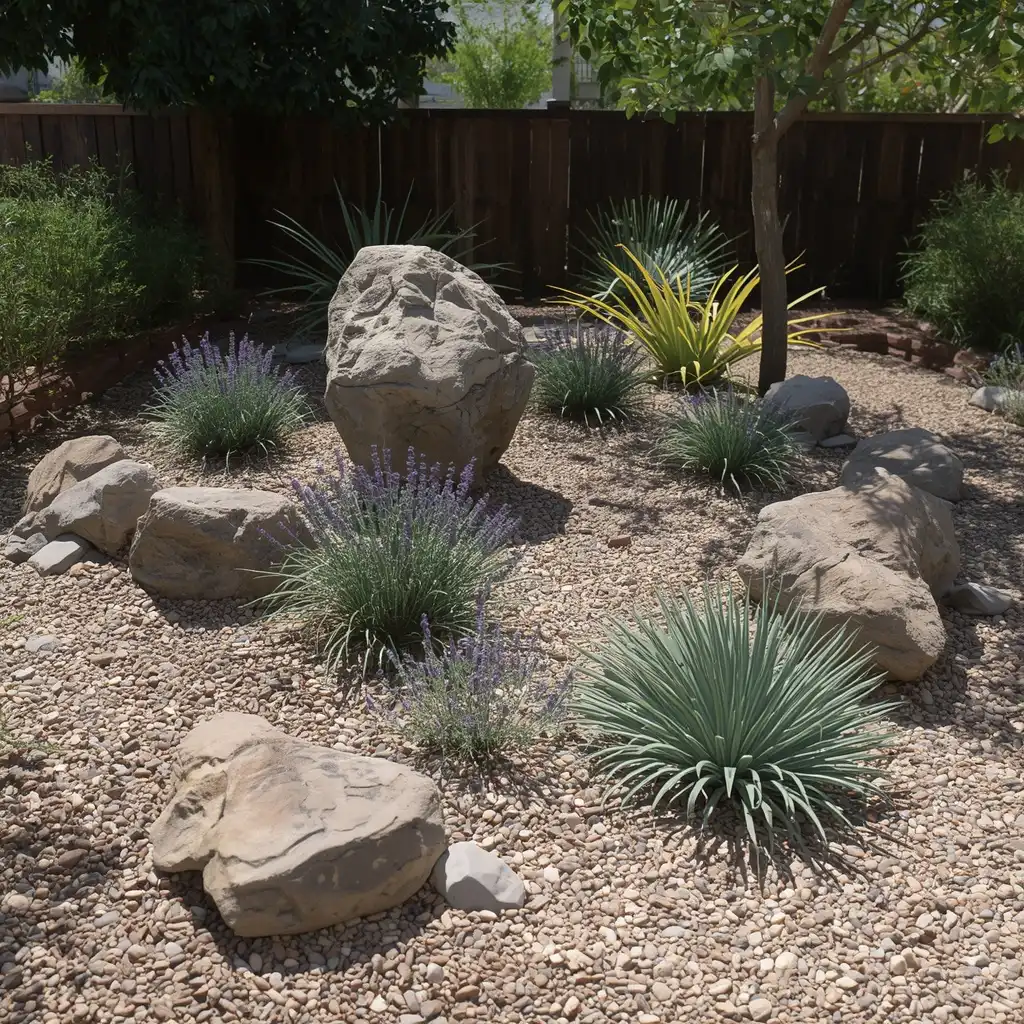
Best for: Sunny yards with dry soil
Main material: Gravel, medium stones, and boulders
Difficulty: Moderate
Watch out for: Using plants that need very different amounts of water
A rock garden can add color and shape without using a large lawn. It is a good choice for areas where grass struggles in heat.
Start with one or two large stones. Add smaller rocks around them. Leave open gravel between plant groups.
Choose plants that suit your local weather. Good options may include sedum, thyme, lavender, yucca, and blue fescue. Native plants are often a smart choice because they already fit local soil and rainfall.
Group plants with similar water needs. This makes watering easier and reduces plant loss.
9. Create a Quiet Gravel Corner
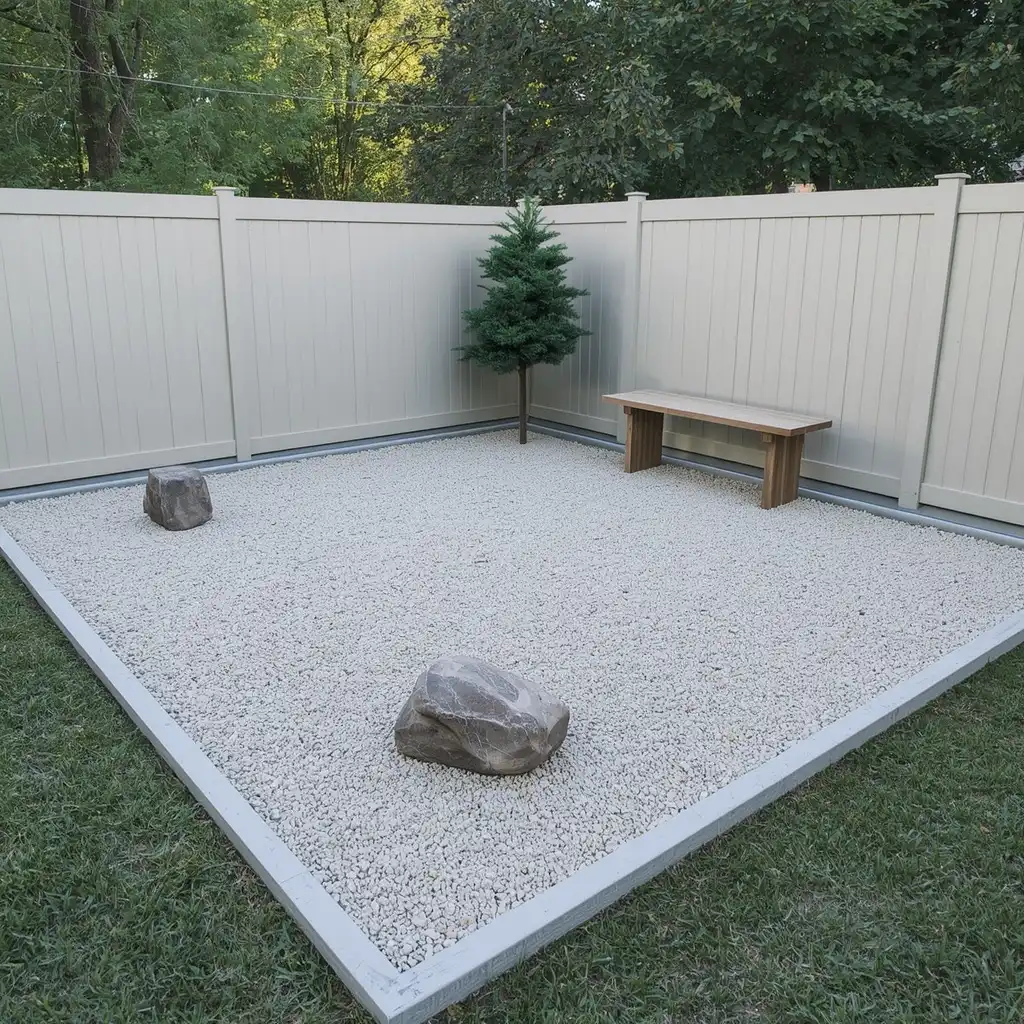
Best for: Small yards and unused fence corners
Main material: Fine gravel and two or three feature stones
Difficulty: Easy
Watch out for: Adding too many objects
An empty corner can become a calm sitting area with very little material. Clear the ground, add edging, and cover the space with fine gravel.
Place two or three rocks in a simple group. Add a bench, lantern, or one evergreen plant.
Keep the design open. Too many statues, pots, and stone colors can make a small corner feel crowded.
A simple layout is easier to clean. It also gives your eye a place to rest.
10. Add a Wide Rock Ring Around a Mature Tree
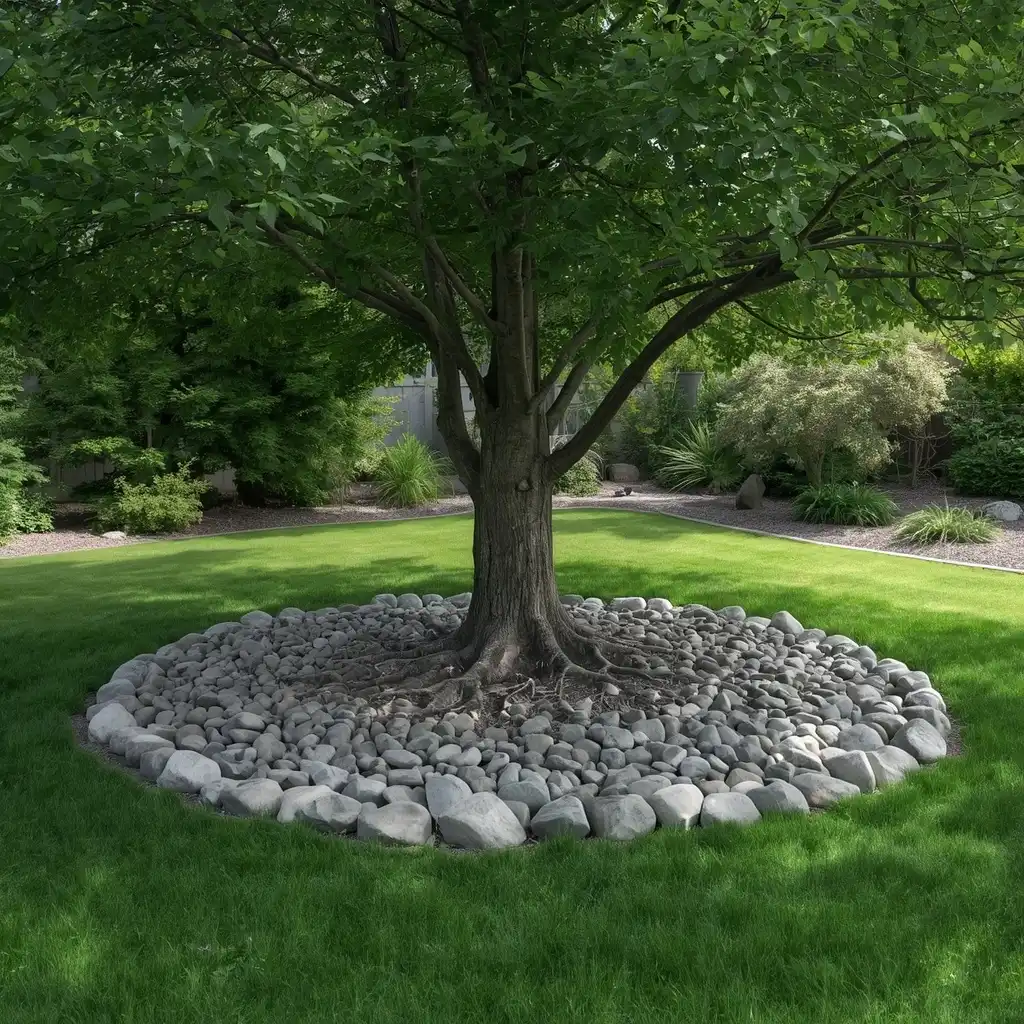
Best for: Trees surrounded by weak grass
Main material: River rock or medium decorative stone
Difficulty: Easy
Watch out for: Piling rock against the trunk
Grass often grows poorly under mature trees because of shade and root competition. A wide stone bed can make the area look cleaner.
Do not dig deeply around major roots. Remove grass with care and keep the natural root flare visible.
Leave open space around the trunk. Do not build a tight ring or stone mound against the bark.
A wide, shallow bed looks more natural than a small circle. You can add shade-loving plants if the roots and soil allow it.
4 Ways to Build Backyard Living Areas With Rock
You do not need a large concrete patio to create a useful outdoor space. Gravel and crushed stone can provide a lower-cost surface for chairs, tables, and shade structures.
11. Create a Gravel Fire Pit Area
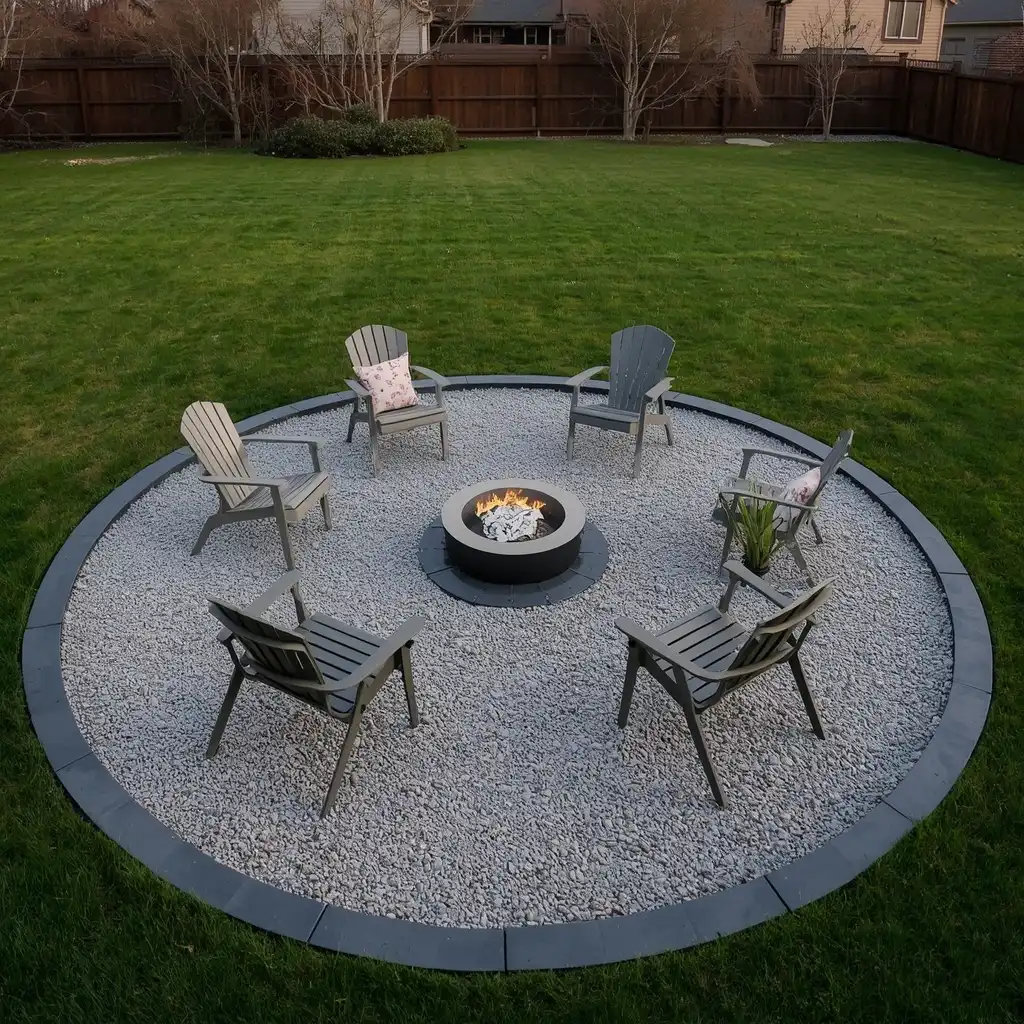
Best for: Social backyards with open space
Main material: Compacted gravel
Difficulty: Moderate
Watch out for: Local fire rules and nearby plants
A gravel fire pit area creates a clear place for people to gather. It can also keep chairs out of wet grass.
Mark a round or square space that gives people room to move. A 12-foot-wide circle may work for a small portable fire pit and a few chairs.
Use solid edging to hold the gravel. Compact the base so chair legs do not sink.
Check local fire rules before you build. Keep the fire away from fences, roofs, branches, dry plants, and fuel storage. Follow the maker’s instructions for your fire pit.
12. Install a Crushed Granite Patio
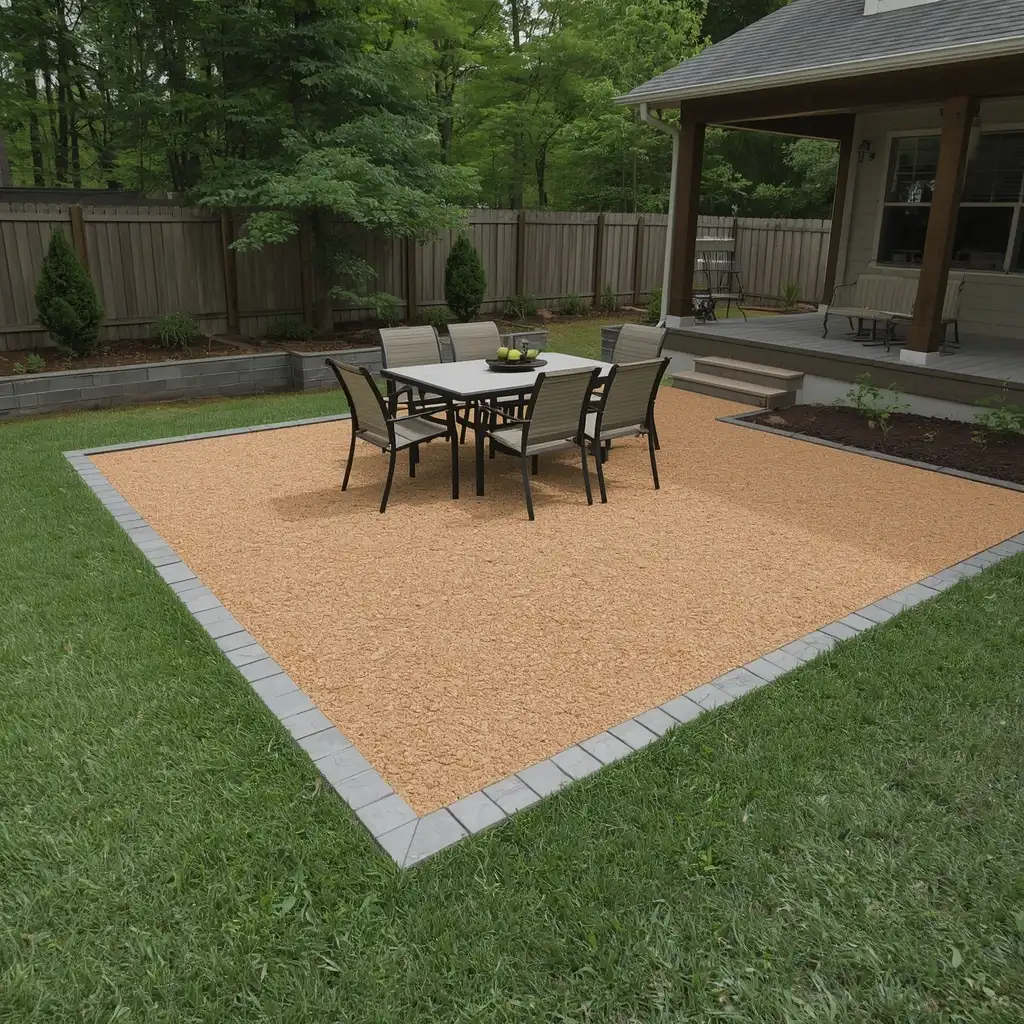
Best for: Outdoor dining and small patio projects
Main material: Decomposed granite or compactable crushed stone
Difficulty: Moderate
Watch out for: Poor drainage and loose edges
Crushed granite can create a firmer surface than pea gravel. It works well under dining tables and lounge chairs.
Remove soft soil and install a stable base. Spread the material in thin layers. Compact each layer before adding more.
Use strong edging around the full space. This helps stop the surface from breaking apart at the sides.
Do not place the patio in a low spot where rainwater collects. Give the surface a slight slope away from the house.
13. Use Gravel Under a Pergola
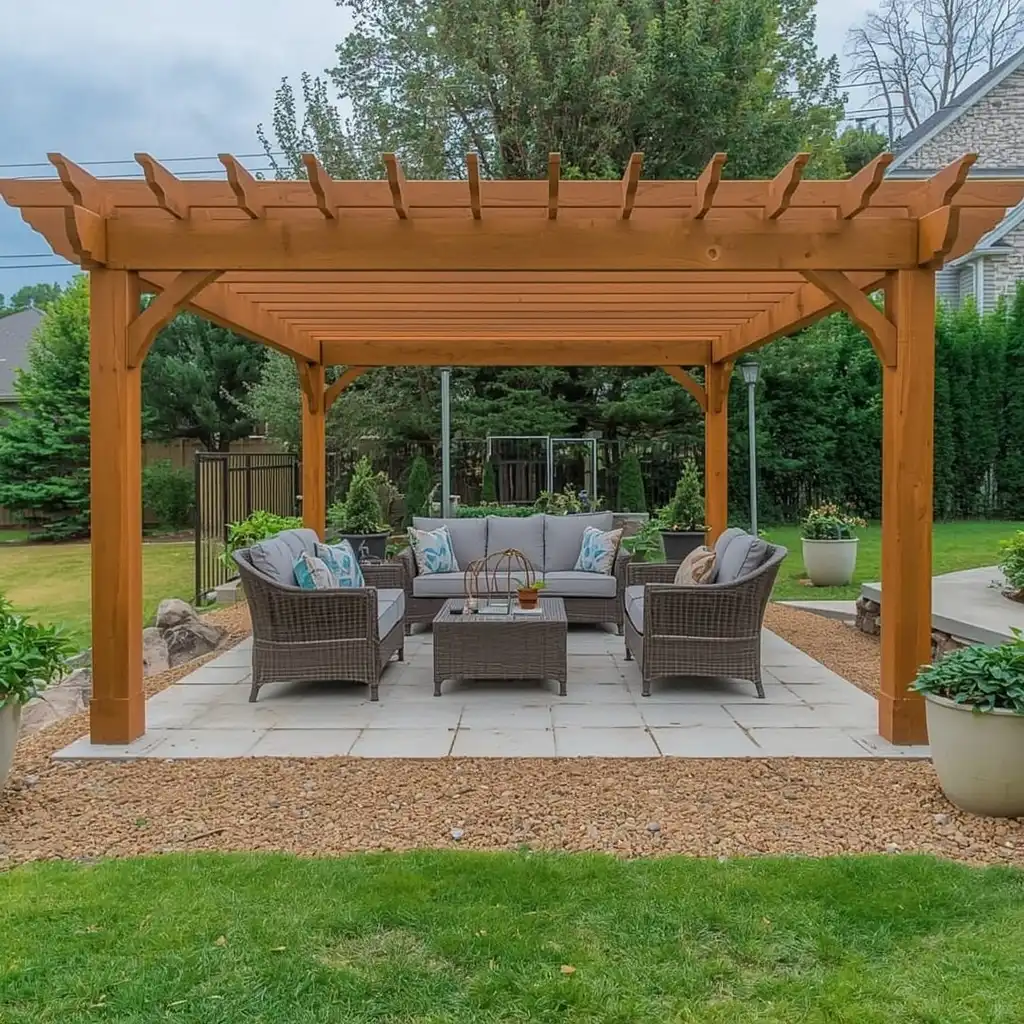
Best for: Existing pergolas and shade structures
Main material: Compacted gravel
Difficulty: Easy to moderate
Watch out for: Heavy furniture sinking into loose stone
Gravel can make a pergola feel like a complete outdoor room. It creates a clear floor and separates the space from the lawn.
Choose a gravel color that works with the wood or metal frame. Gray gravel feels clean and modern. Warm tan stone suits natural wood.
Place flat pavers under heavy table and sofa legs. This keeps furniture steady.
Add a few large pots around the outside. Plants will soften the hard materials and add shade or color.
14. Build a Stone Bench Nook
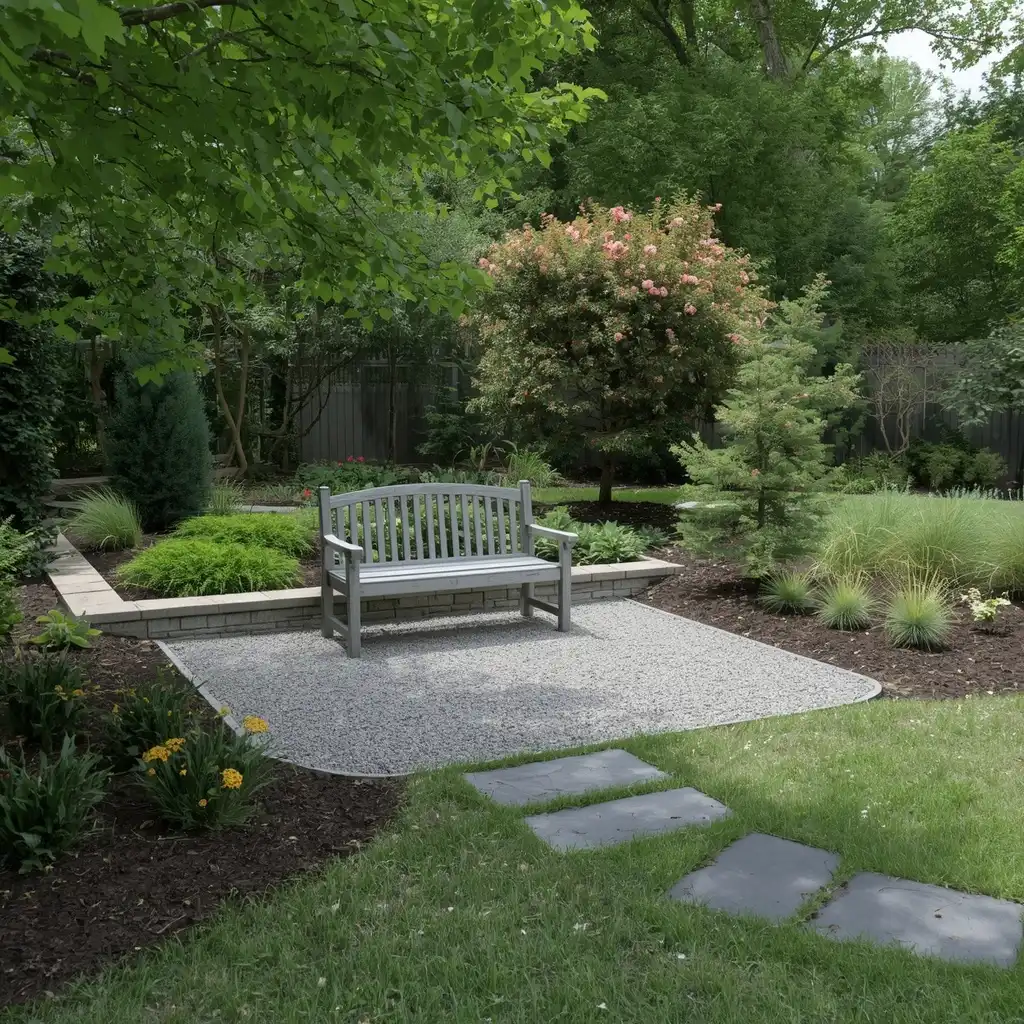
Best for: Large yards and private corners
Main material: Gravel, stepping stones, and a bench
Difficulty: Easy
Watch out for: Choosing a place that is too hot or exposed
A bench nook gives people a reason to walk to another part of the yard. It can make a large backyard feel more planned.
Choose a spot with shade, privacy, or a good garden view. Build a small gravel pad and connect it to the main path with stepping stones.
You can use a stone bench or place a wood bench on firm pavers. Add low plants around the edges.
Before building, sit in the spot at different times of day. Check the sun, wind, noise, and view.
3 Rock Ideas That Help With Water and Slopes
Decorative rock cannot fix a water problem unless the water has a safe place to go. Watch your yard during heavy rain before building any drainage feature.
15. Build a Decorative Dry Creek Bed
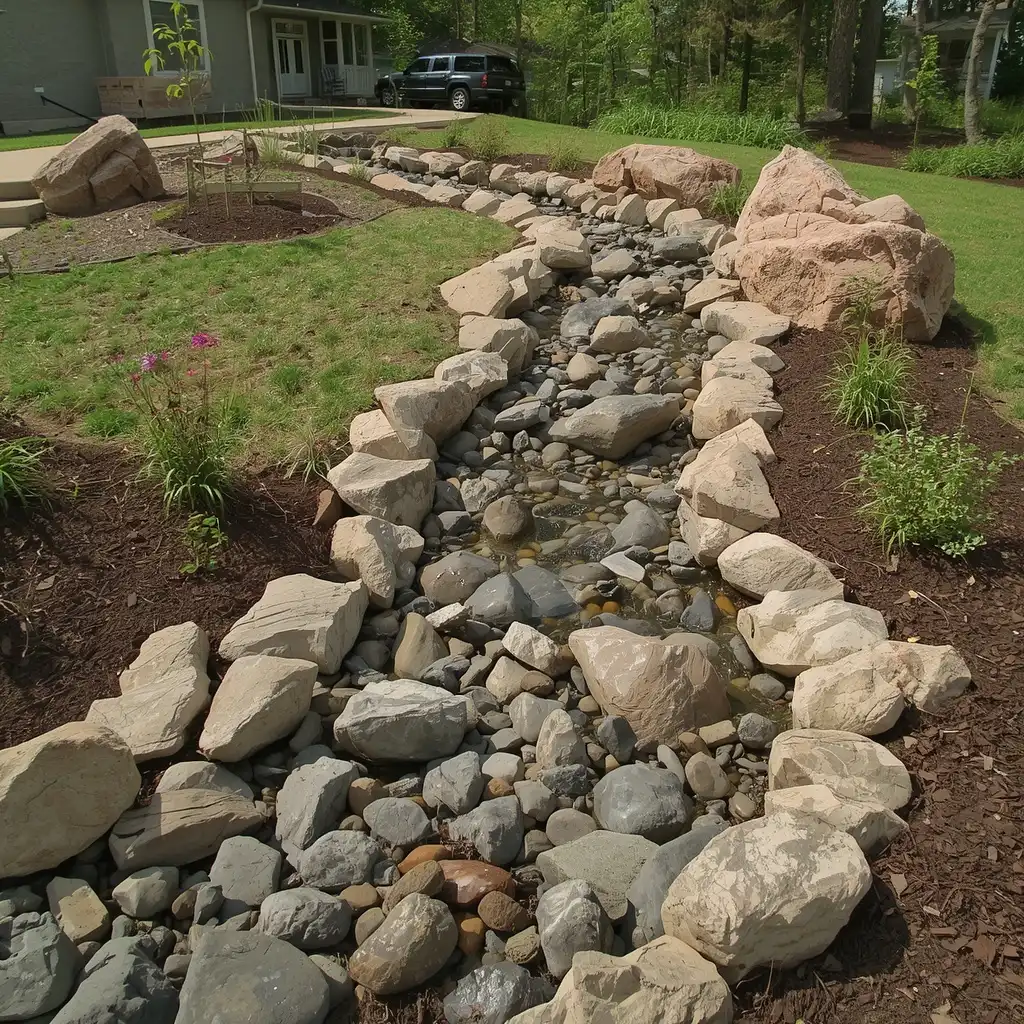
Best for: Shallow runoff routes
Main material: River rock and larger edge stones
Difficulty: Moderate to professional
Watch out for: Sending water toward the house or another property
A dry creek bed can guide rainwater while adding a natural feature to your yard. It should follow the direction water already wants to travel.
Use larger stones along the sides. Place smaller river rock through the center. Add a few plants that can handle short wet periods.
Give the creek gentle curves. A straight line often looks more like a drainage ditch.
Make sure the water ends in a safe place. Get professional advice when runoff threatens the house, a retaining wall, or nearby property.
16. Add Cobbles to a Rain Garden
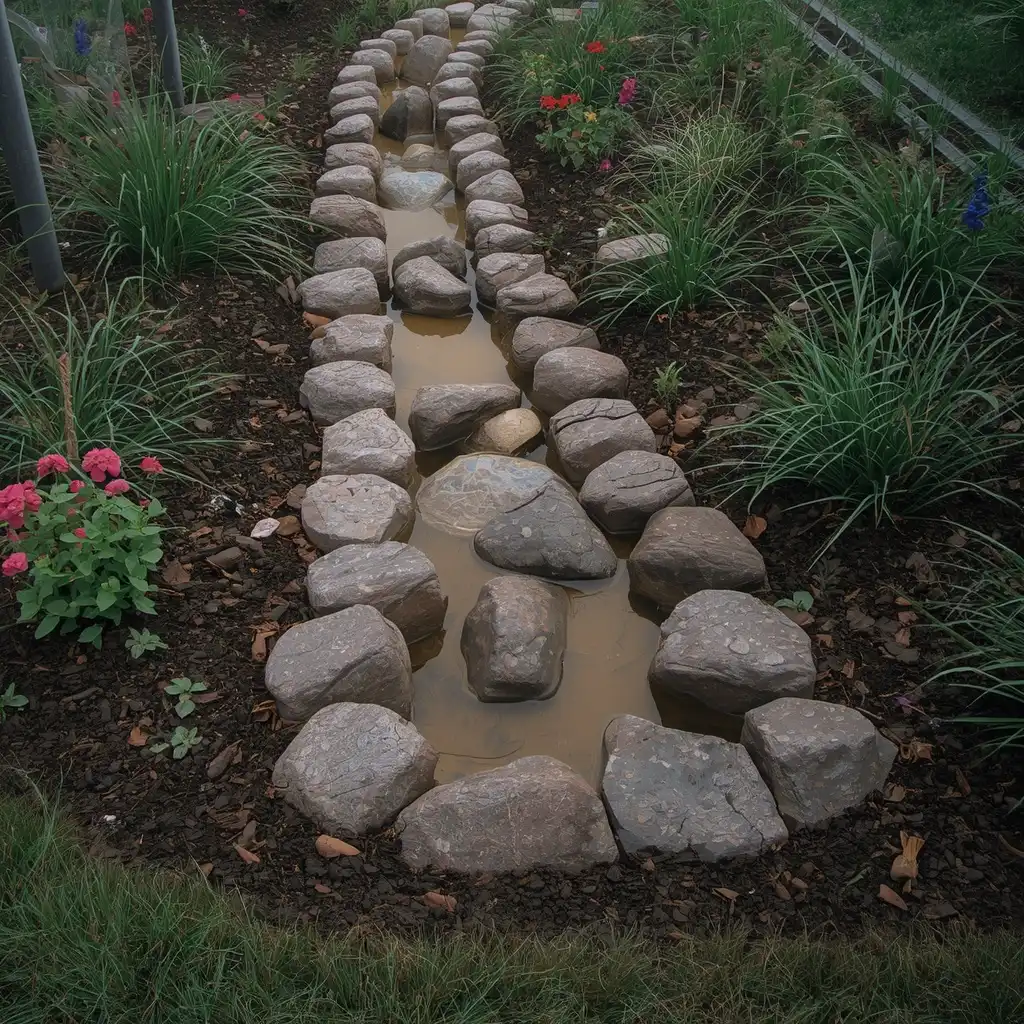
Best for: Low areas that hold water for a short time
Main material: Cobbles, flat stones, and water-tolerant plants
Difficulty: Moderate
Watch out for: Building too close to a foundation
A rain garden is a shallow planted area that holds runoff for a short time. It lets water soak into the soil instead of rushing across the yard.
Use cobbles where water enters the garden. They can slow the flow and reduce mud.
Add plants that can handle both wet and dry soil. Your local garden center or extension office can suggest suitable choices.
A rain garden should drain after the storm. It should not remain full of standing water for long periods.
17. Stabilize a Slope With Boulders and Plants
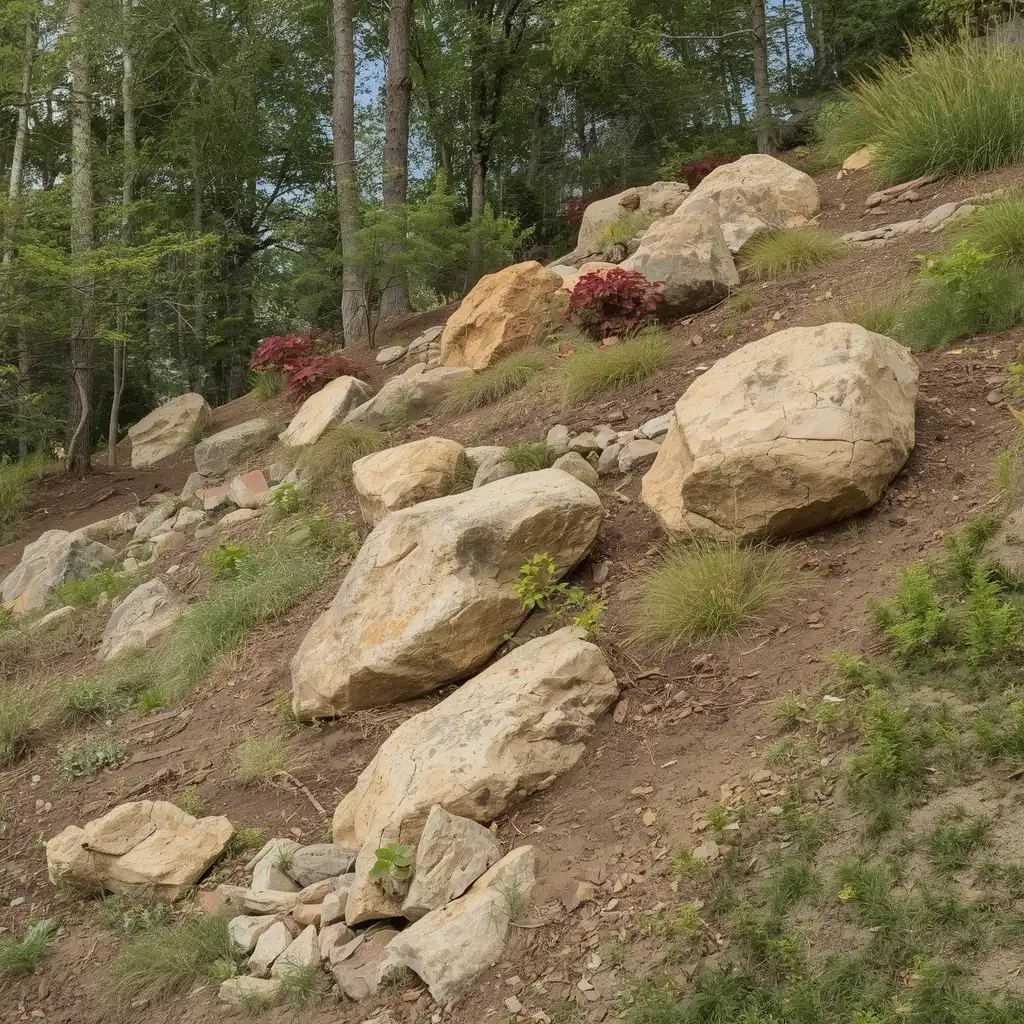
Best for: Mild slopes with exposed soil
Main material: Boulders, ground cover, and smaller stone
Difficulty: Moderate to professional
Watch out for: Loose rock on steep ground
Boulders can break a long slope into smaller planting areas. Plants placed between the stones help hold soil and soften the design.
Set each large stone firmly into the slope. Do not rest heavy boulders on loose soil.
Use spreading ground covers and grasses around the rocks. Choose plants with roots that can help hold the soil.
Avoid smooth, round rock on walking routes. It can roll underfoot.
A steep or unstable slope may need a proper retaining system. This is a job for a trained contractor or engineer.
2 Budget Rock Landscaping Ideas for Small Backyards
You do not have to cover the whole yard with stone. A small project can solve a clear problem and cost far less.
18. Add a Gravel Strip Along a Fence or Shed
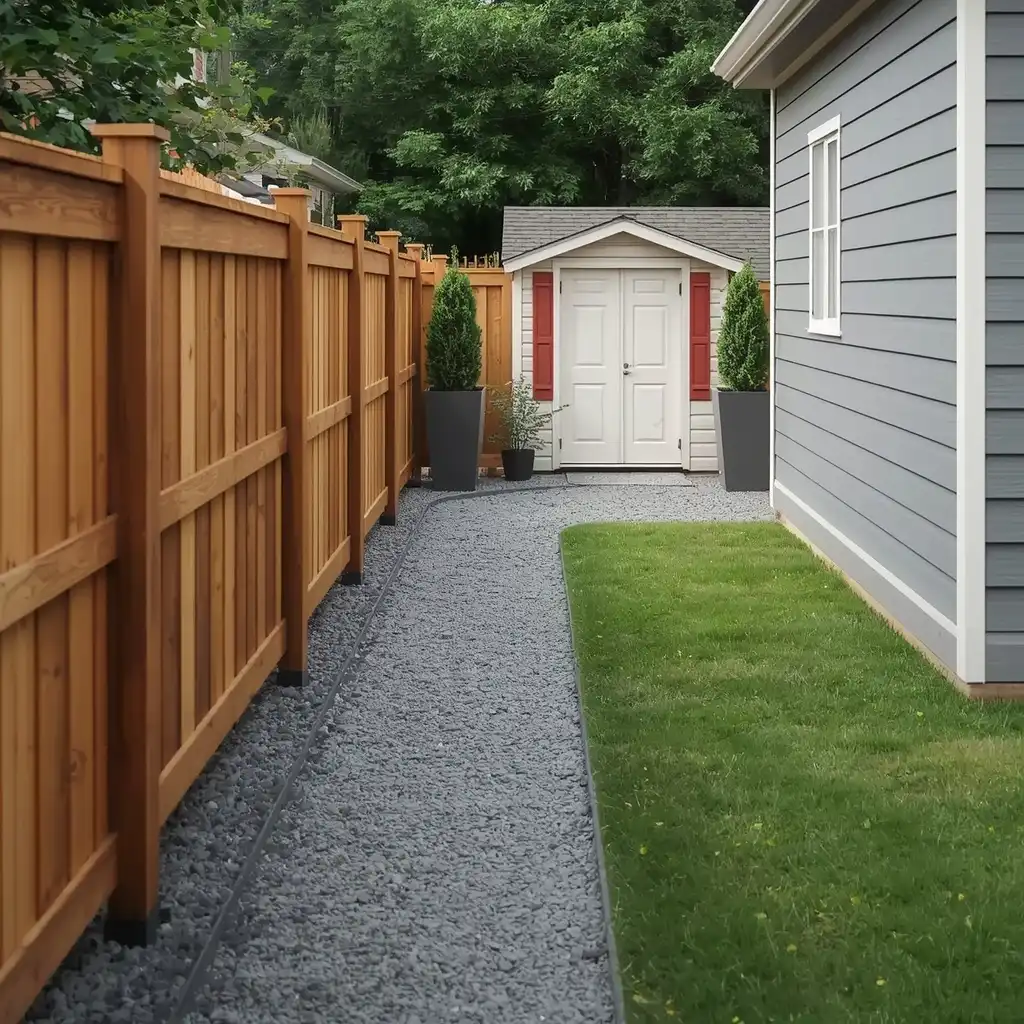
Best for: Narrow spaces where grass grows poorly
Main material: Gravel or small crushed stone
Difficulty: Easy
Watch out for: Weeds growing along the edge
A narrow gravel strip can clean up the space beside a shed or fence. These areas are often hard to mow and may stay muddy after rain.
Create a strip about two feet wide. Install edging where the gravel meets the lawn.
Add tall pots, upright plants, or a simple storage bench. Keep enough space to reach the fence for repairs.
This project can also protect the lower edge of a shed from wet soil. Make sure the gravel does not cover vents or wood siding.
19. Create a Container-and-Rock Feature Corner
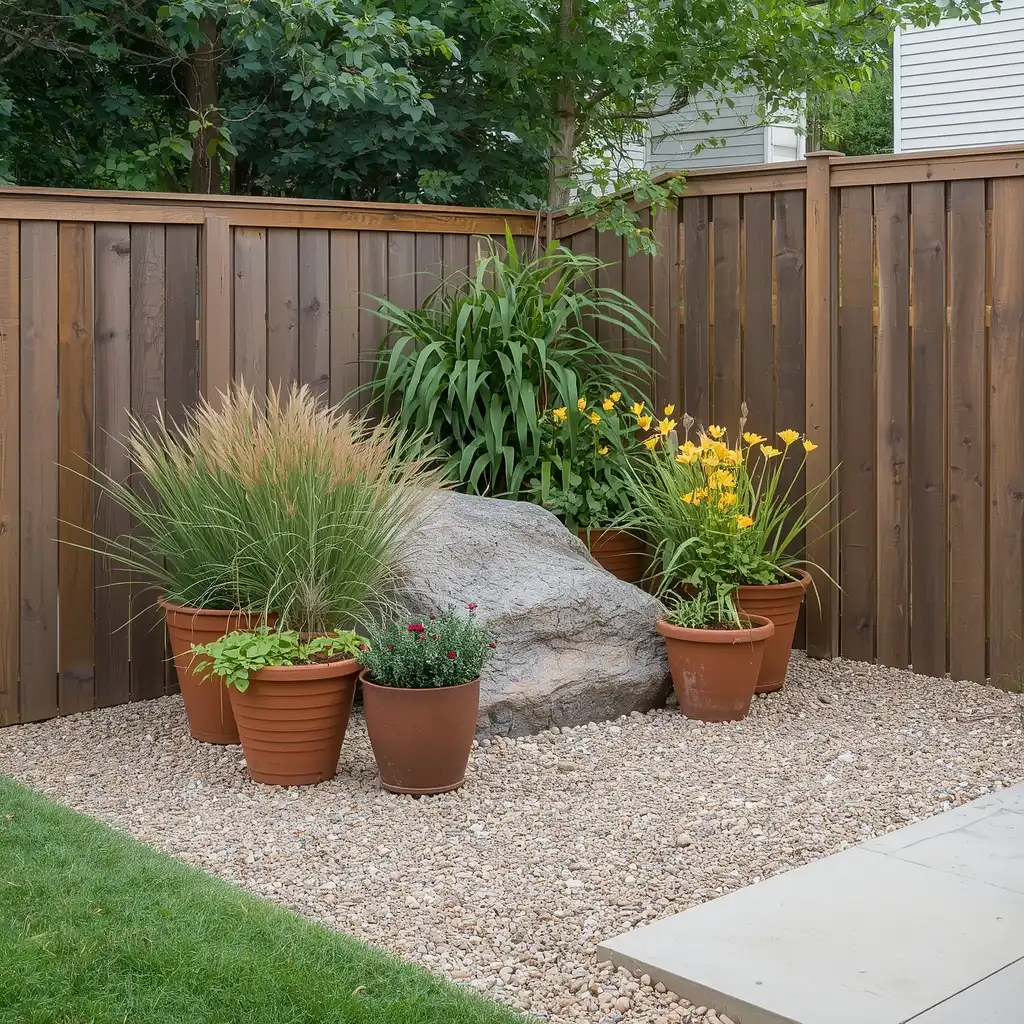
Best for: Renters, small yards, and low budgets
Main material: Gravel, planters, and one larger stone
Difficulty: Easy
Watch out for: Using too many small pots
A container-and-rock corner can fill an empty space without permanent construction. It is also easy to change later.
Cover a small area with gravel. Group three or five planters in different heights. Add one larger rock to give the group more weight.
Repeat colors from your house, fence, or patio. This helps the feature feel connected to the rest of the yard.
Use fewer large pots instead of many tiny ones. Large pots usually look cleaner and need less frequent watering.
Which Rock Idea Fits Your Backyard Problem?
Use this quick guide when you are not sure where to start.
- Muddy route: Build a compacted gravel path.
- Empty corner: Add pots, gravel, and one feature rock.
- Plain patio: Install a river rock border.
- Mulch that washes away: Try decorative gravel.
- Weak grass under a tree: Create a wide, shallow rock bed.
- Small seating need: Build a gravel bench nook.
- Dry sunny bed: Create a drought-tolerant rock garden.
- Mild runoff: Consider a dry creek bed.
- Steep or unstable slope: Speak with a professional.
- Low-cost weekend project: Add a gravel strip beside a fence.
How to Install Landscaping Rock So It Lasts
The visible rock is only the top layer. The work below it decides whether your project stays neat.
1. Mark the Area
Use string, stakes, marking paint, or a garden hose. Check the size from several viewing points.
2. Check for Buried Lines
Contact your local utility marking service before deep digging. This step can help prevent injury and costly damage.
3. Remove Grass and Loose Soil
Clear the area to the depth needed for the base and rock. Do not cut major tree roots.
4. Grade the Ground
Slope the surface away from your house. Water should not collect near walls, doors, or foundations.
5. Add the Right Base
Paths and patios need a firm, compacted base. Decorative garden beds may need less base work.
6. Install Edging
Edging stops gravel from spreading. It also makes lawn care easier.
7. Add the Rock in Even Layers
Spread the rock with a rake. Avoid dumping the full load in one place.
8. Compact the Surface When Needed
Crushed stone and decomposed granite often need compaction. Smooth river rock usually stays loose.
Does Landscape Fabric Stop All Weeds?
Landscape fabric may reduce some weeds at first. It does not create a weed-free yard.
Dust, leaves, and soil can collect on top of the fabric. Seeds may then grow in that new layer.
Fabric can also make future planting harder. It may tear and mix with the stone over time.
Use it with care. Good site cleaning, proper rock depth, strong edging, and regular leaf removal are still important.
How to Keep Rock Landscaping Looking Clean
Rock landscaping needs less routine care than many lawns or mulch beds. It still needs some work.
Follow these simple steps:
- Pull weeds while they are small.
- Rake loose gravel back into place.
- Blow leaves away before they break down.
- Sweep stone off patios and walkways.
- Check edging after heavy rain.
- Refill thin areas when gravel settles.
- Wash light stone when dirt becomes easy to see.
- Keep rock away from tree trunks and wood siding.
- Clear blocked dry creek beds and drainage paths.
7 Mistakes That Can Ruin a Rock Landscaping Project
1. Choosing Rock Based on Color Alone
A smooth river rock may look good, but it may be hard to walk on. Match the material to the job first.
2. Skipping the Base
Loose soil under a path can sink and form low spots. Prepare and compact the ground.
3. Forgetting Edging
Gravel spreads into lawns and beds without a firm border.
4. Using Too Many Rock Colors
Several bold colors can make a yard feel busy. Pick one main stone and one accent.
5. Piling Rock Around Trees
Rock against tree bark can trap moisture and cause damage. Keep the root flare clear.
6. Ignoring Heat
Dark or light-reflecting stone can become very hot. Check the site before placing it near delicate plants, bare feet, or pet areas.
7. Hiding a Drainage Problem
Covering a wet area with stone does not fix the cause. Find out where the water comes from and where it should go.
Final Thoughts
Good rock landscaping should make your backyard easier to use. It can create clean paths, define garden beds, support dry-climate plants, and improve problem areas.
Start with one space instead of changing the whole yard at once. Measure it, test a rock sample, and price the complete job before ordering materials.
Be honest about the work involved. Stone lasts a long time, but it still needs edging, cleaning, and weed control.
Choose one of these rock landscaping ideas for backyard spaces that solves your biggest problem. A focused project will usually look better, cost less, and be easier to finish.